eSignature - DocuSign
Run the eSignature installer
Section titled “Run the eSignature installer”- Before doing the setup connection, ensure that you already have the latest eSignature installer and run the
GLMSysAddOnInstalleras administrator.
Setup the DocuSign Connection via RPA
Section titled “Setup the DocuSign Connection via RPA”- Go to Modules > RPA > Setup > Connection > Connection.
- Create a New Connection.
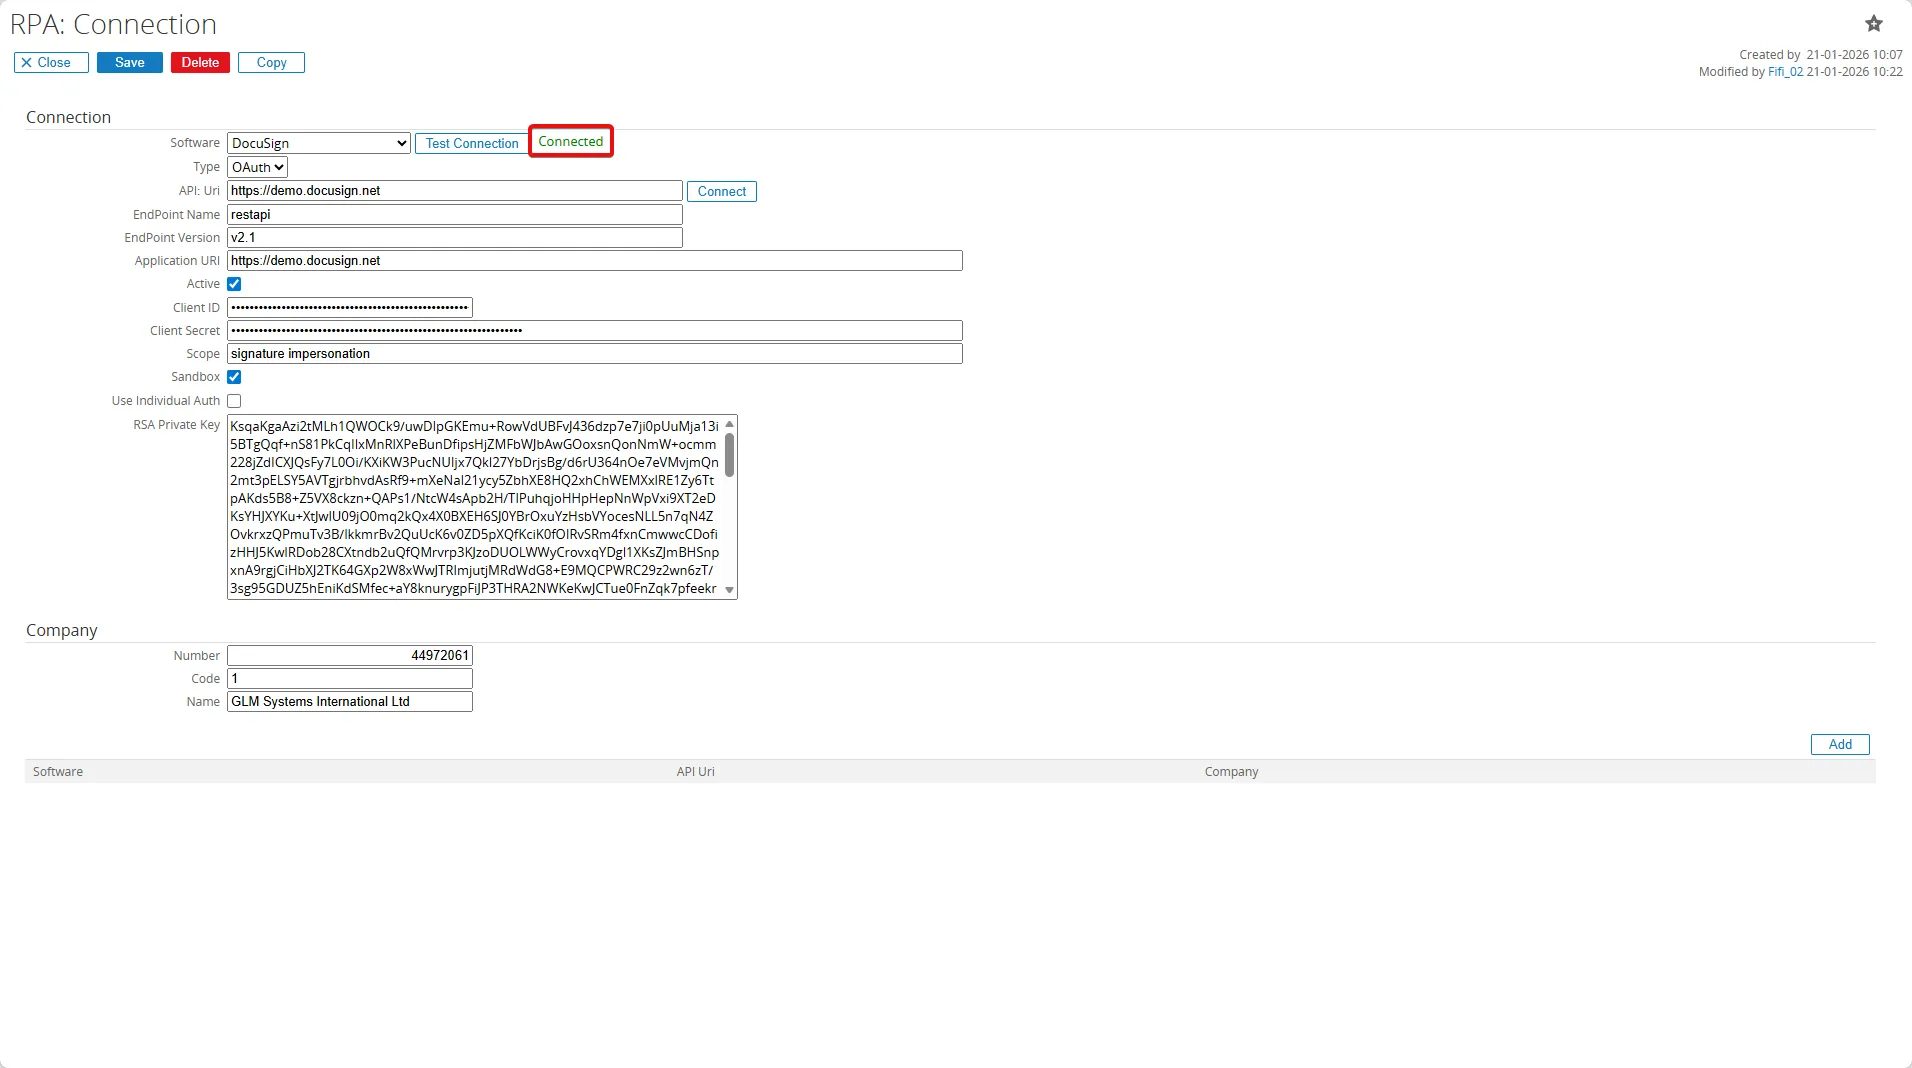
- Fill in all the fields:
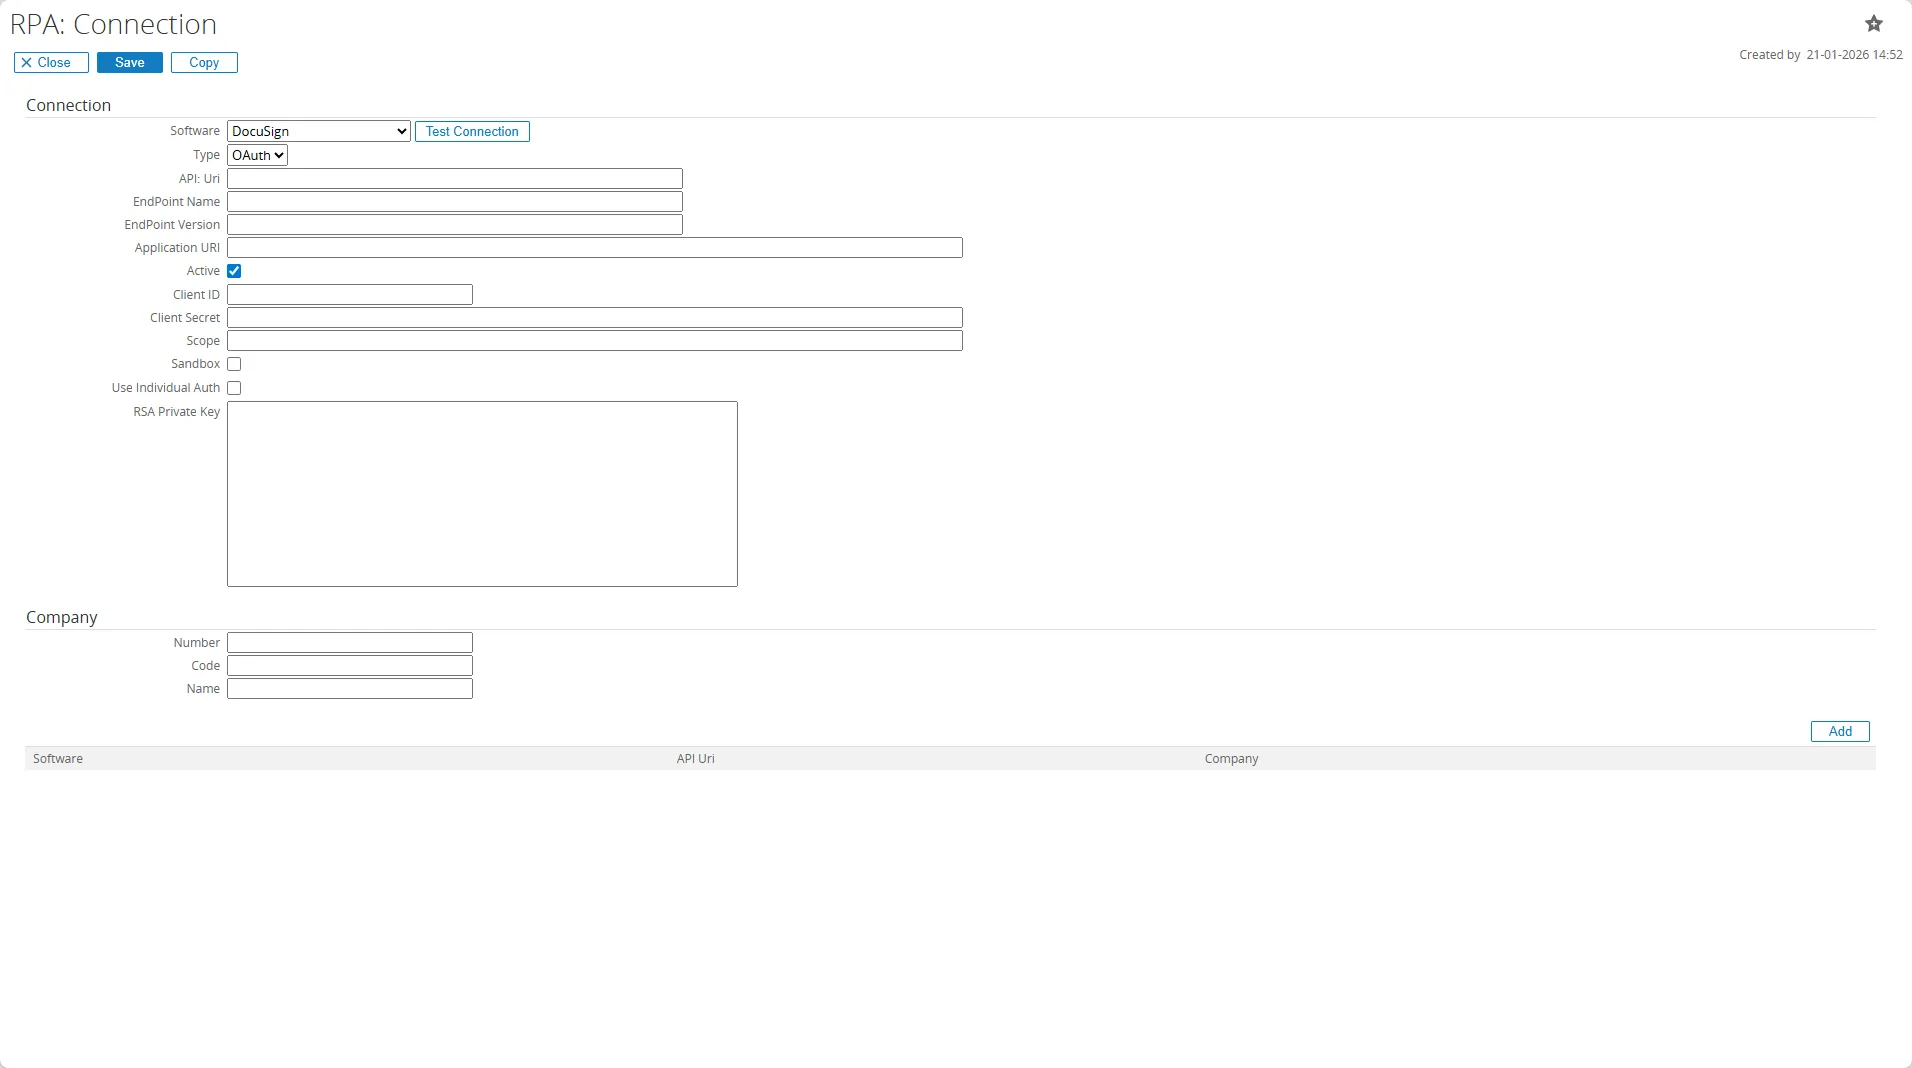
| Field | Description |
|---|---|
| Software | Choose DocuSign |
| Type | Choose OAuth as type |
| API URI | https://demo.docusign.net |
| EndPoint Name | Enter restapi |
| EndPoint Version | Enter v2.1 |
| Application URI | [https://demo.docusign.net] |
| ClientID | Copy the Integration Key provided from your DocuSign Apps & Keys settings |
| ClientSecret | Copy the Secret Key provided from your DocuSign Apps & Keys settings |
| Scope | Use: signature impersonation This scope is required during the OAuth Authorization Request |
| Sandbox | Enables the Sandbox |
| Use Individual Auth | This field can be left empty |
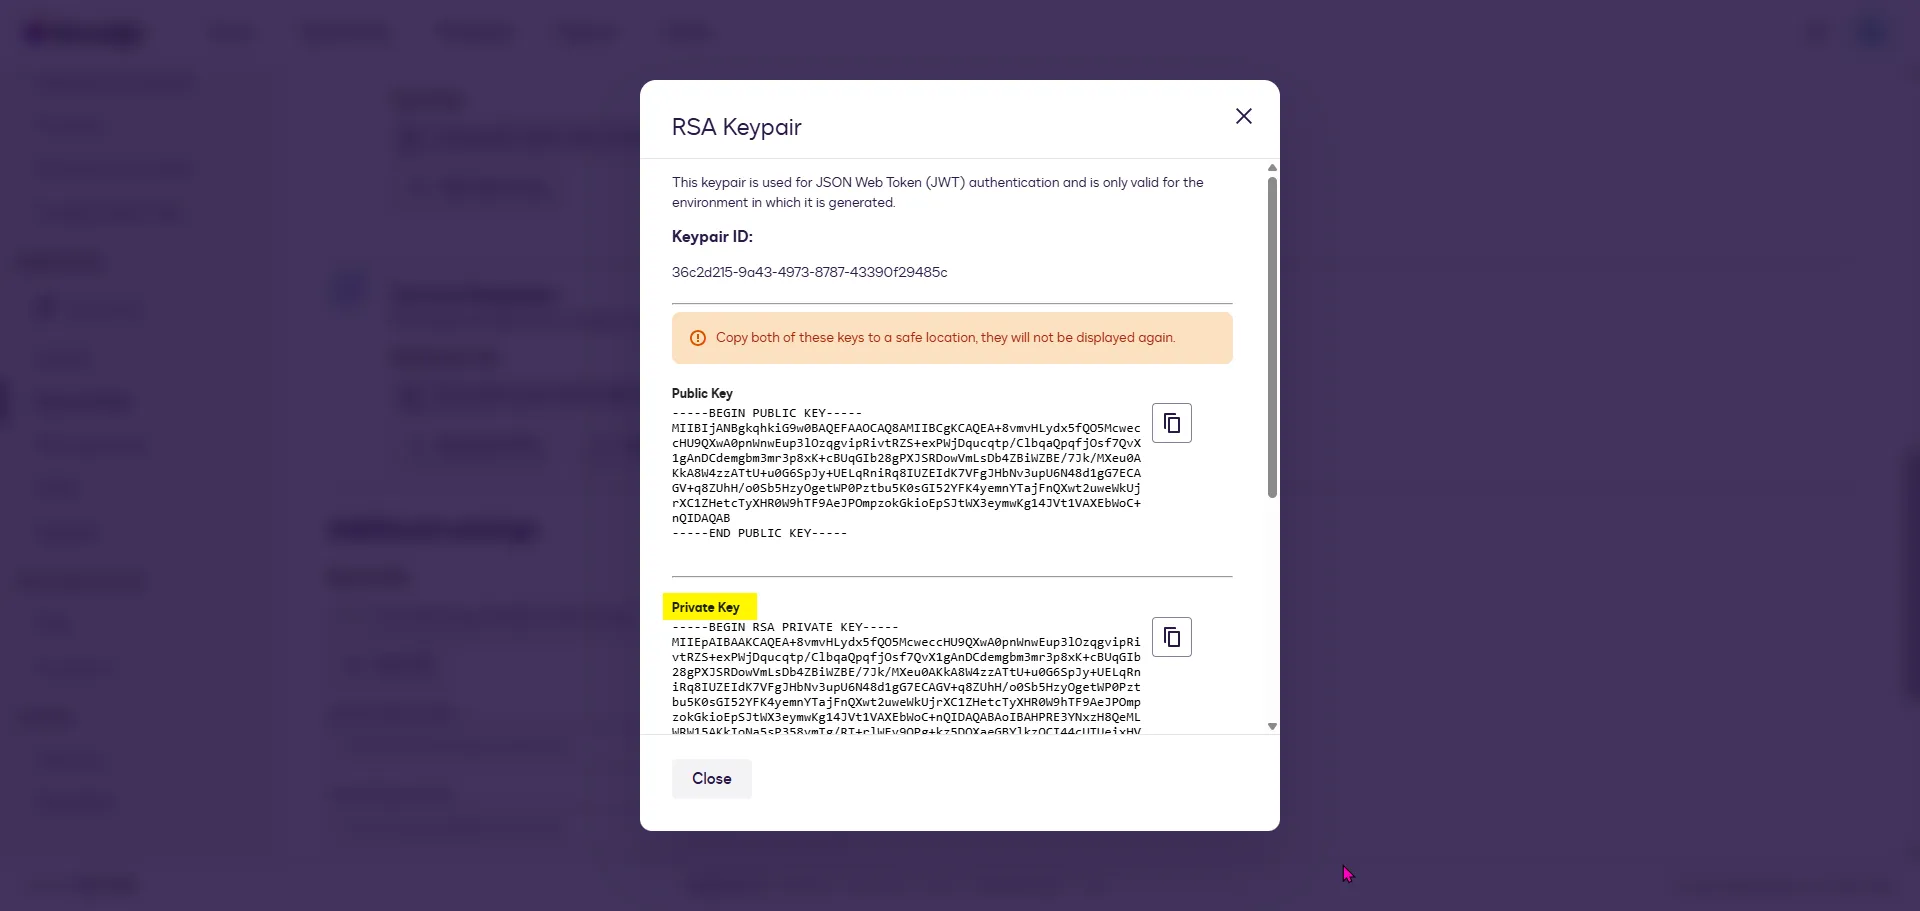
| RSA Private Key | Copy the RSA Private Key generated from DocuSign |
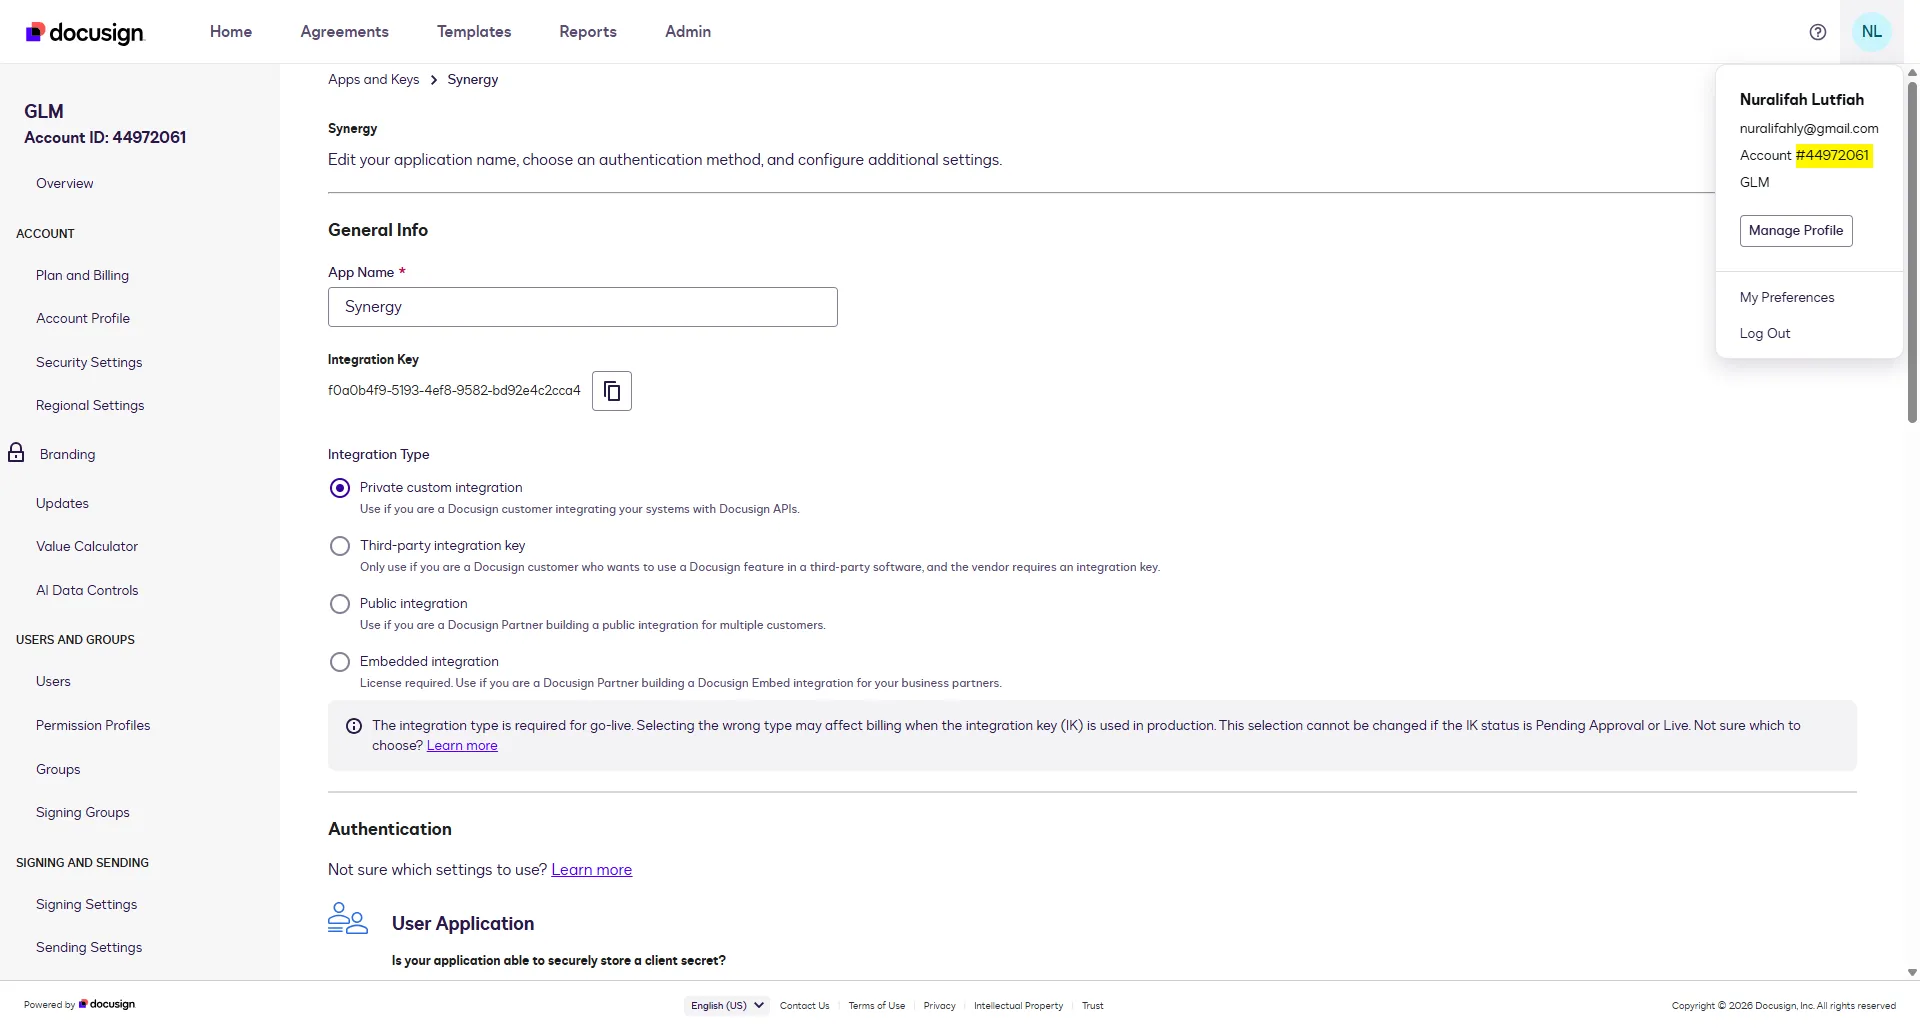
| Company - Number | Copy the account number from your profile picture |
| Code | Enter the code of your company |
| Name | Enter the name of your company |
- To complete the fields that need Client ID, Client Secret, RSA Private Key and the Company Number you need to access the DocuSign Developers platform by going to this page
https://developers.docusign.com/platform/account/. - Create an account, or click Log in if you already have one.
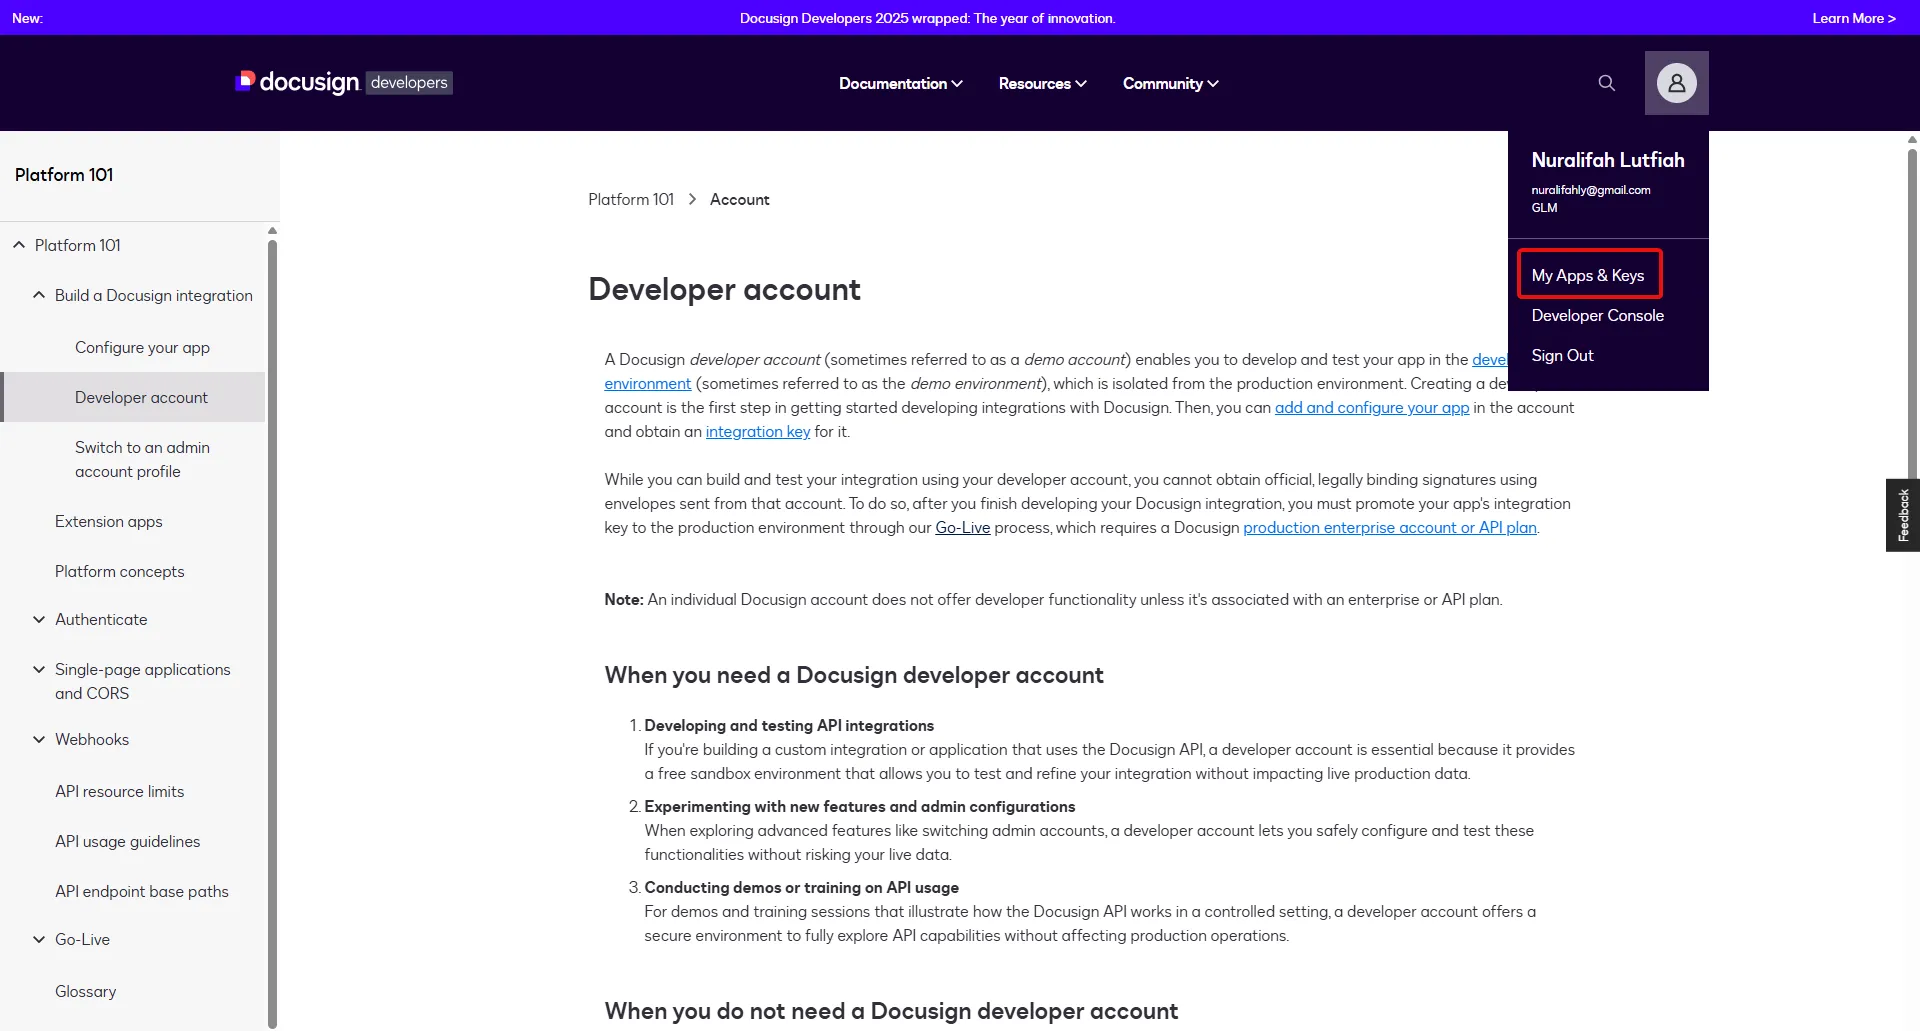
- Go to My Apps & Keys.
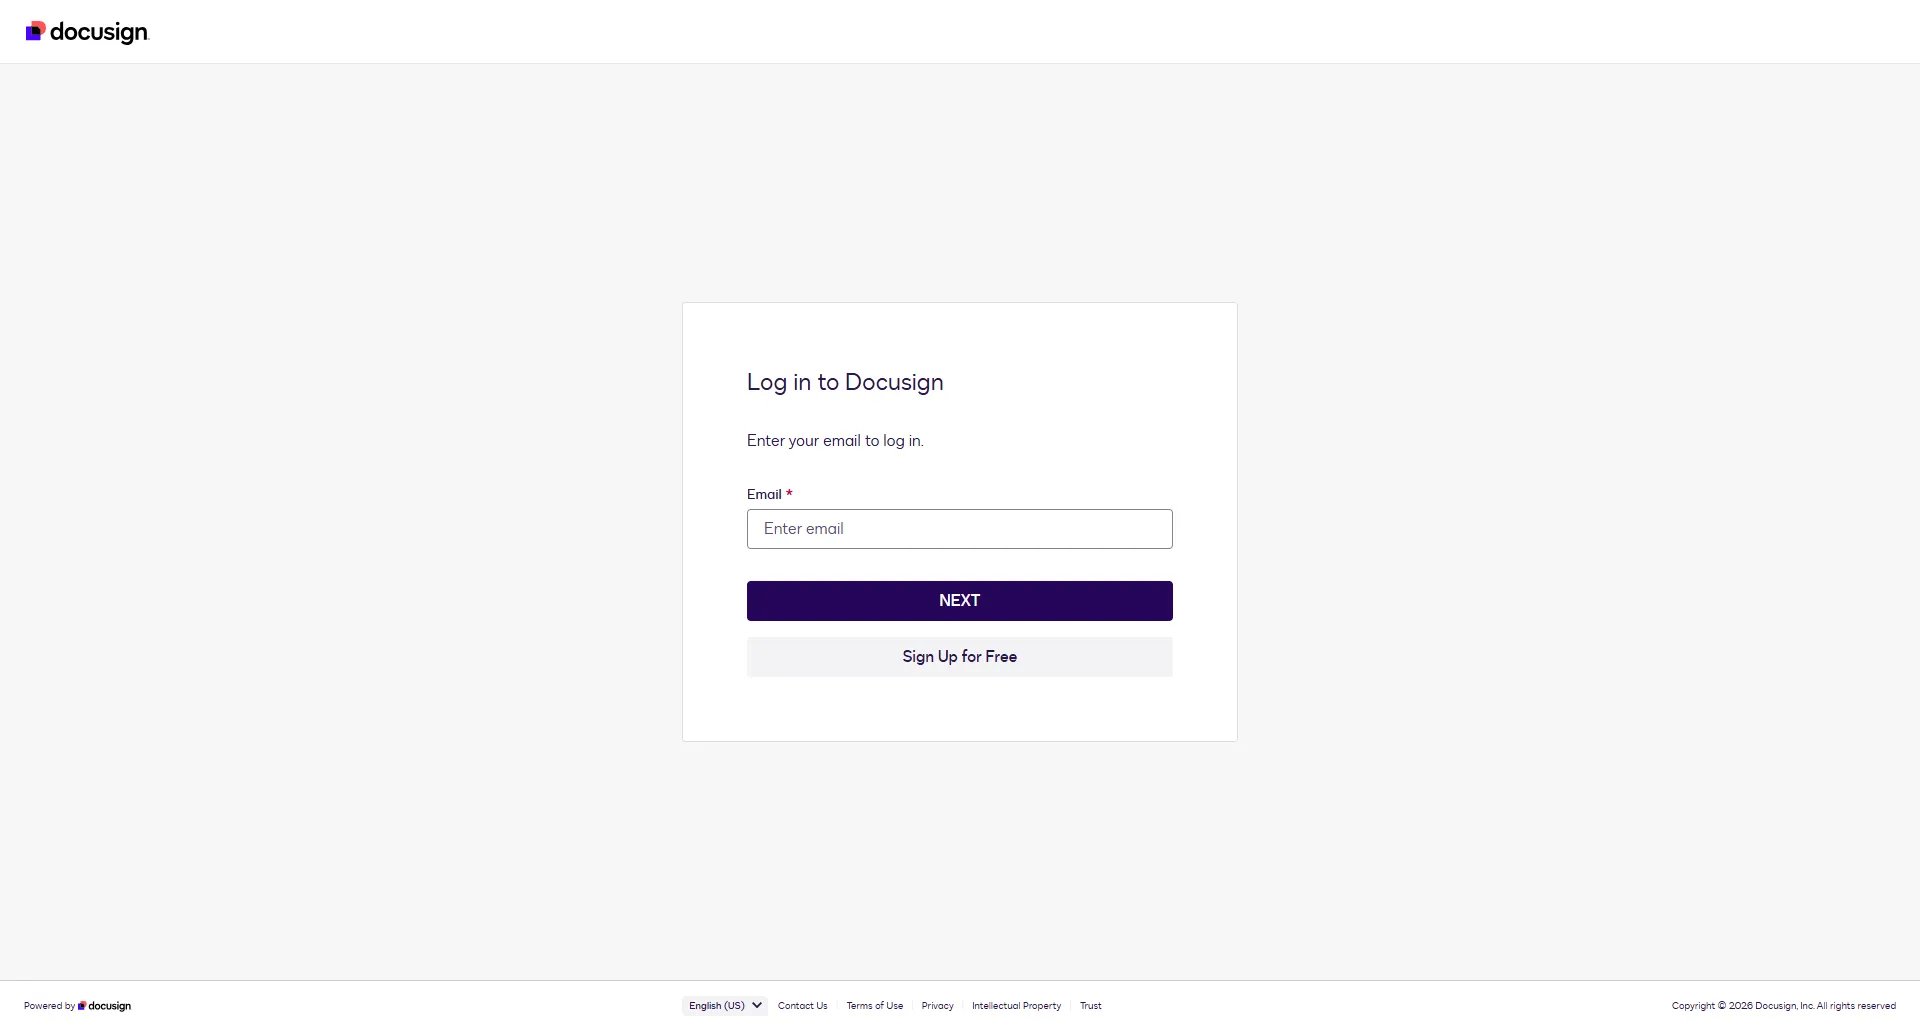
- Enter your account.
- Click the Add App and Integration Key.
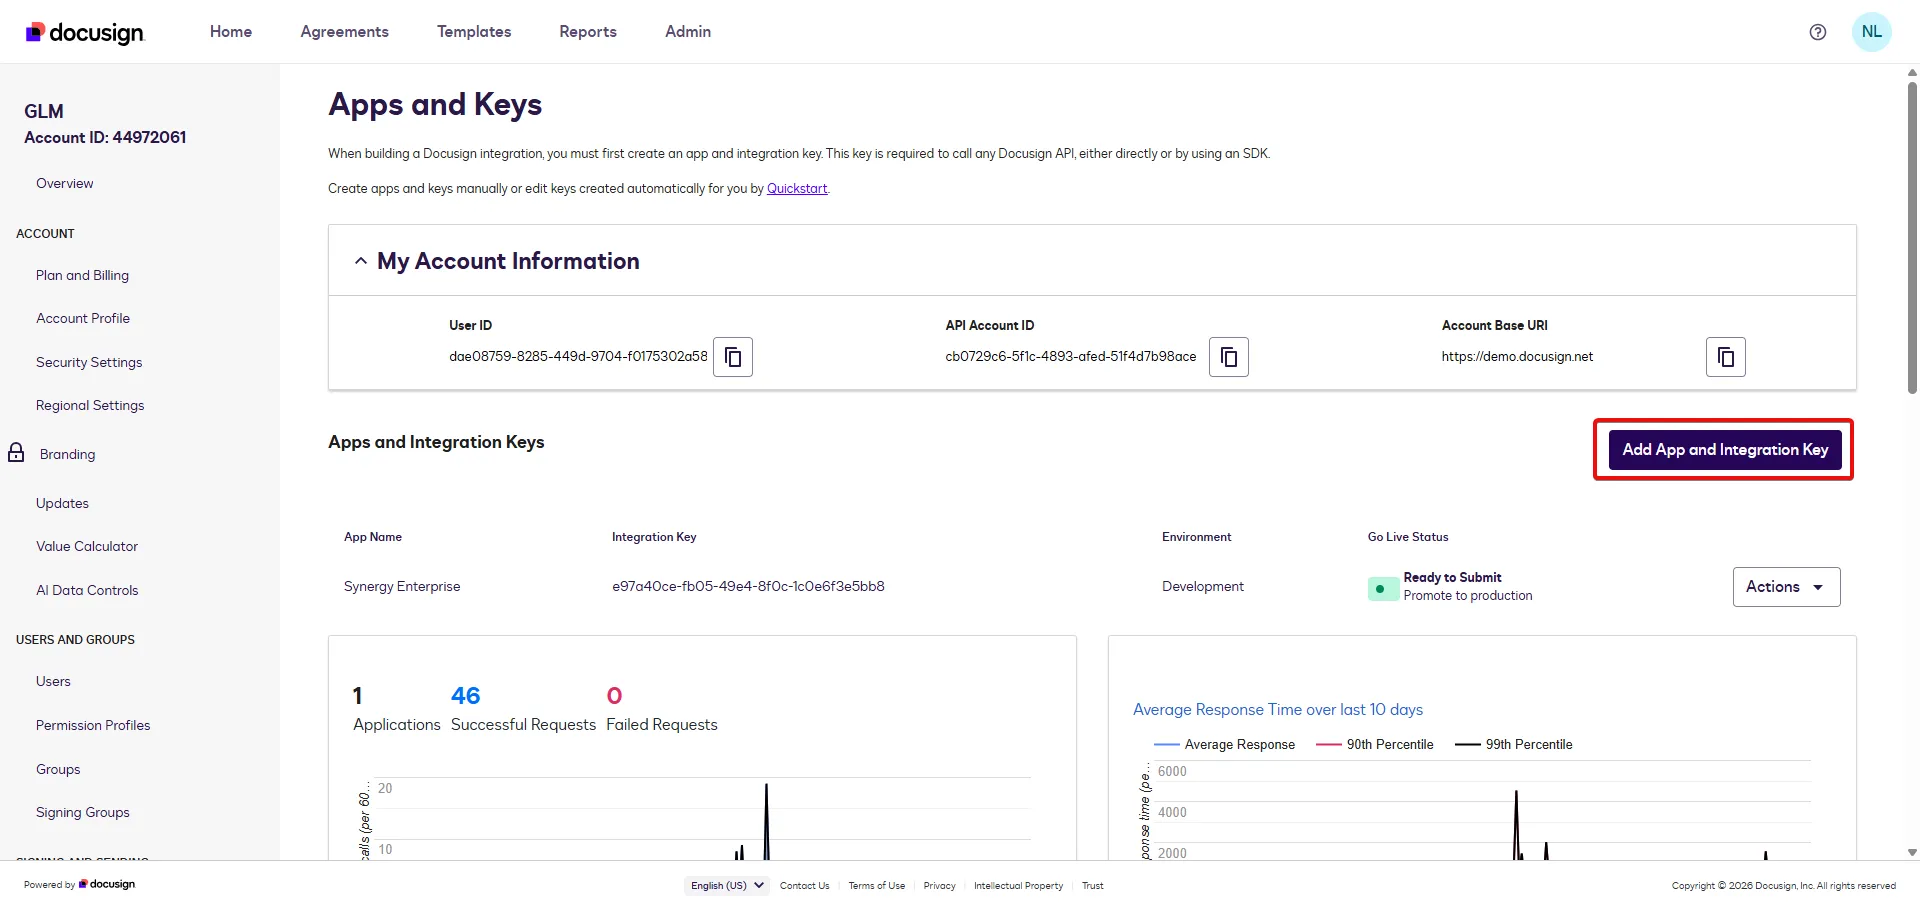
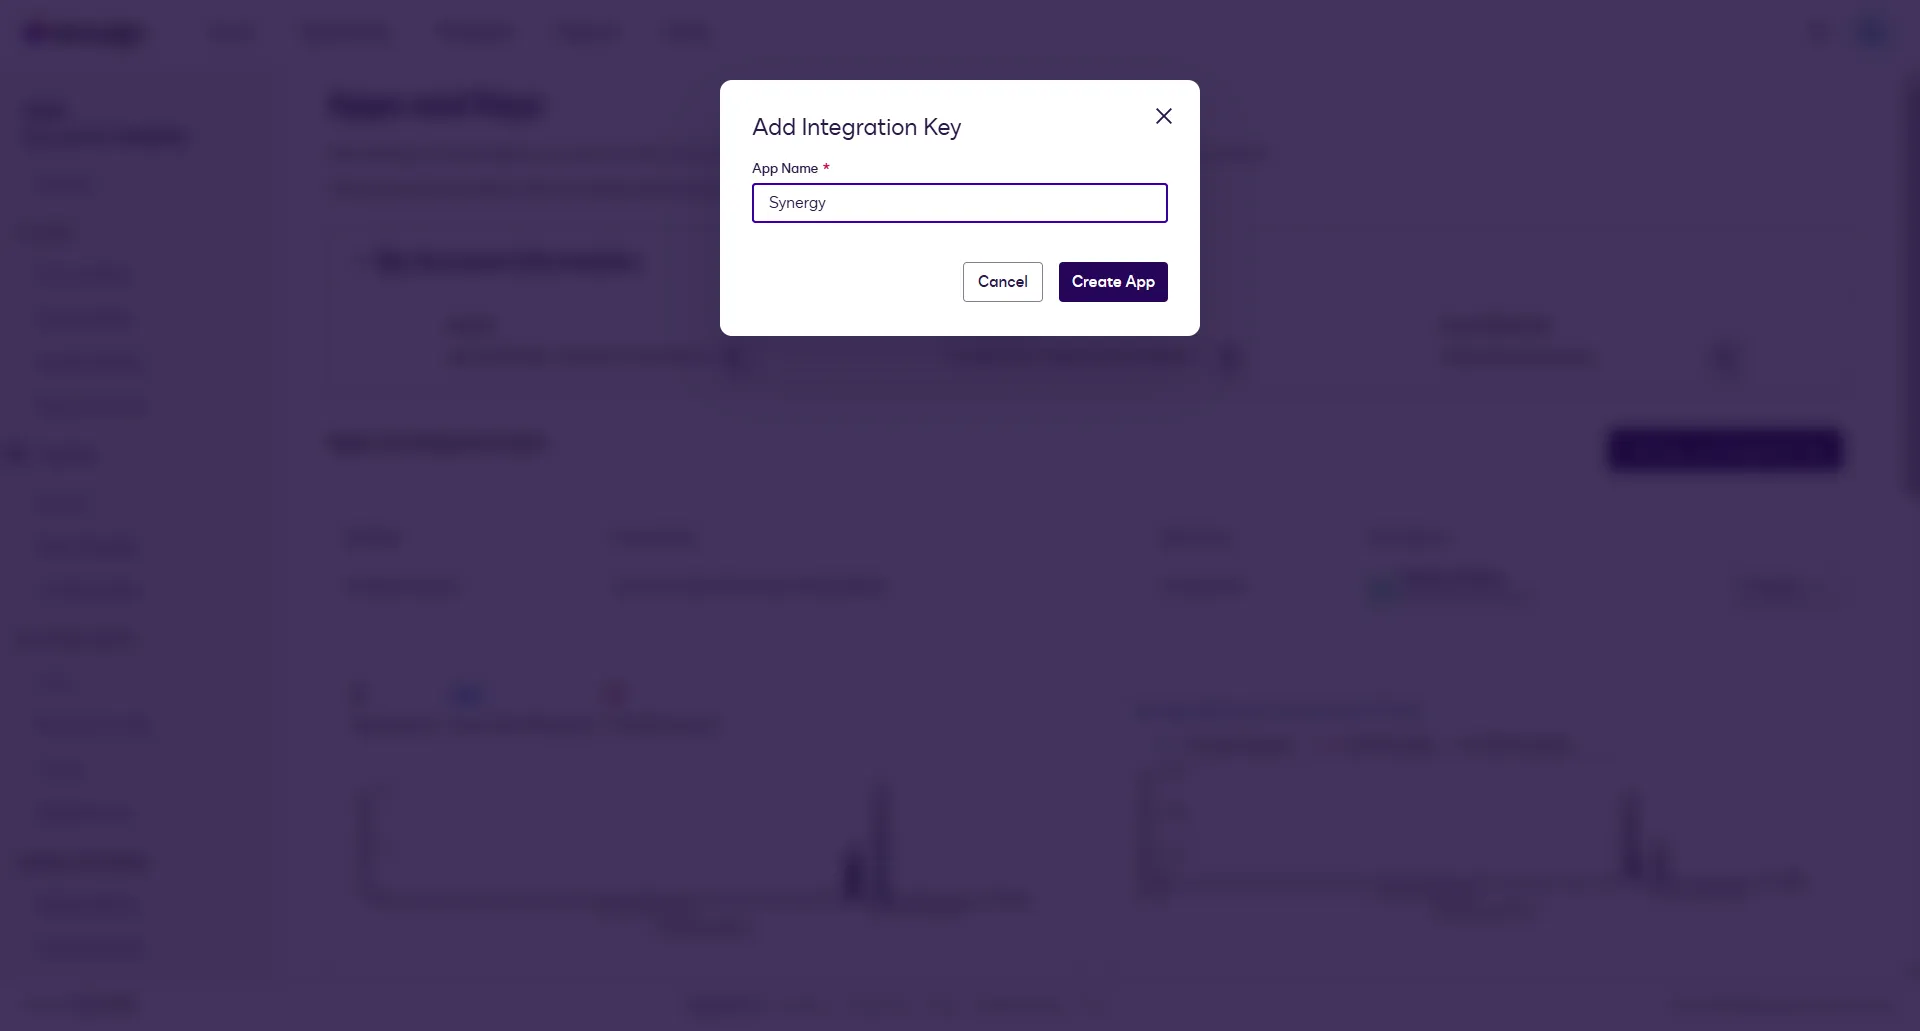
- Enter your App Name then click Create App.
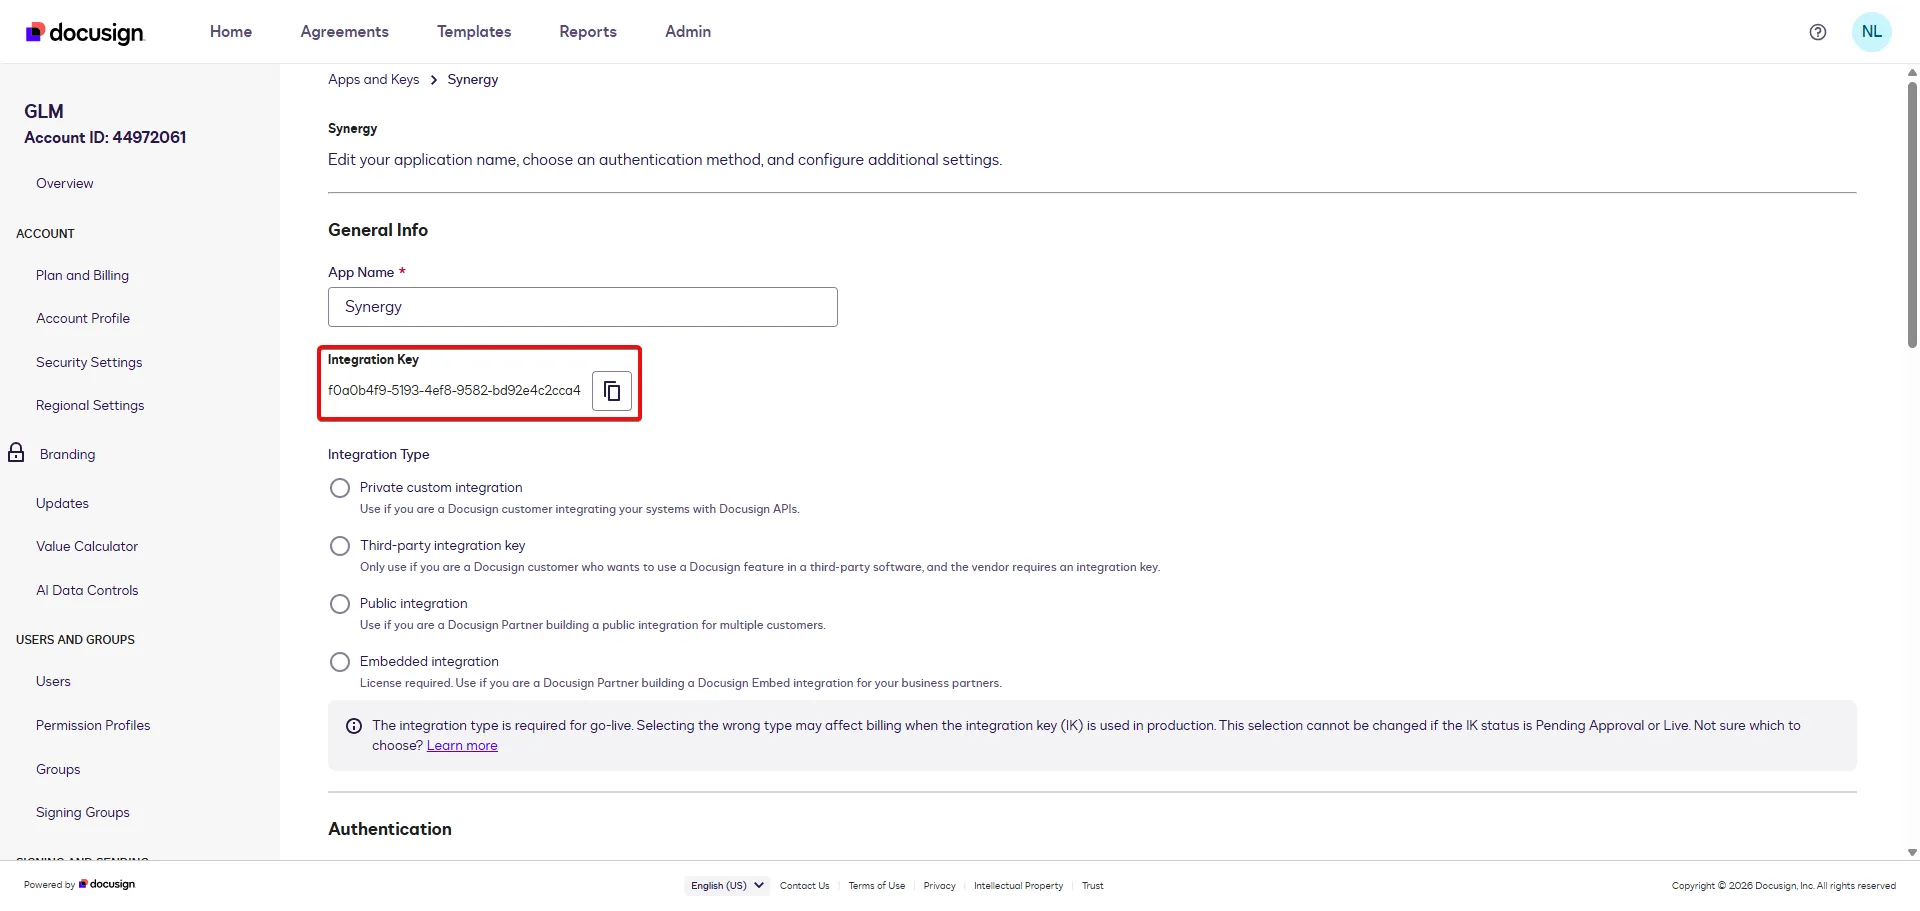
- Copy the Integration Key.
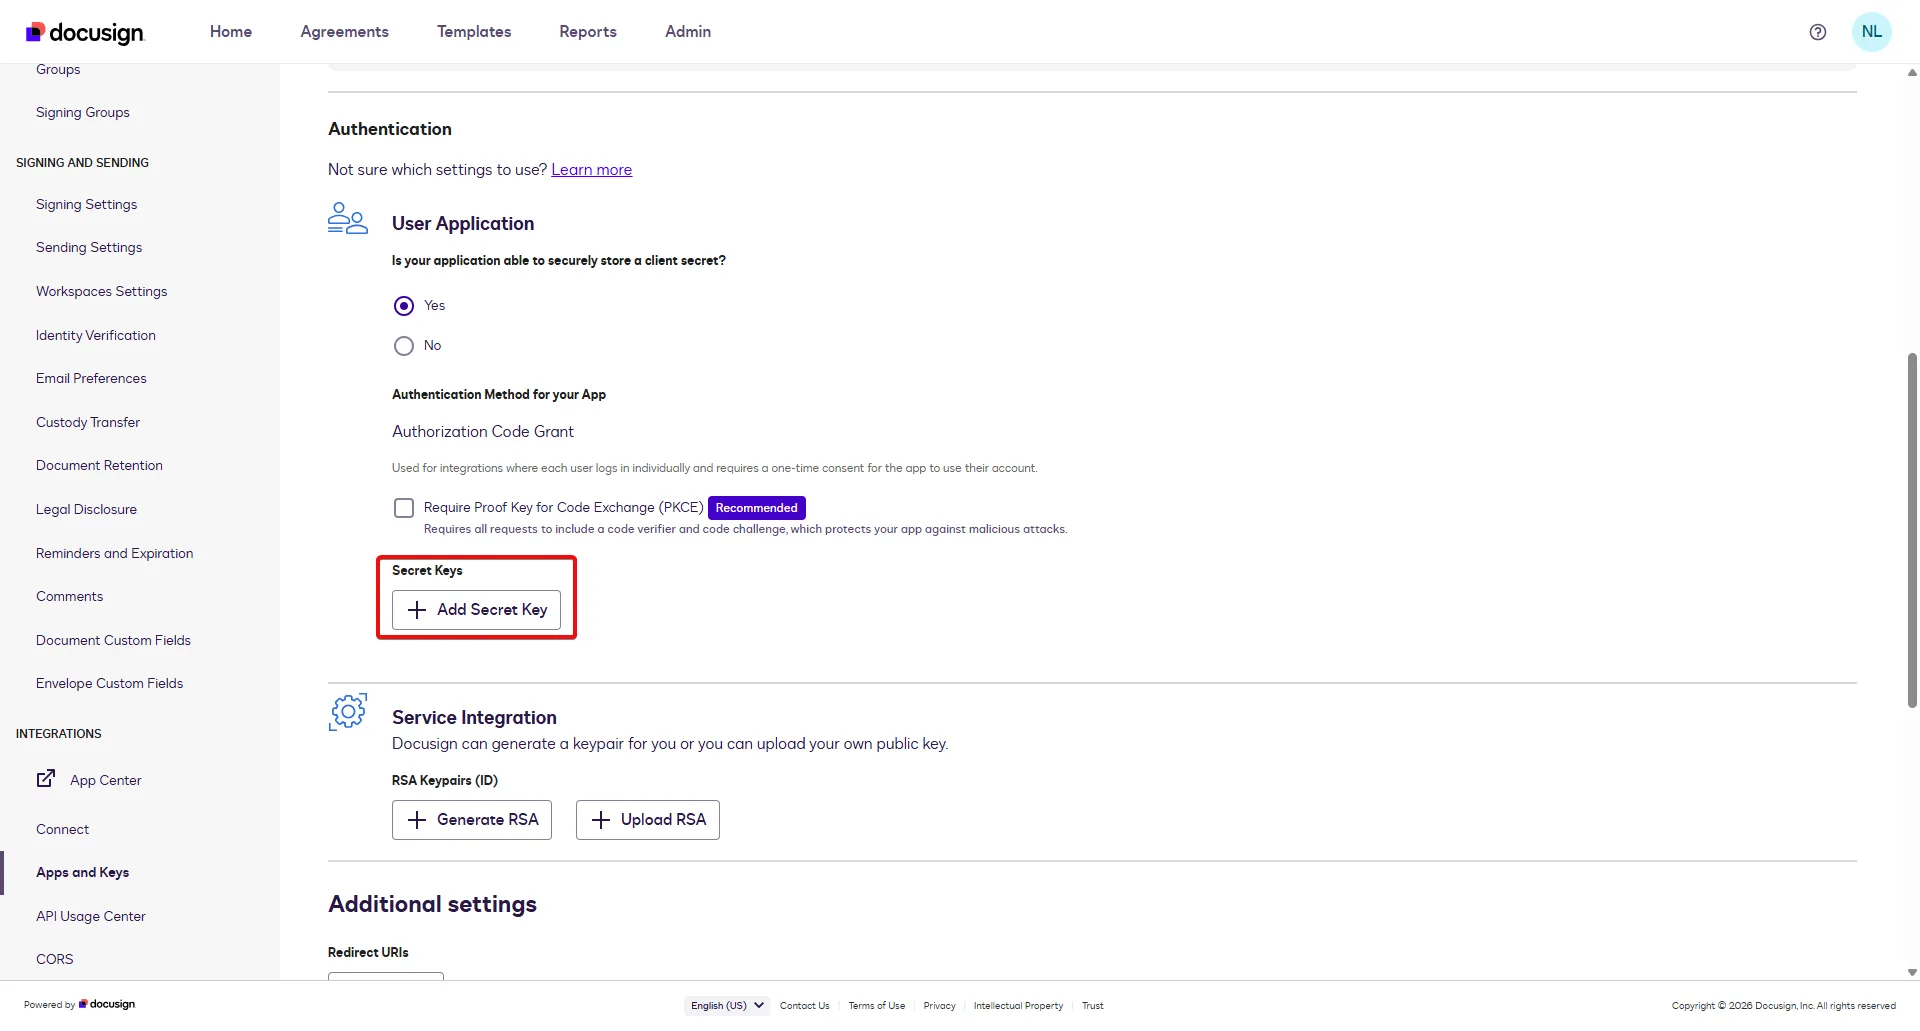
- Click the Add Secret Key button.
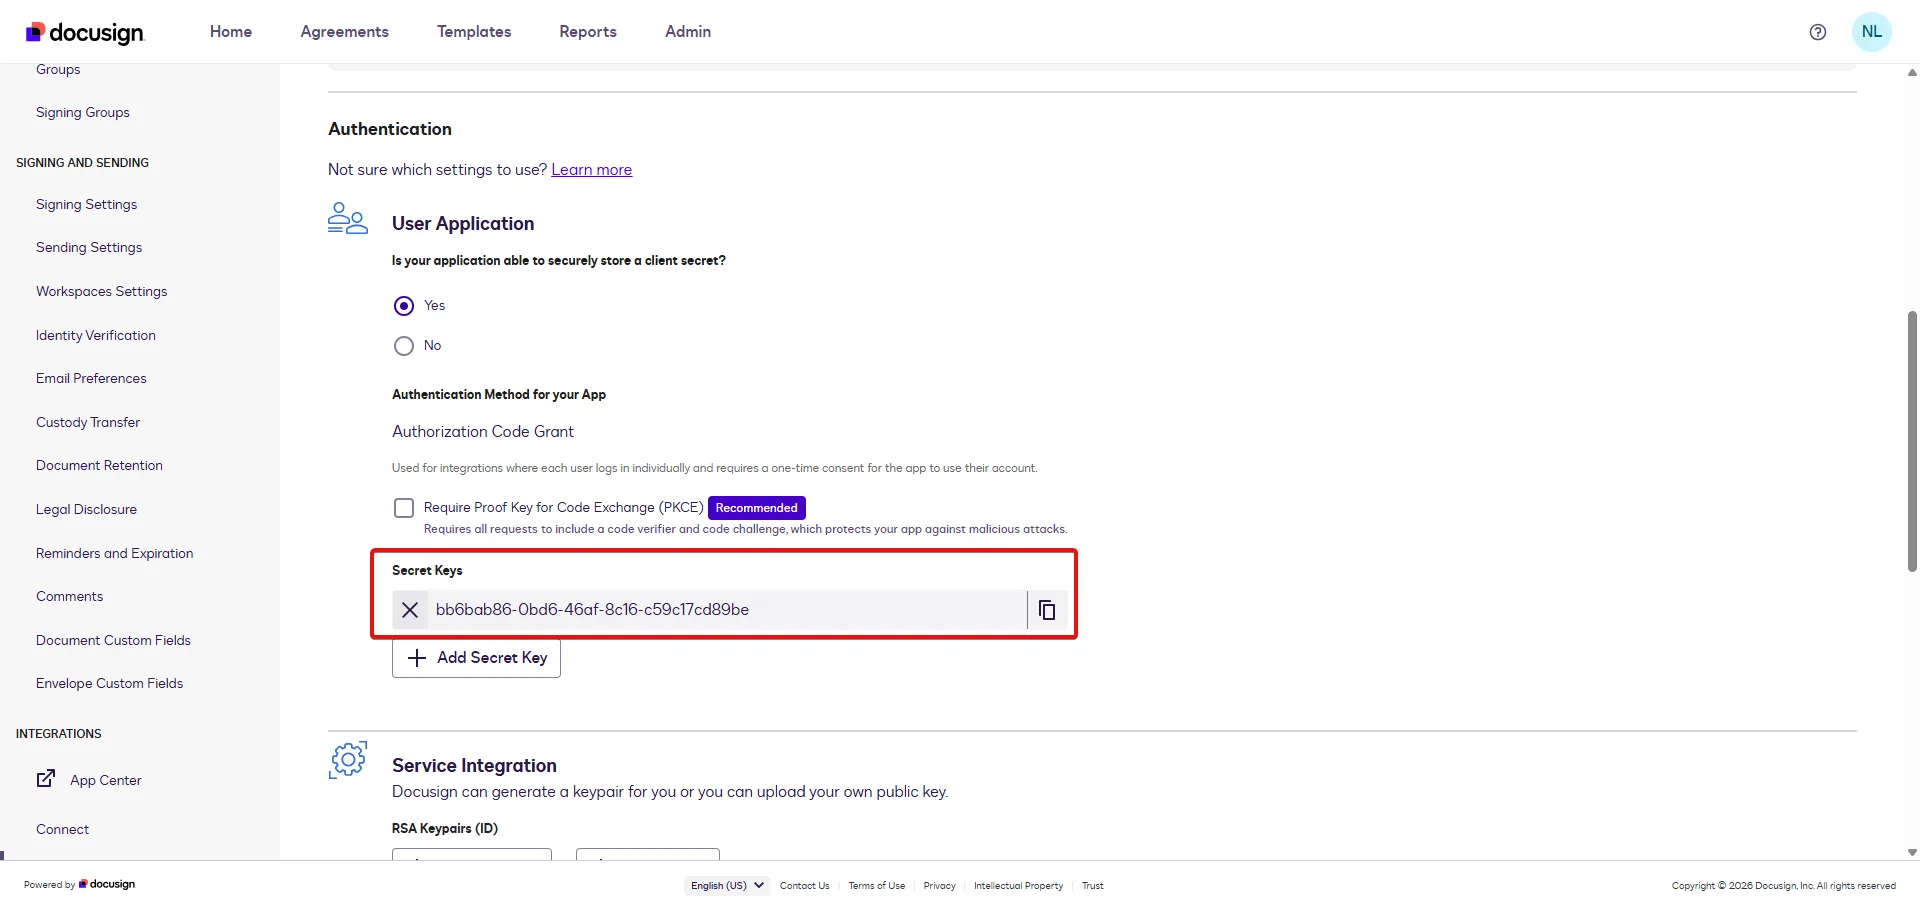
- Copy the Secret Key.
- Click the Generate RSA button.
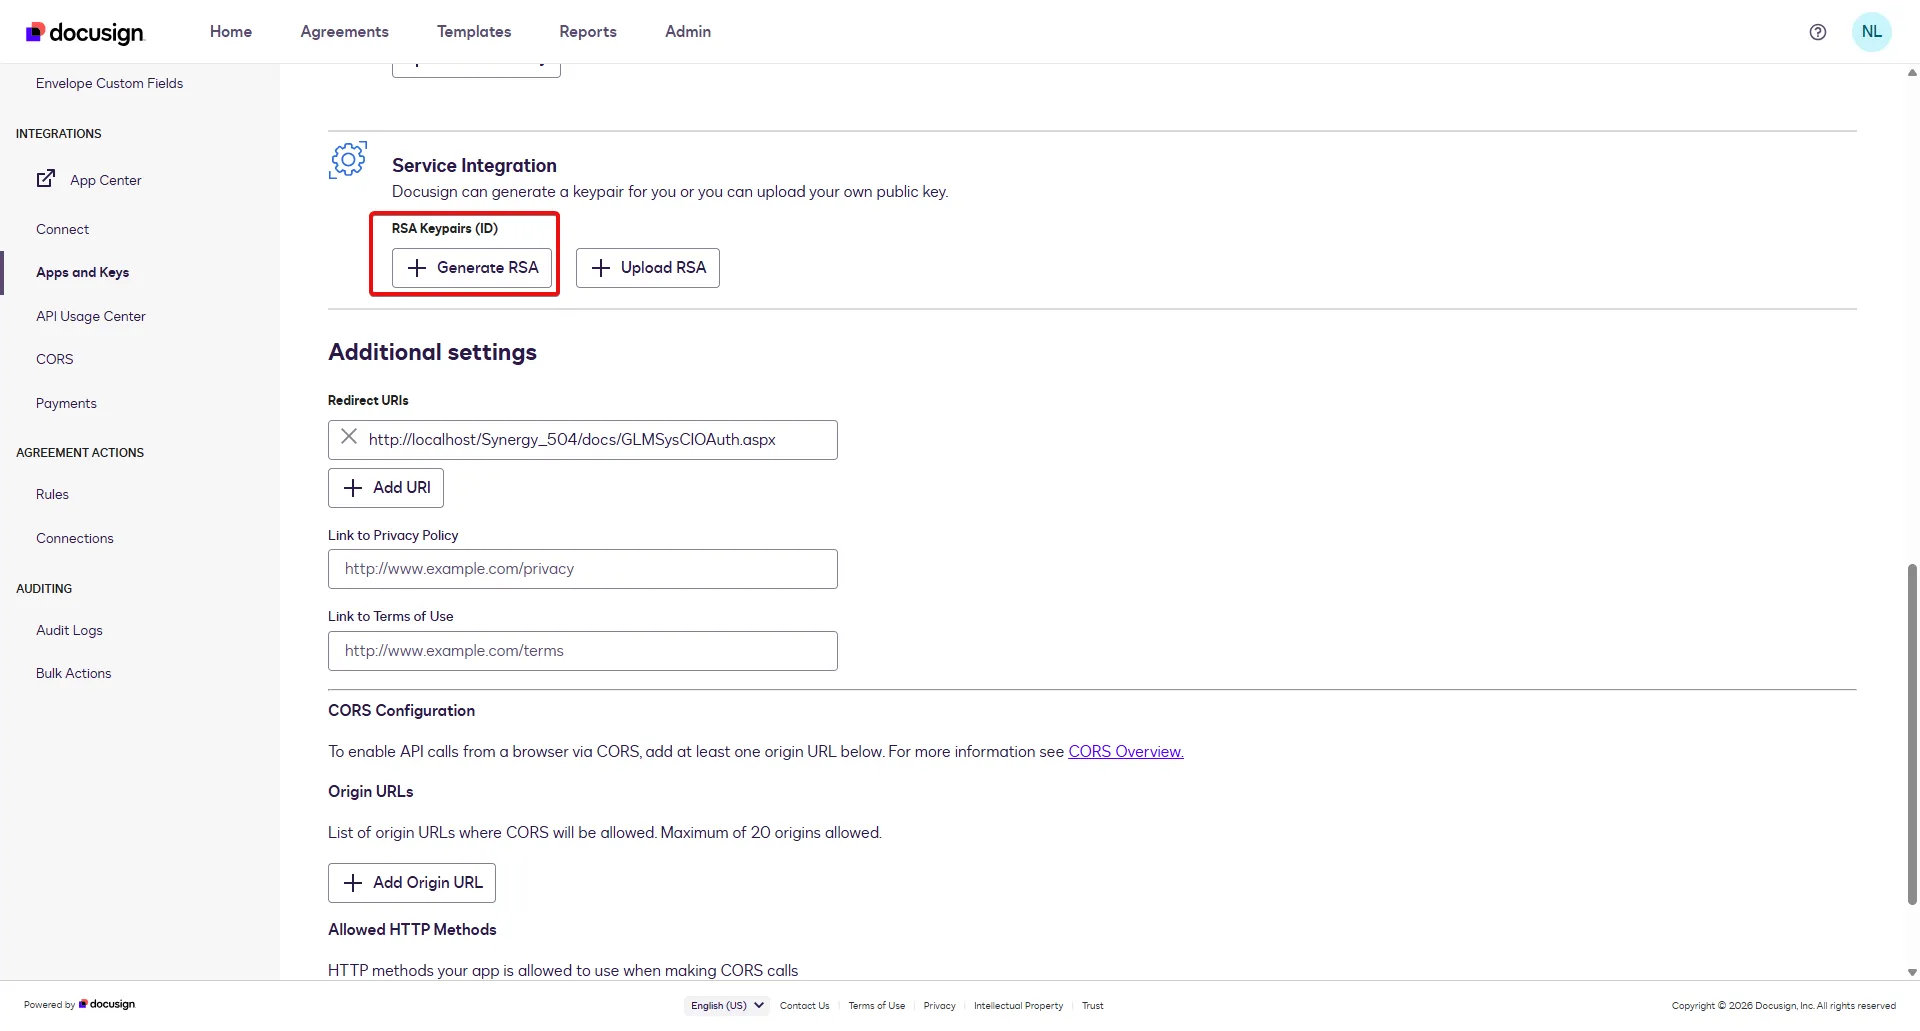
- Copy the RSA Private Key.
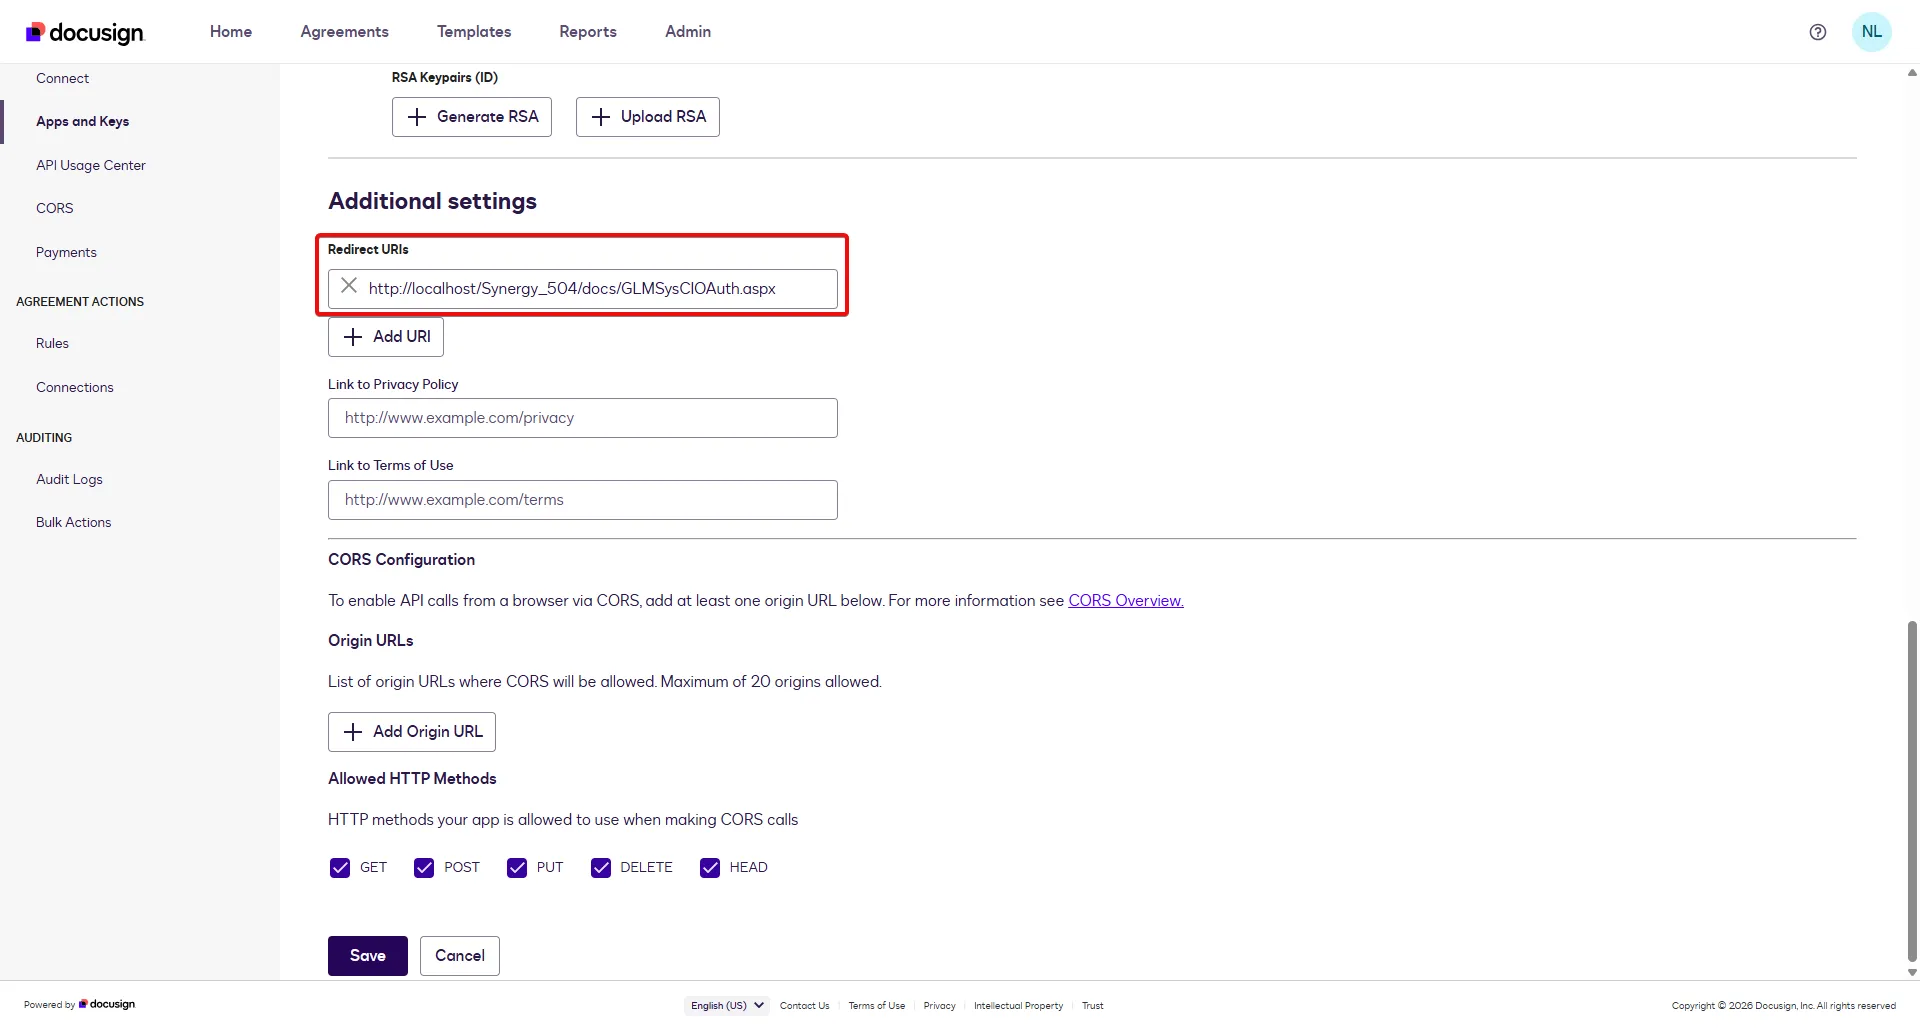
- Enter the Redirect URIs.
- Copy the account number displayed on your profile picture as your company number.
- Paste those data you got from the DocuSign platform on the RPA Connection field.
- After filling in all the fields, click Test Connection. If the connection is successful, a ‘Connected’ message will appear.
Add the eSignature Roles
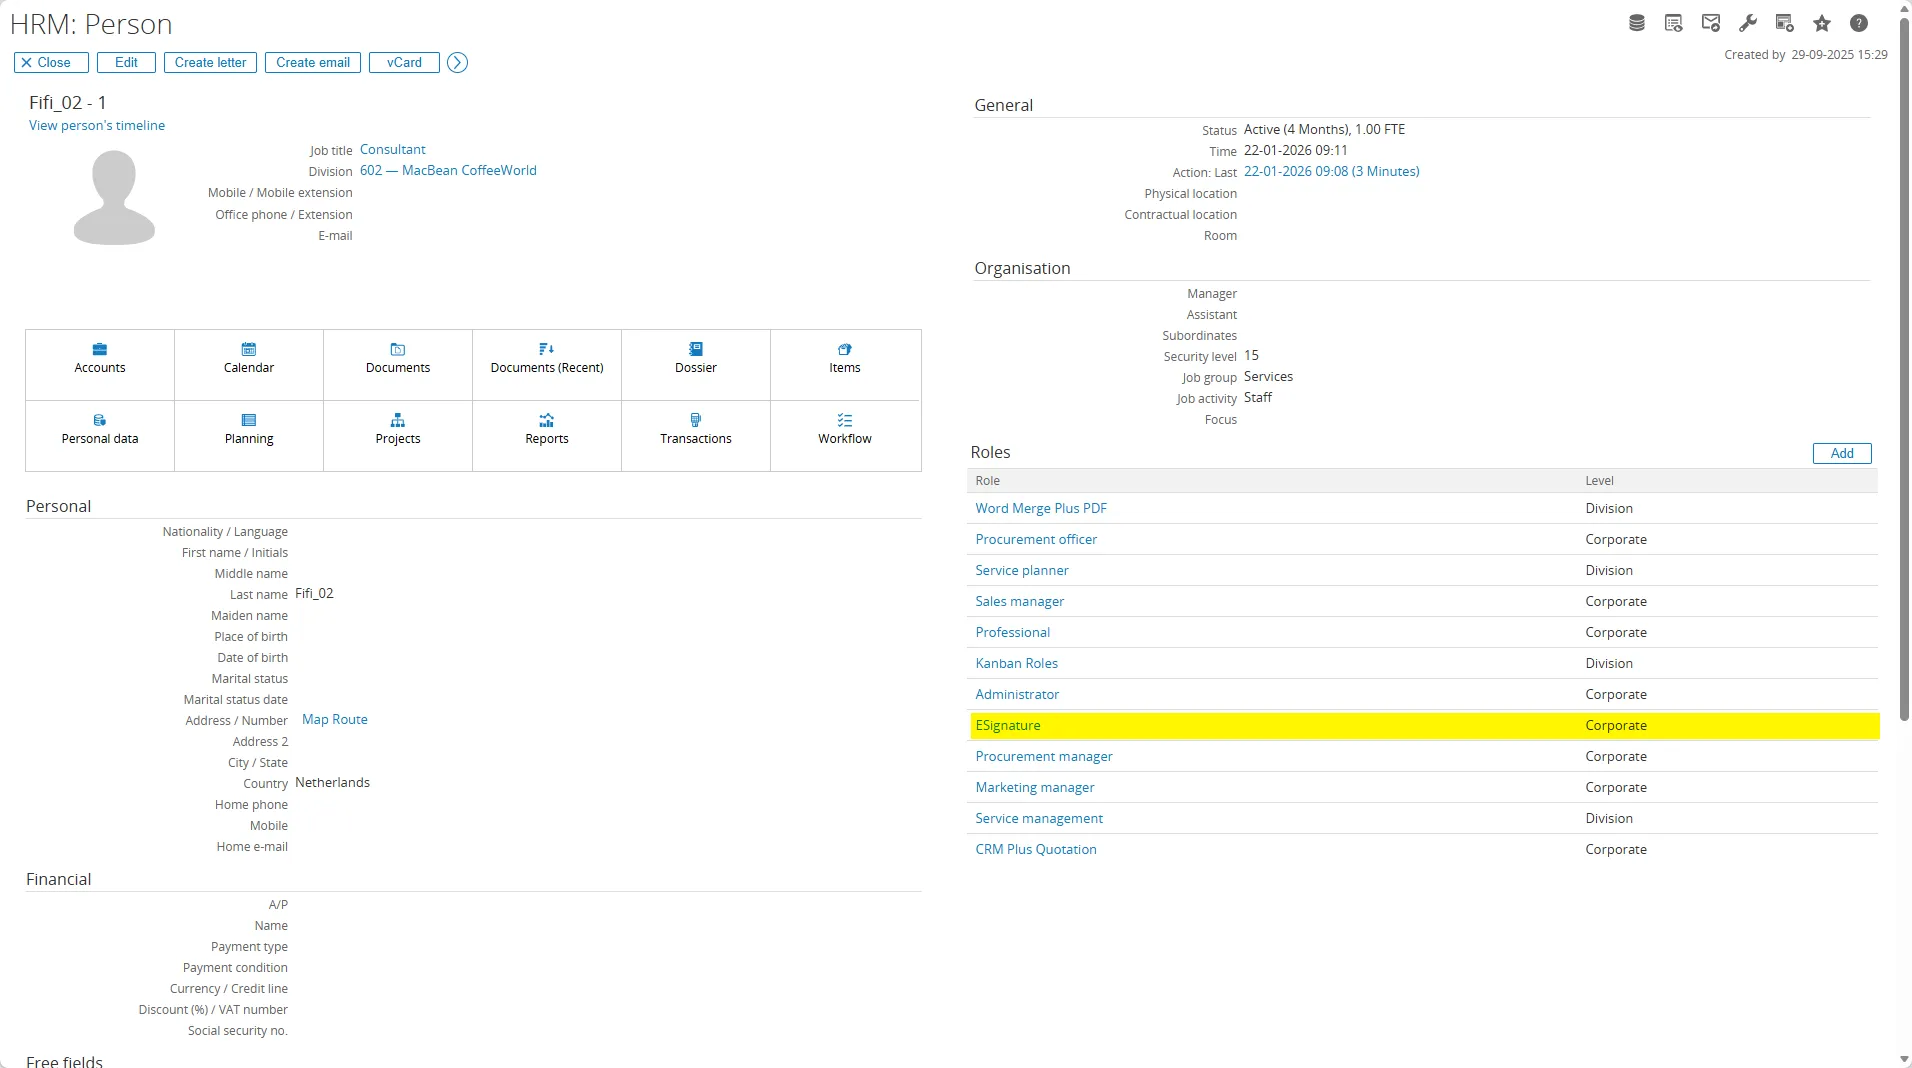
Section titled “Add the eSignature Roles”To allow users to use the DocuSign add-on in Synergy, you must first add the eSignature role by going to HRM: Person and assigning the new role.
Import DocuSign View
Section titled “Import DocuSign View”- Go to the RPA Modules.
- Then navigate to Setup > Templates > Import.
- Open this path on the application server to get the XML files, for example:
<ESE installation folder>\Templates\DocuSign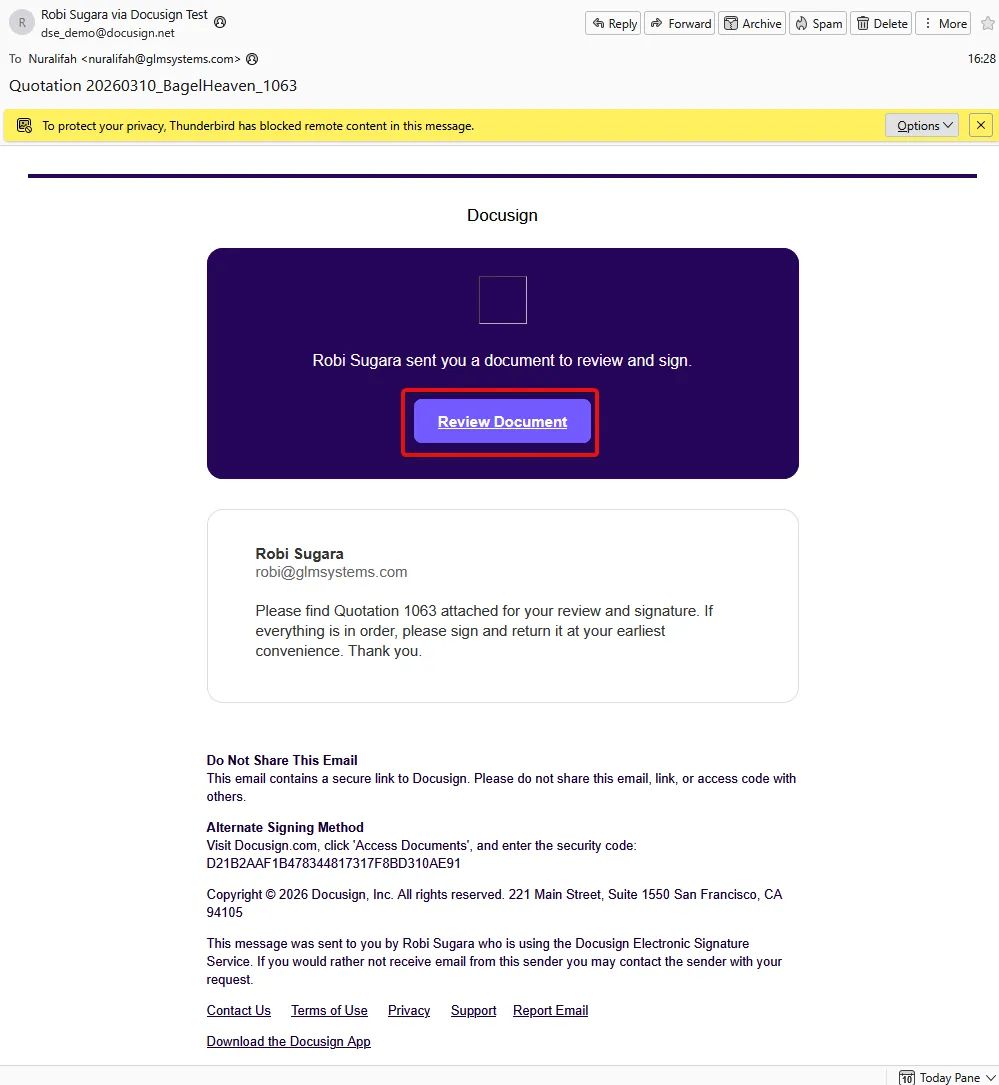
- Select
DocuSignViews.xmlthen click Import.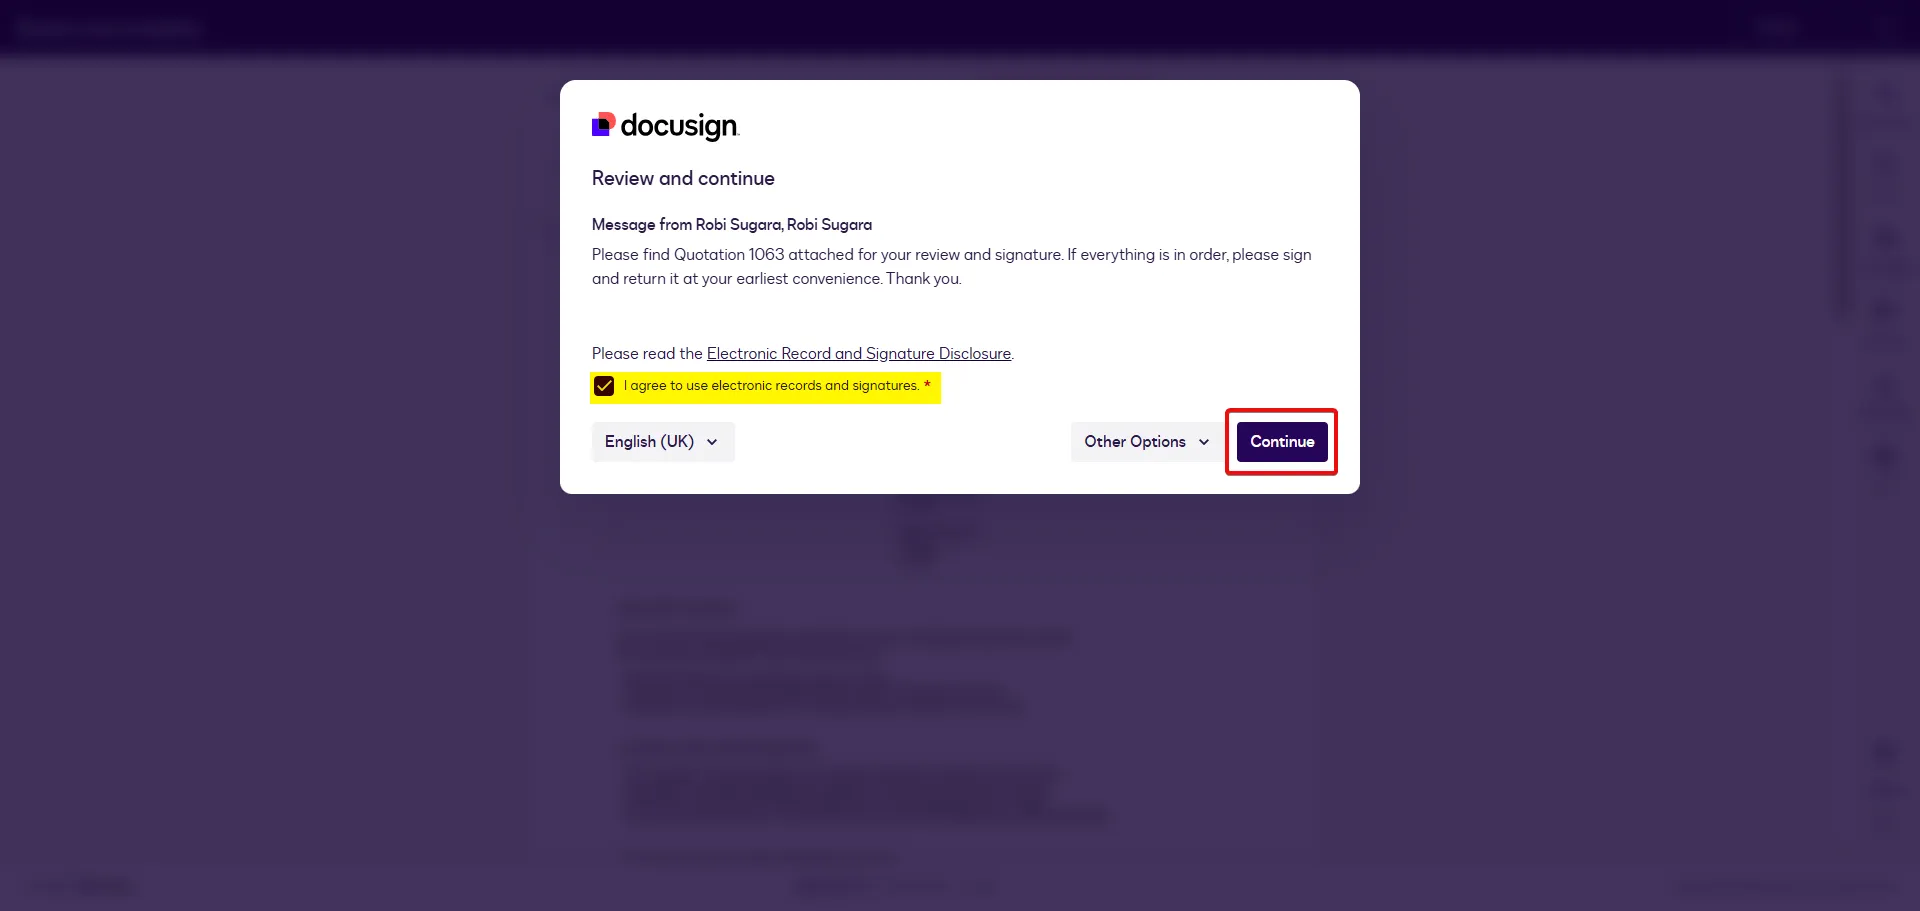
- Confirm that DocuSignViews appears in the Import Result with a Success status.
Enable DocuSign add-on
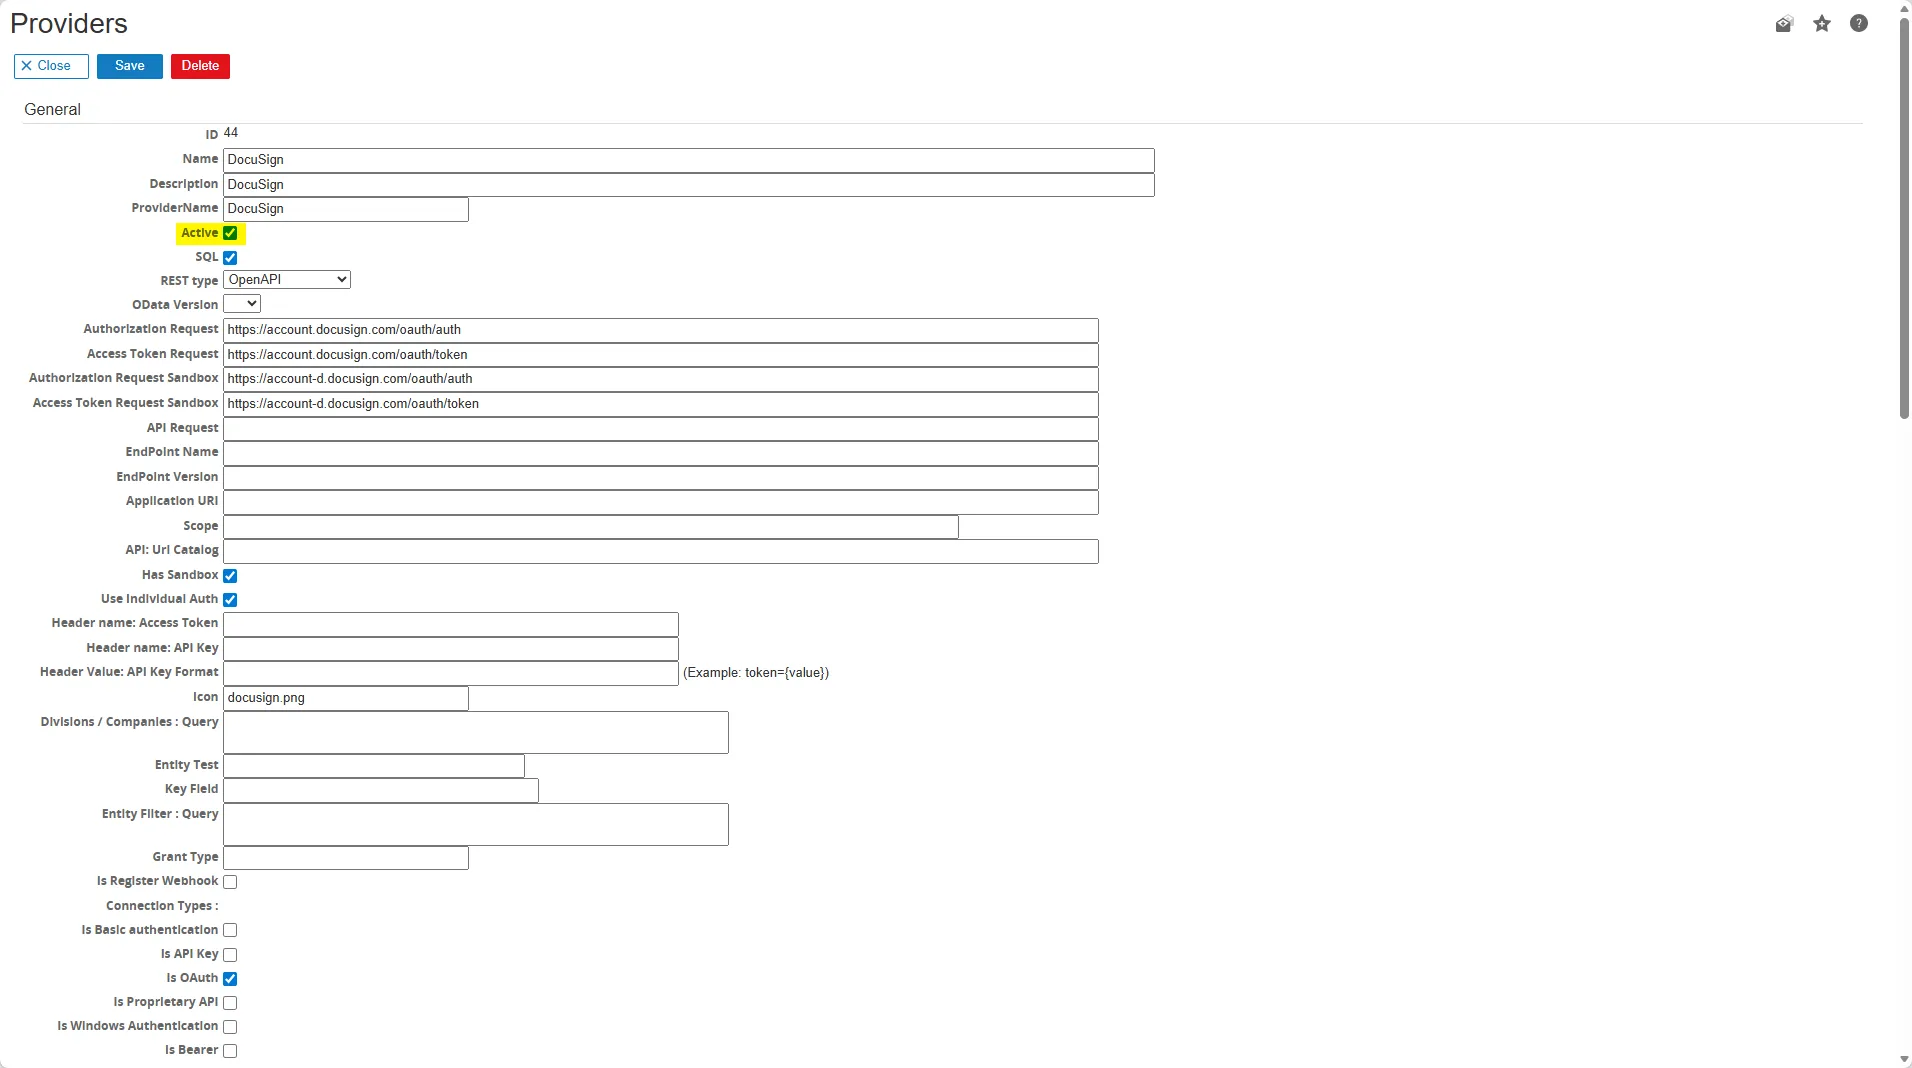
Section titled “Enable DocuSign add-on”- Go to RPA Modules > Setup > Connection > Providers.
- Open the DocuSign providers.
- Check the Active and OData checkboxes.
Set the DocuSign settings
Section titled “Set the DocuSign settings”Once DocuSign Connection has been created, continue to set up the DocuSign add-on at the Document Type level.
-
Go to Documents > Setup > Document: Types.
-
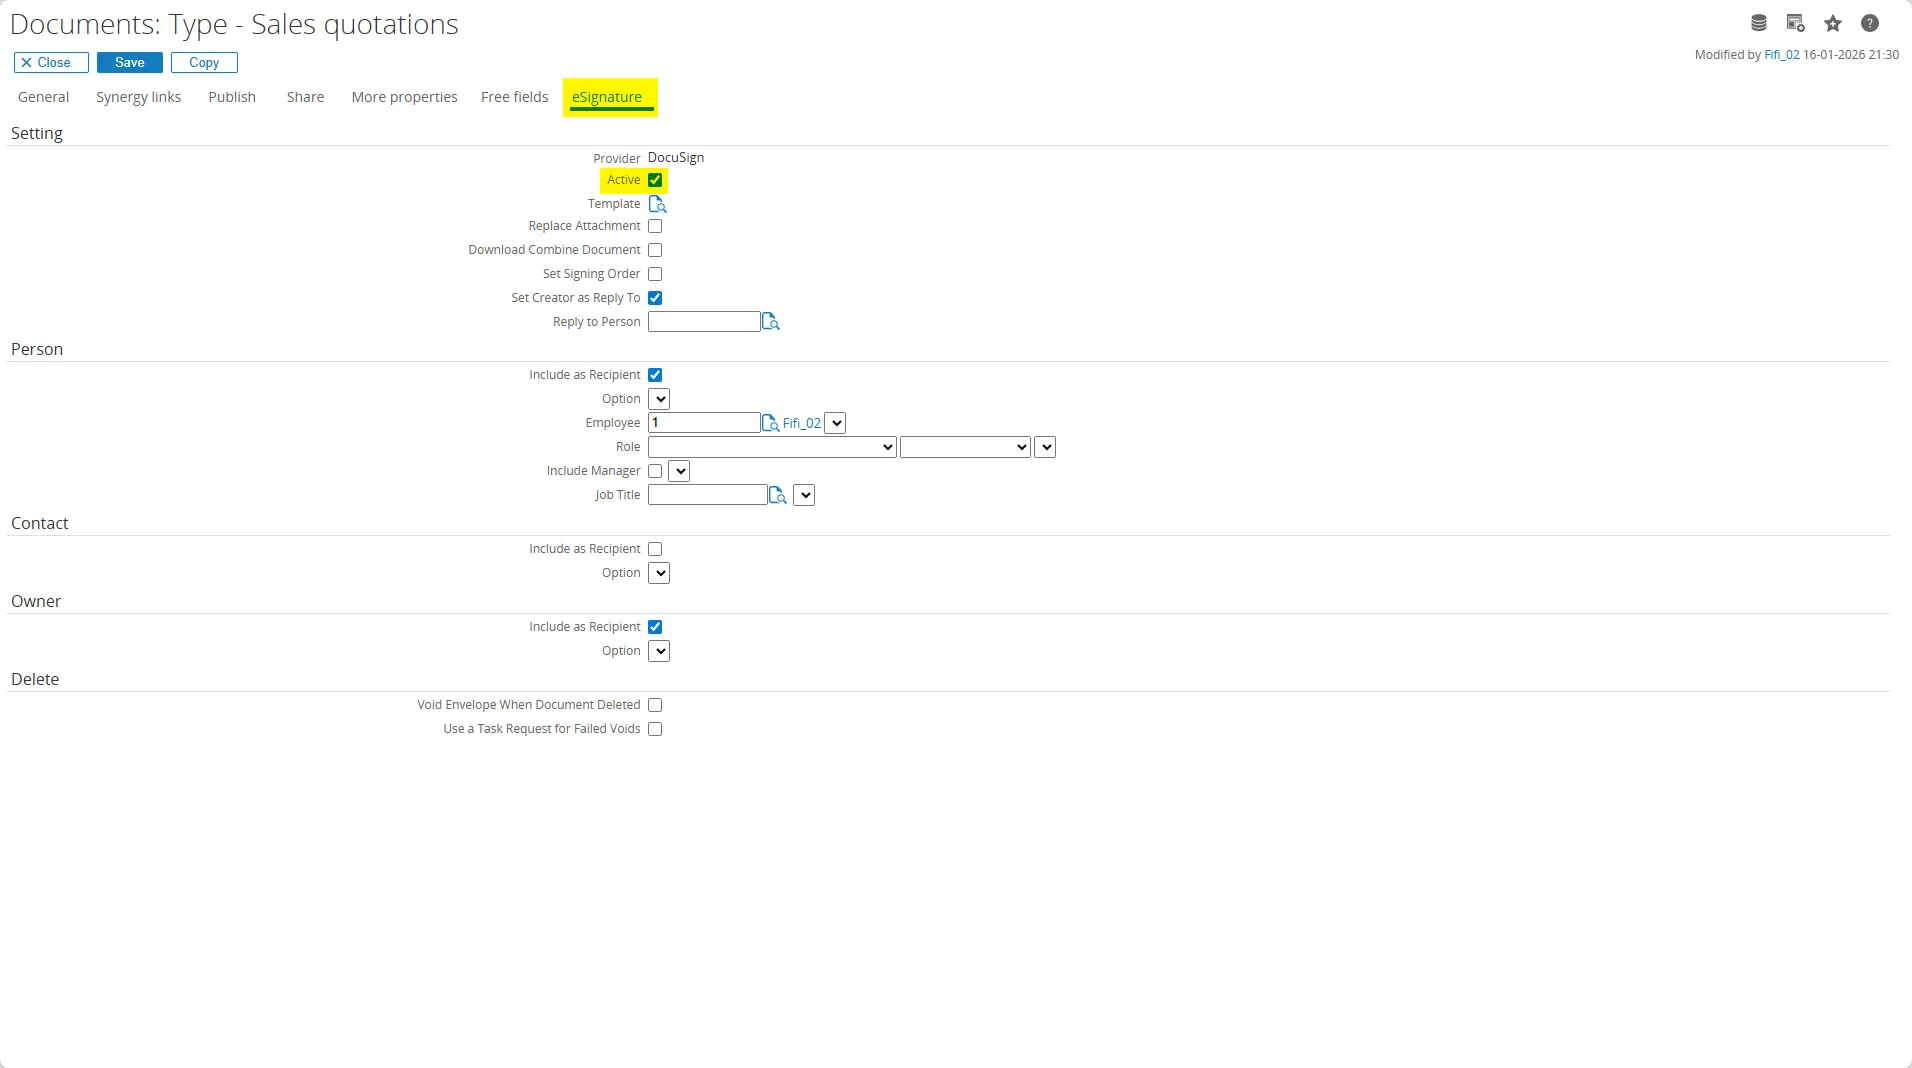
Select the eSignature tab section, then ensure that the Active checkbox is selected.
-
Setting:
| Field | Description |
|---|---|
| Provider | Choose DocuSign as the provider. |
| Active | Select the Active checkboxes. |
| Template | This option allows you to use a template form DocuSign by default. |
| Replace Attachment | This option allows the attachment to be replaced with a signed document. |
| Download Combine Document | This option allows to download the Combine Document if the envelope has multiple attachments. |
| Set Signing Order | This option allows to use the Signing Order by default when sending the document via DocuSign Synergy App. |
| Set Creator as Reply to | Select the checkboxes if you want to set the creator as reply to. |
| Reply to Person | This option allows to reply the email sent by DocuSign to the specific person instead of dse@docusign.com. |
- Person:
| Field | Description |
|---|---|
| Include as Recipient | This option allows the Person that is linked to the Document, can be added as recipient on the DocuSign Synergy App. It also can be setup for a specific person or be linked to a role. |
- Contact:
| Field | Description |
|---|---|
| Include as Recipient | This option allows the Contact that is linked to the Document to be set as recipient on the DocuSign Sign add-on. |
- Owner:
| Field | Description |
|---|---|
| Include as Recipient | This option allows that the Owner of the Document can be added as recipient on the DocuSign addon. |
- Delete:
| Field | Description |
|---|---|
| Void Envelope When Document Deleted | When the envelope is voided or deleted in DocuSign, the signing process stops and the documents in that envelope can no longer be signed or used. The document in DocuSign has been deleted so the signing process stops and the documents in that envelope can no longer be signed or used. |
| Use a Task Request for Failed Voids | When this option is selected, the system automatically creates a task request containing the envelope details and error message when a void fails. |
Configure the Background Job
Section titled “Configure the Background Job”The DocuSign add-on has the ability to upload signed documents to Synergy in the background. You need to copy the batch file (GLMSysDocuSignBackgroundJob.cmd) available in the setup/installer. The batch file make use of the Exact.Process.exe to run the upload signed document.
In the cmd file there is a virtual directory, change this directory to your Exact Synergy virtual directory from where the Exact Synergy is running. Create a task schedule using Windows Task Scheduler or a SQL Job for these command files, which will start the upload process for signed documents to Exact Synergy on a defined schedule. These jobs can be set up in the same way as other standard Exact Synergy jobs.
Sending the Document with DocuSign
Section titled “Sending the Document with DocuSign”In this scenario, we want to create a sales quotation that needs to be signed.
Steps:
- Go to Documents Modules.
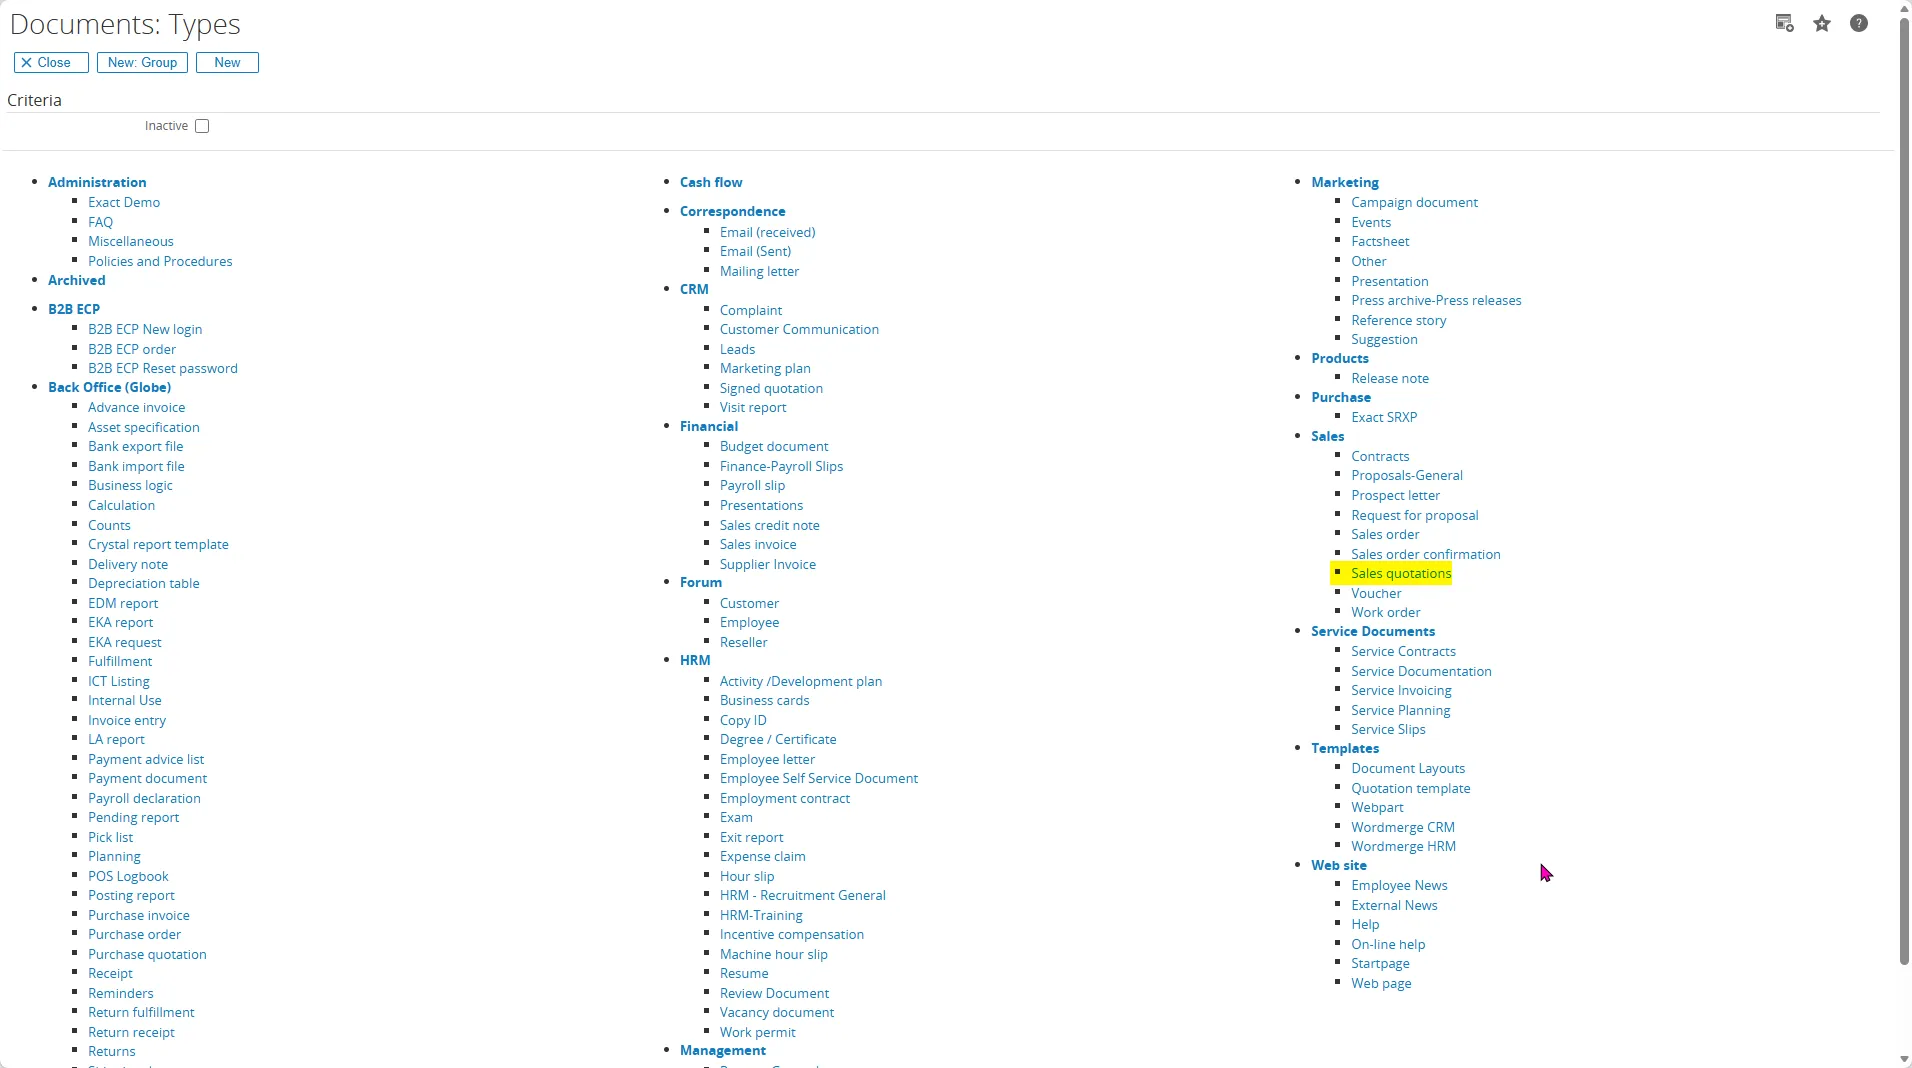
- Setup > Maintenance > Document: Types.
- Choose the document type you want to add and for example in this section we will use Sales quotations types.
- In the Documents: Type, choose eSignature menu and ensure to select the Active button on the Setting section.
- Then click the Save button.
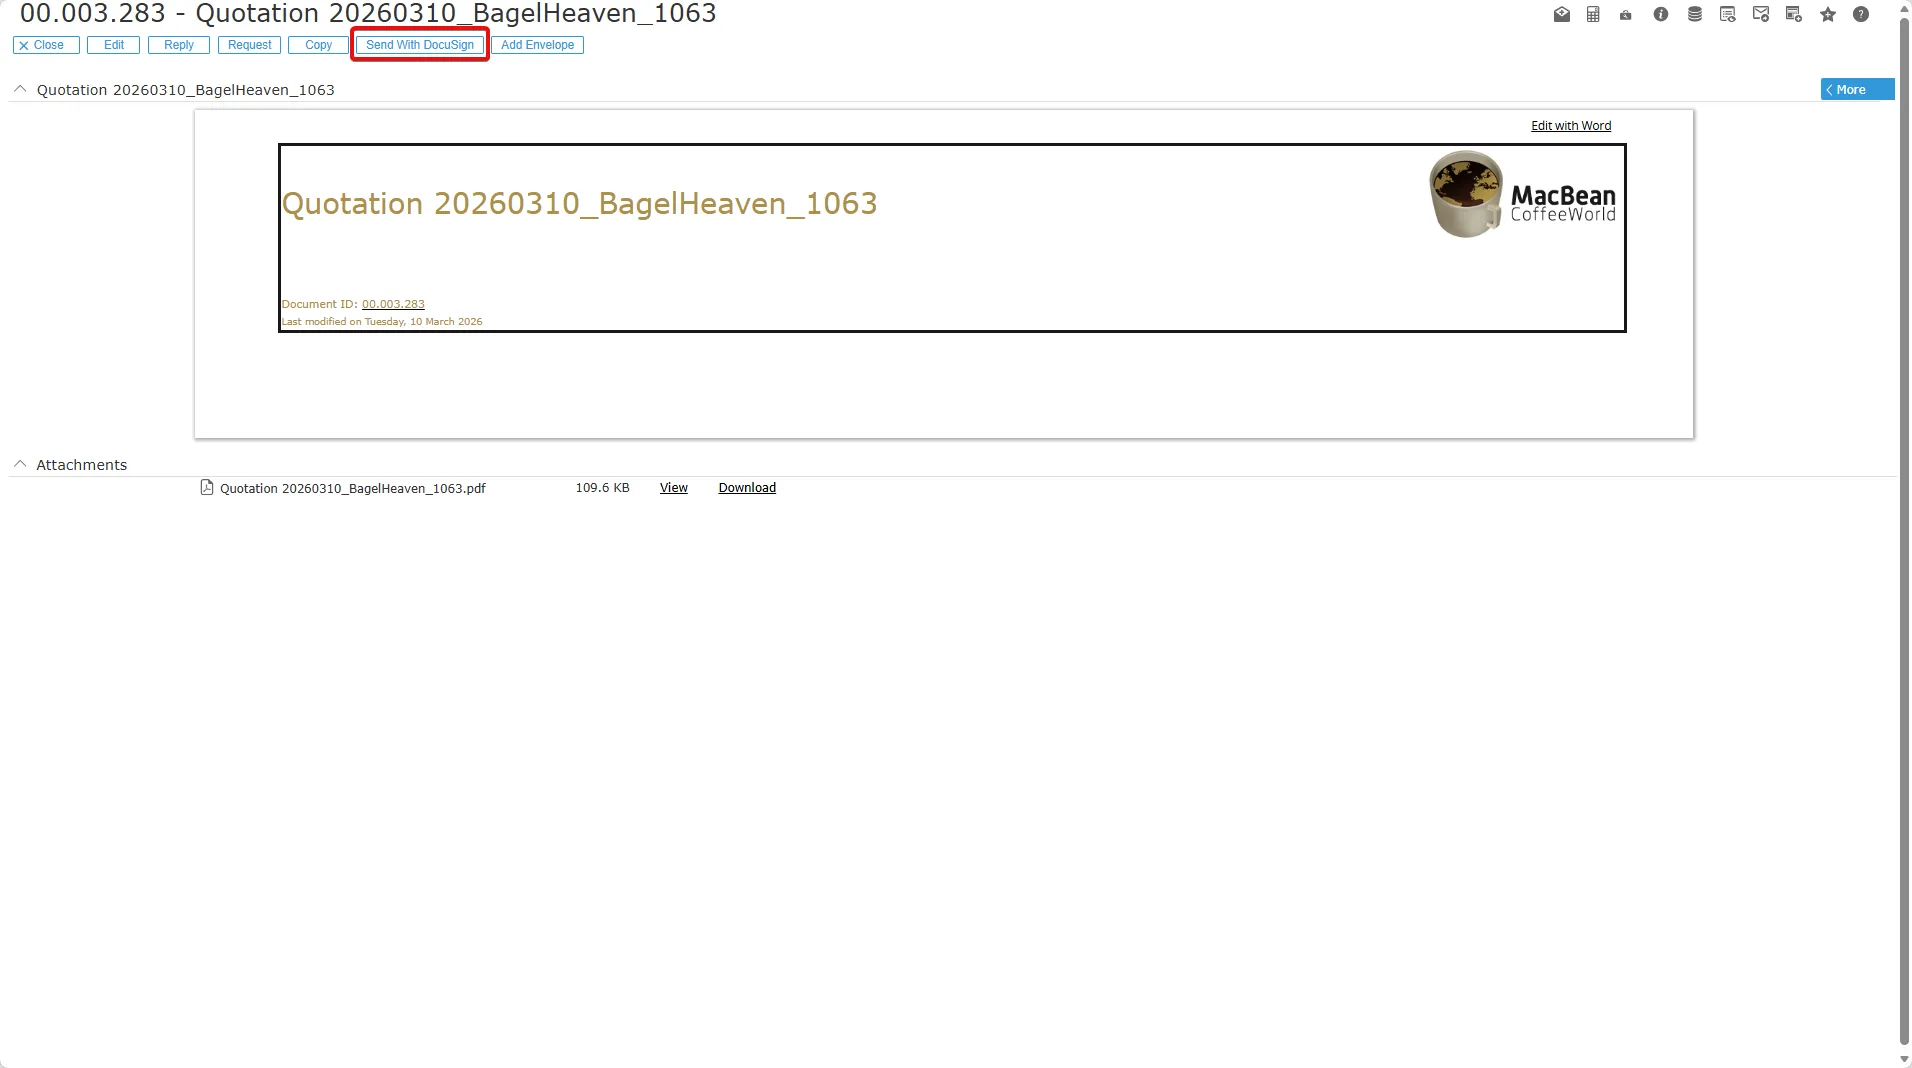
- Next, open your quotation request.
- Click the Generate Quotation.
- Click the Send with DocuSign button.
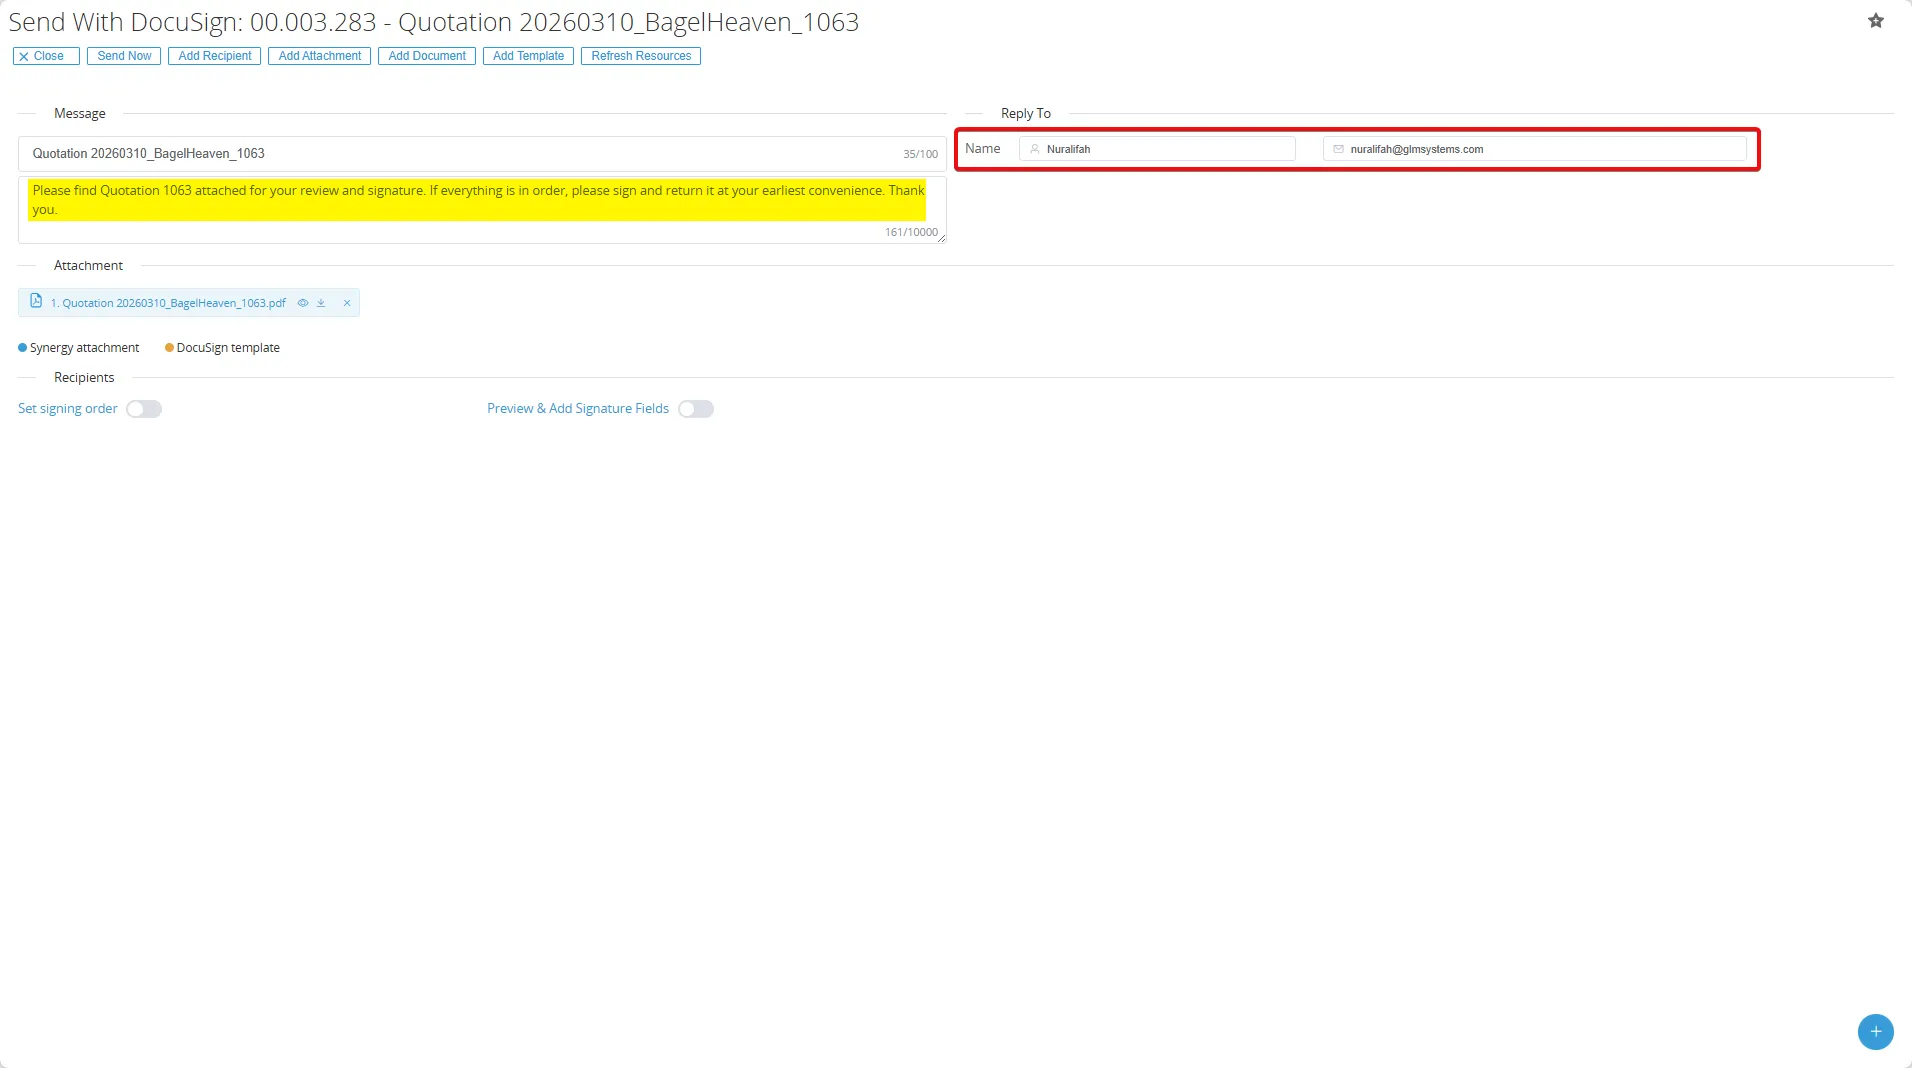
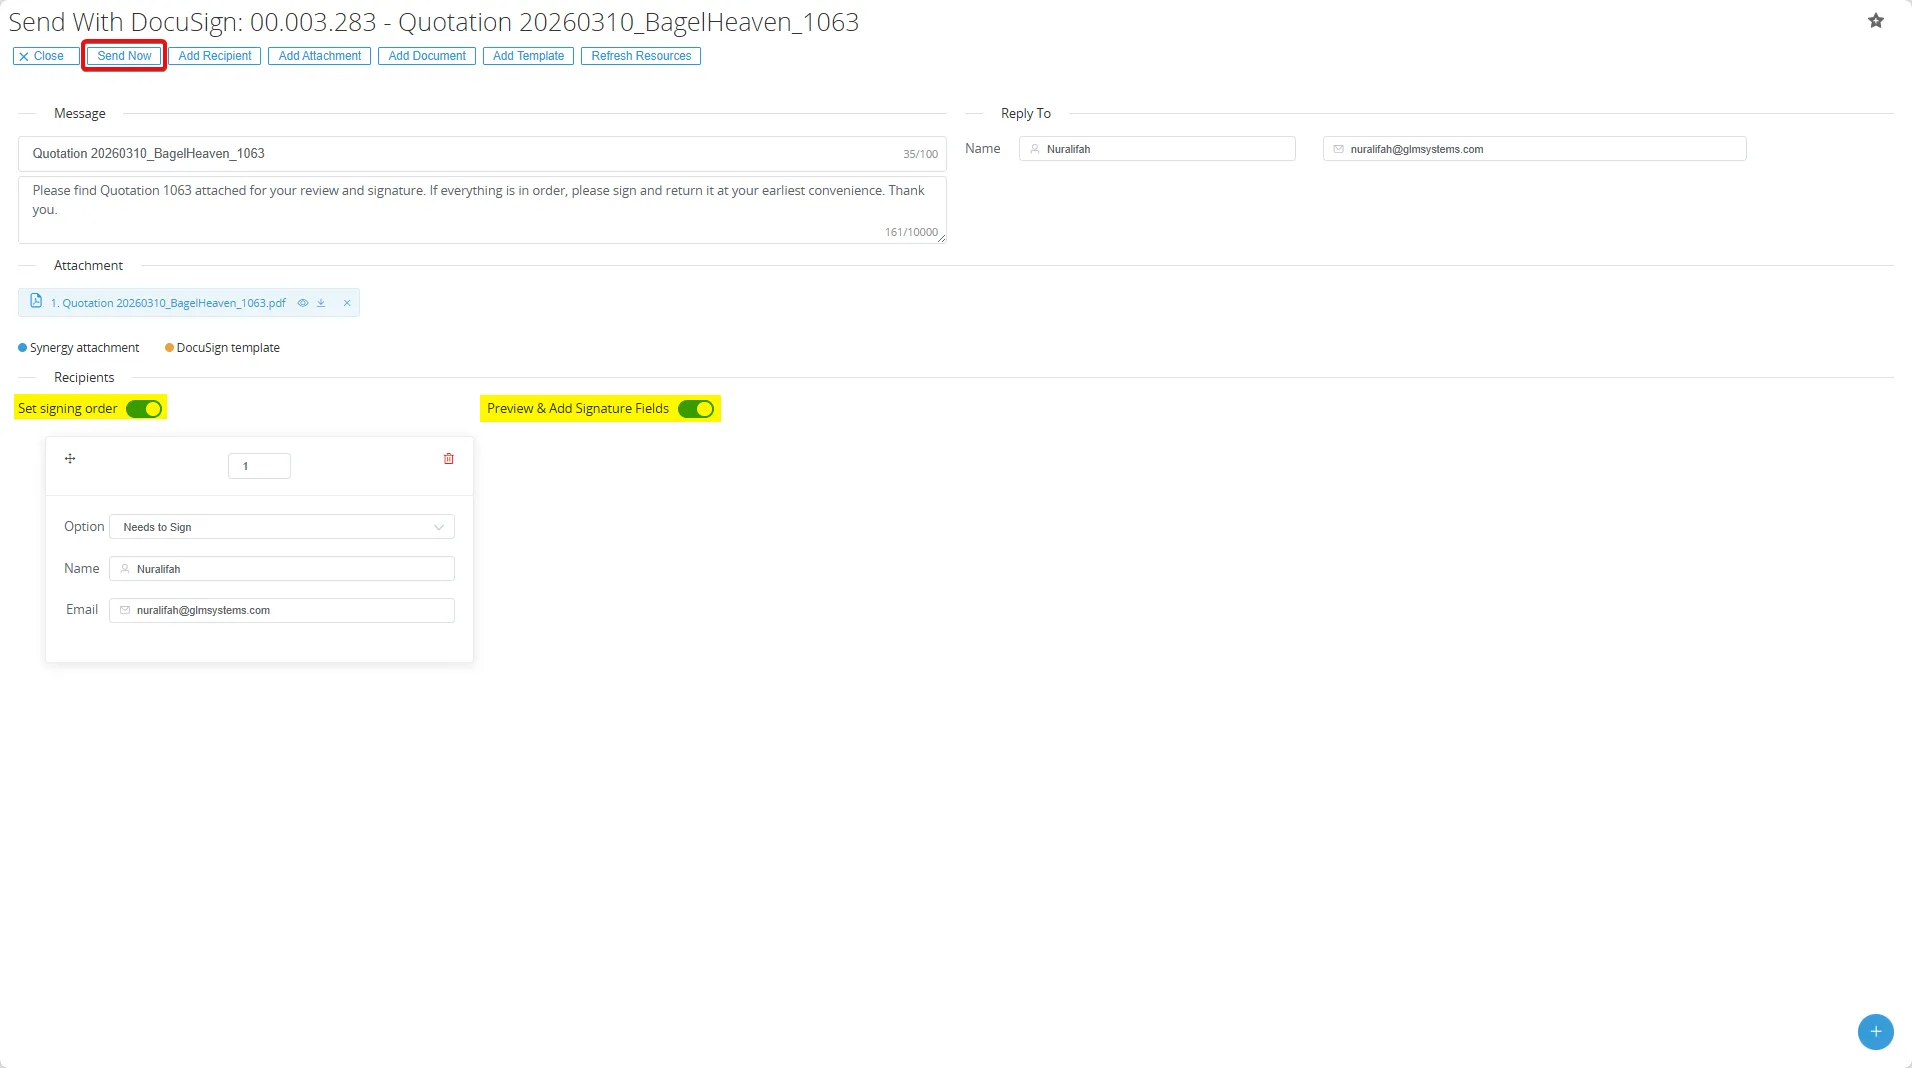
- Enter the message and the reply-to account.
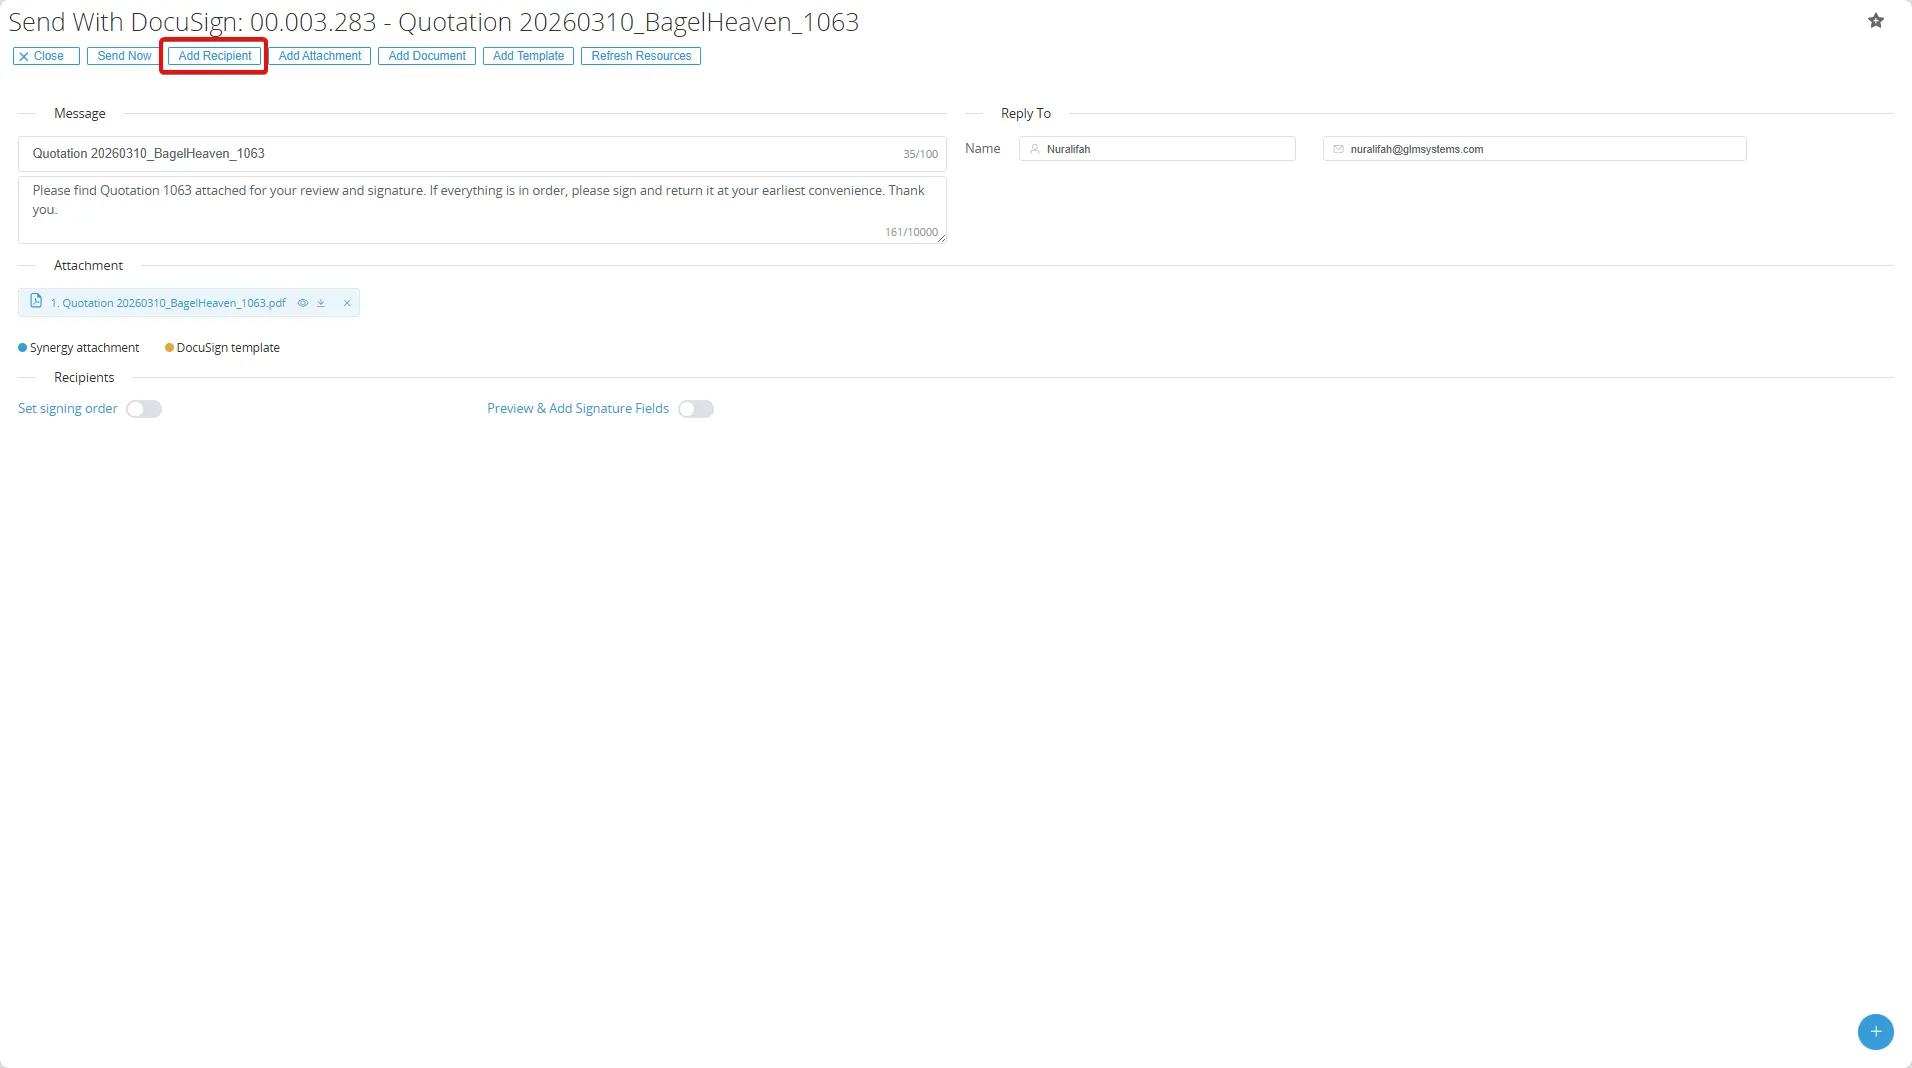
- Click the Add recipient button.
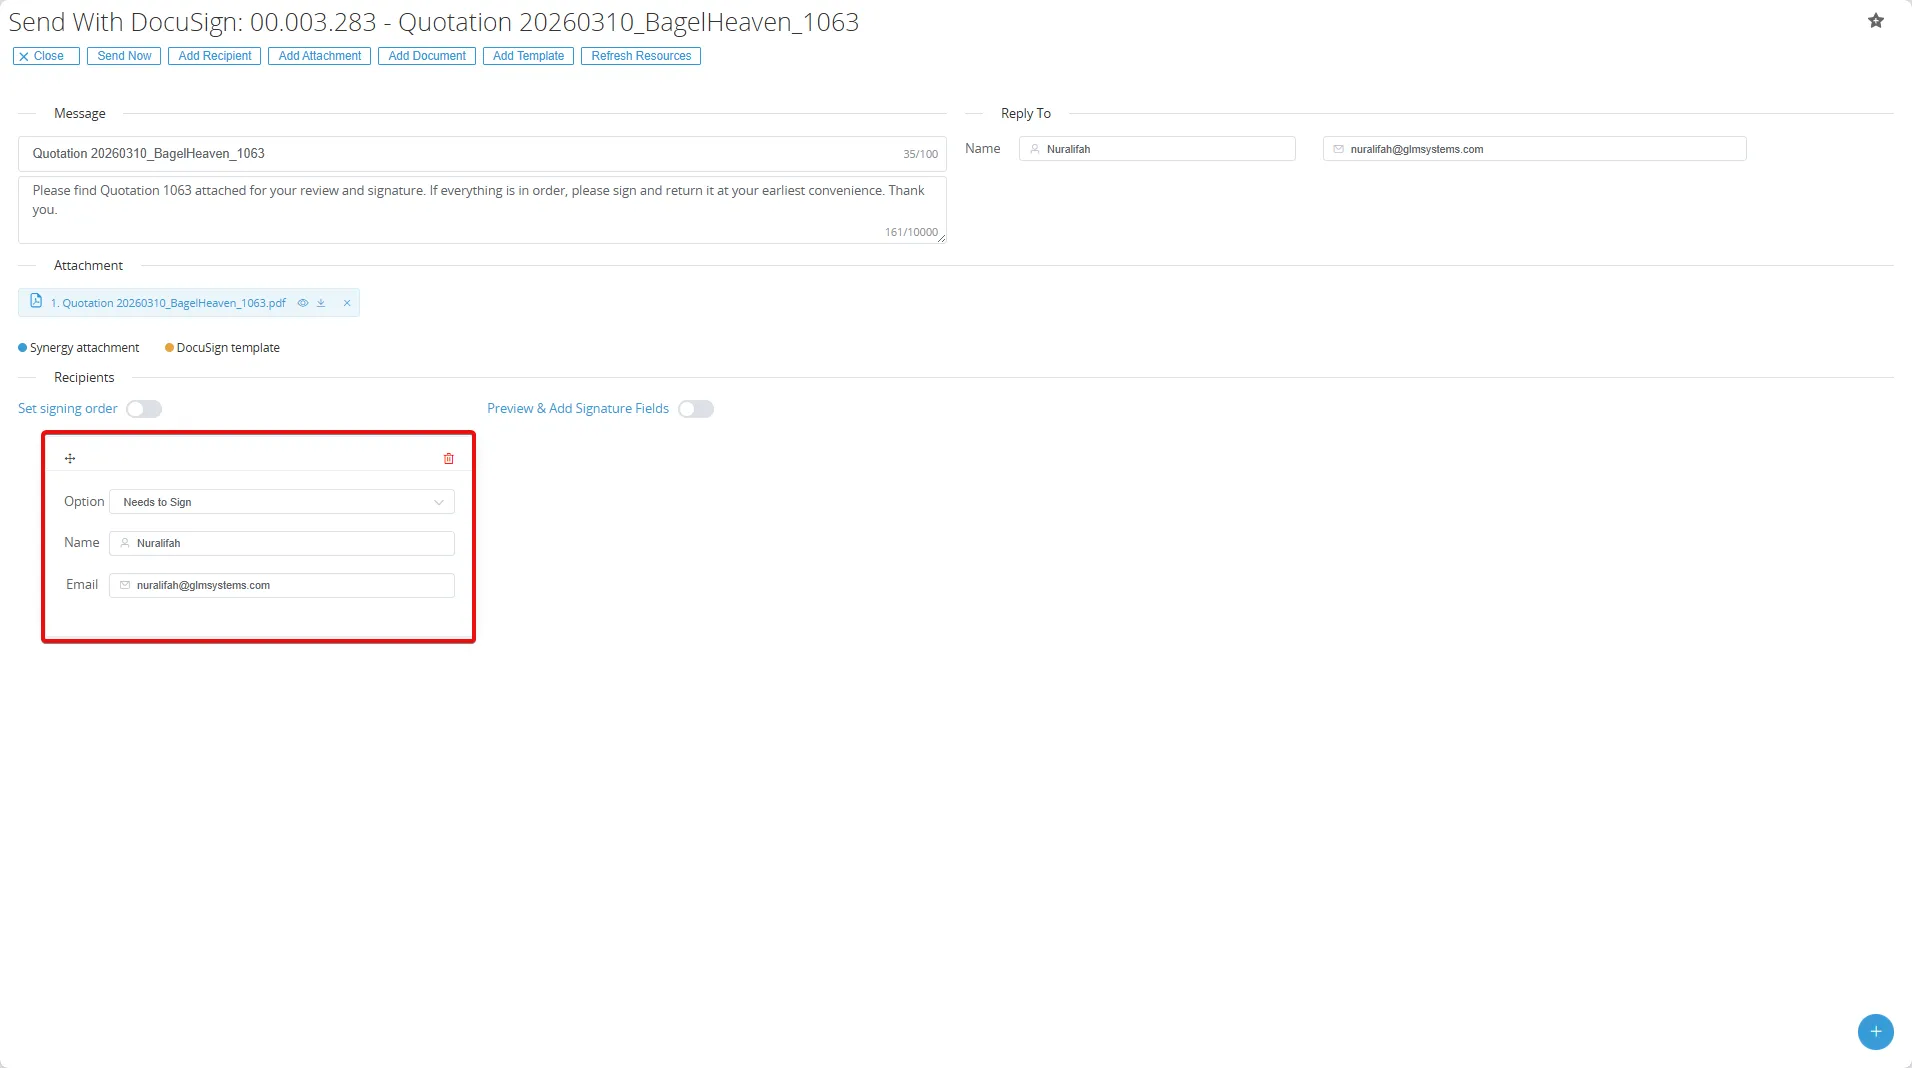
- Enter the recipient information.
- Enable Set signing order and Preview & add signature fields, then click Send now.
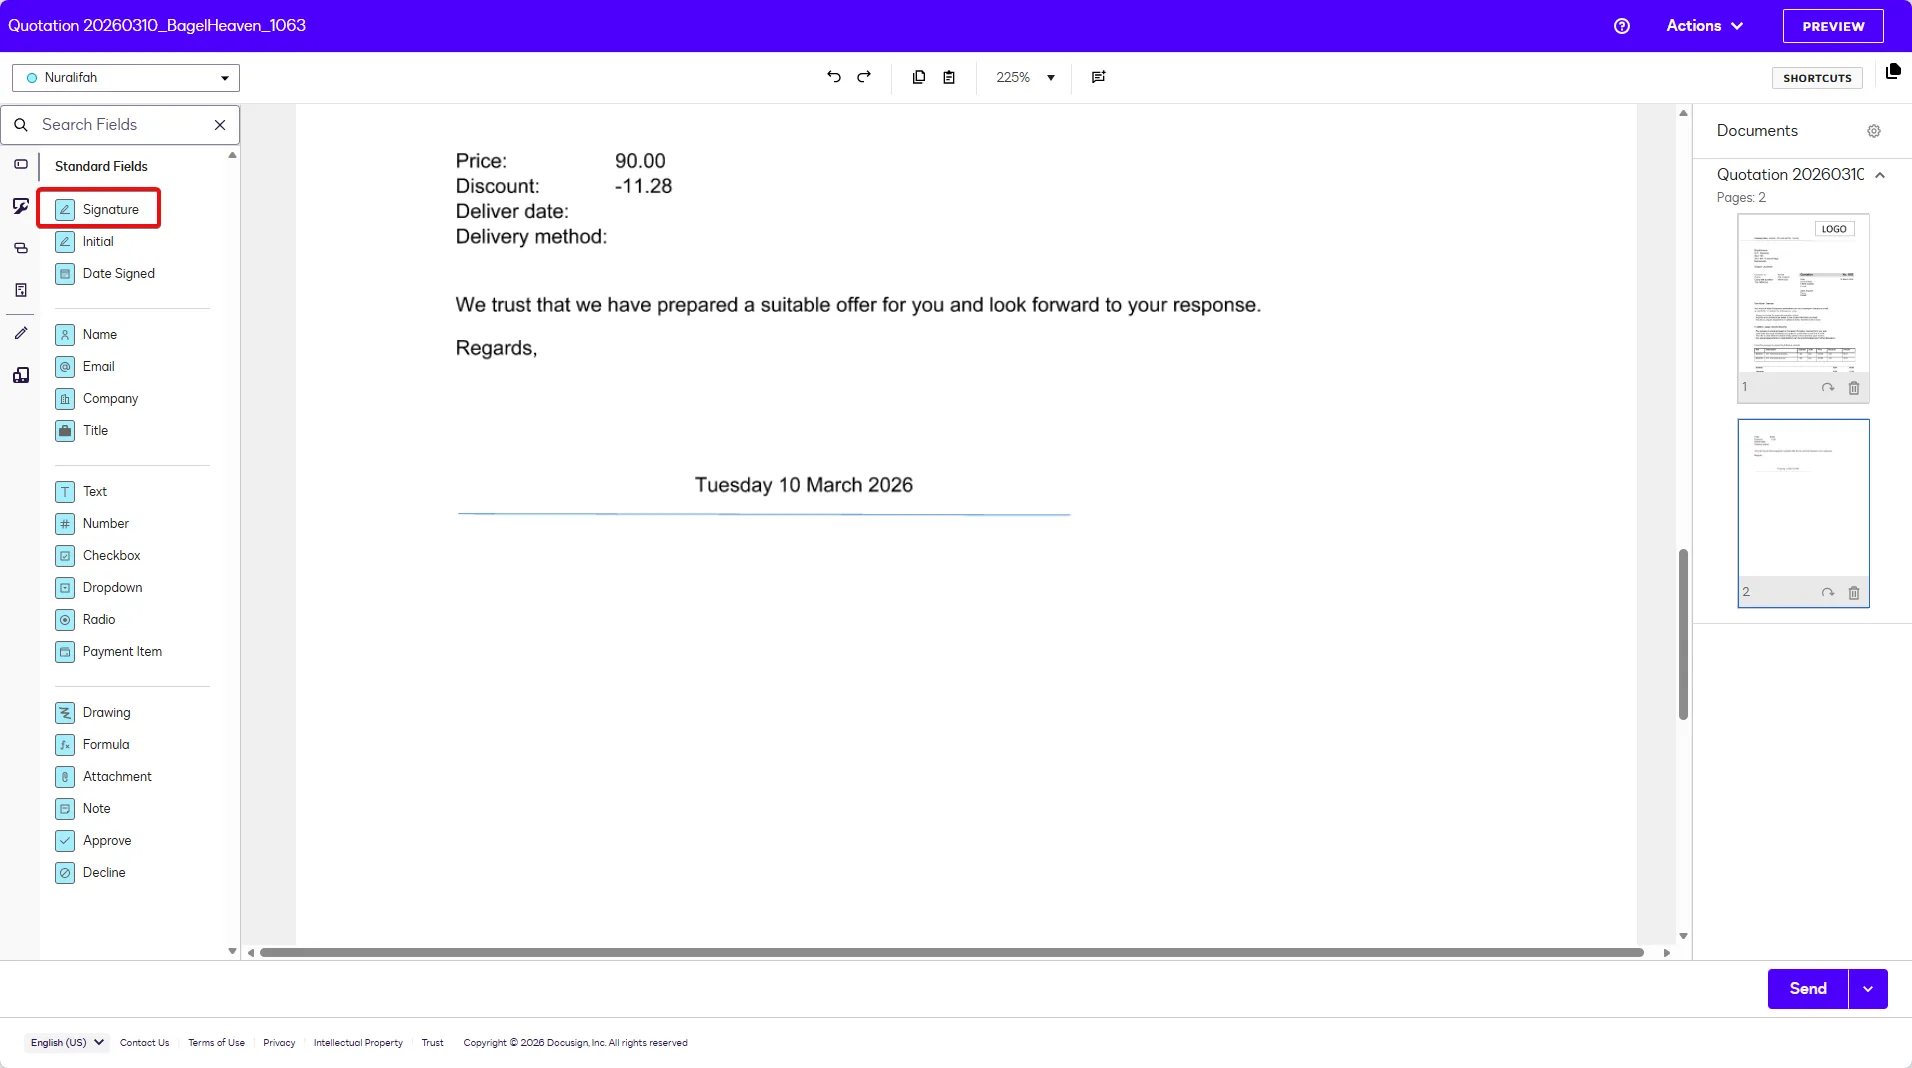
- You will be directed to the DocuSign page, click the Signature button.
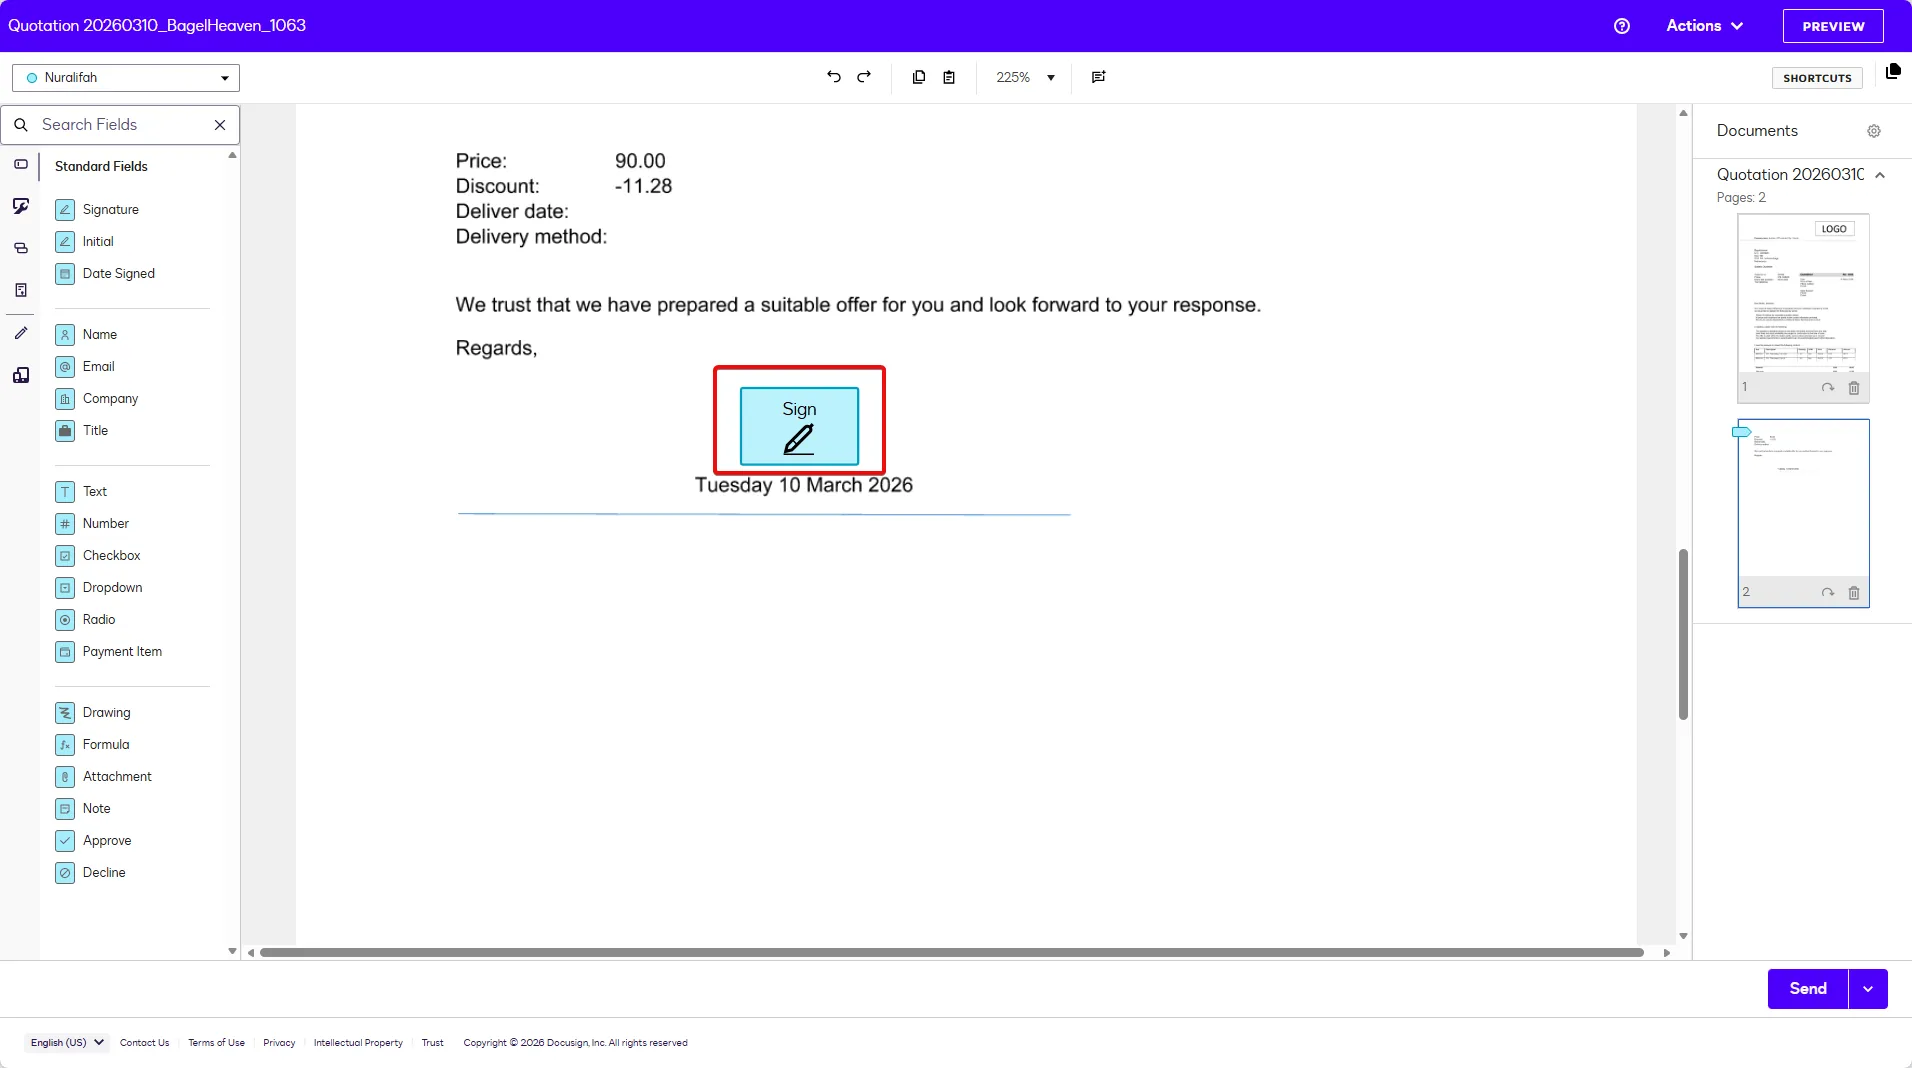
- Replace the signature as needed.
- You will receive an email notification.
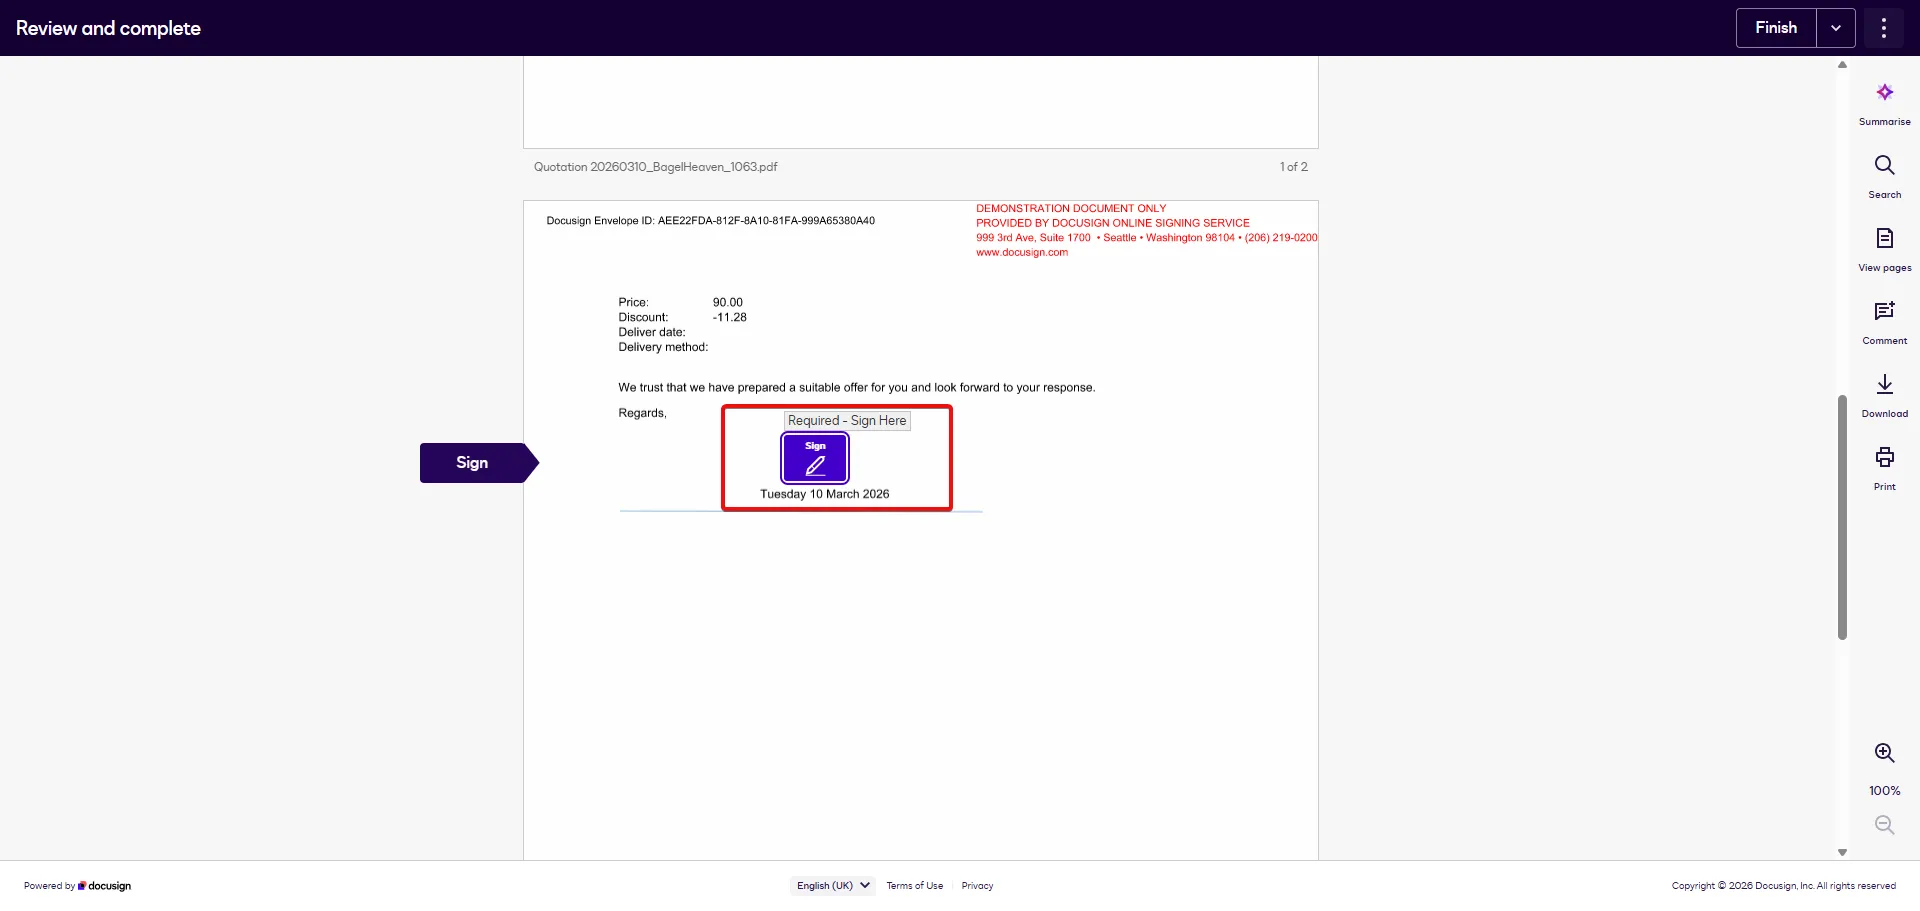
- Click Review Document.
- Check the Electronic Record and Signature Disclosure, then click Continue.
- Click the Sign here field to add your signature.
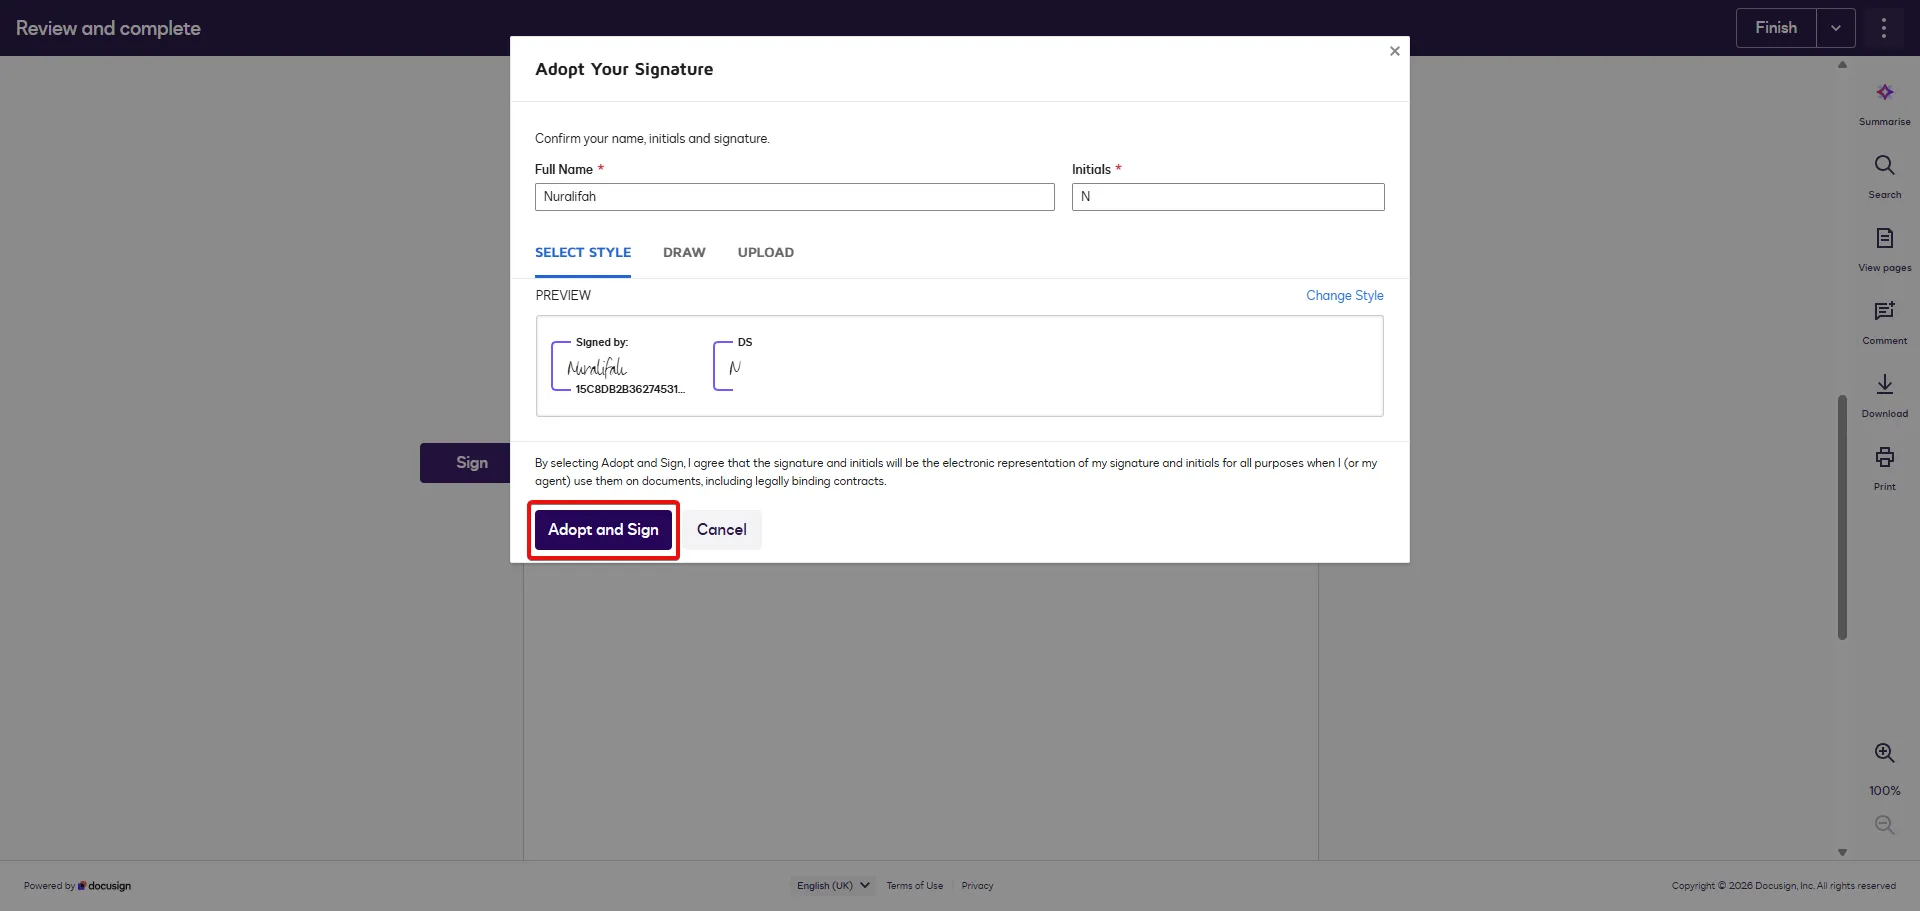
- Click Adopt and Sign after choosing your signature.
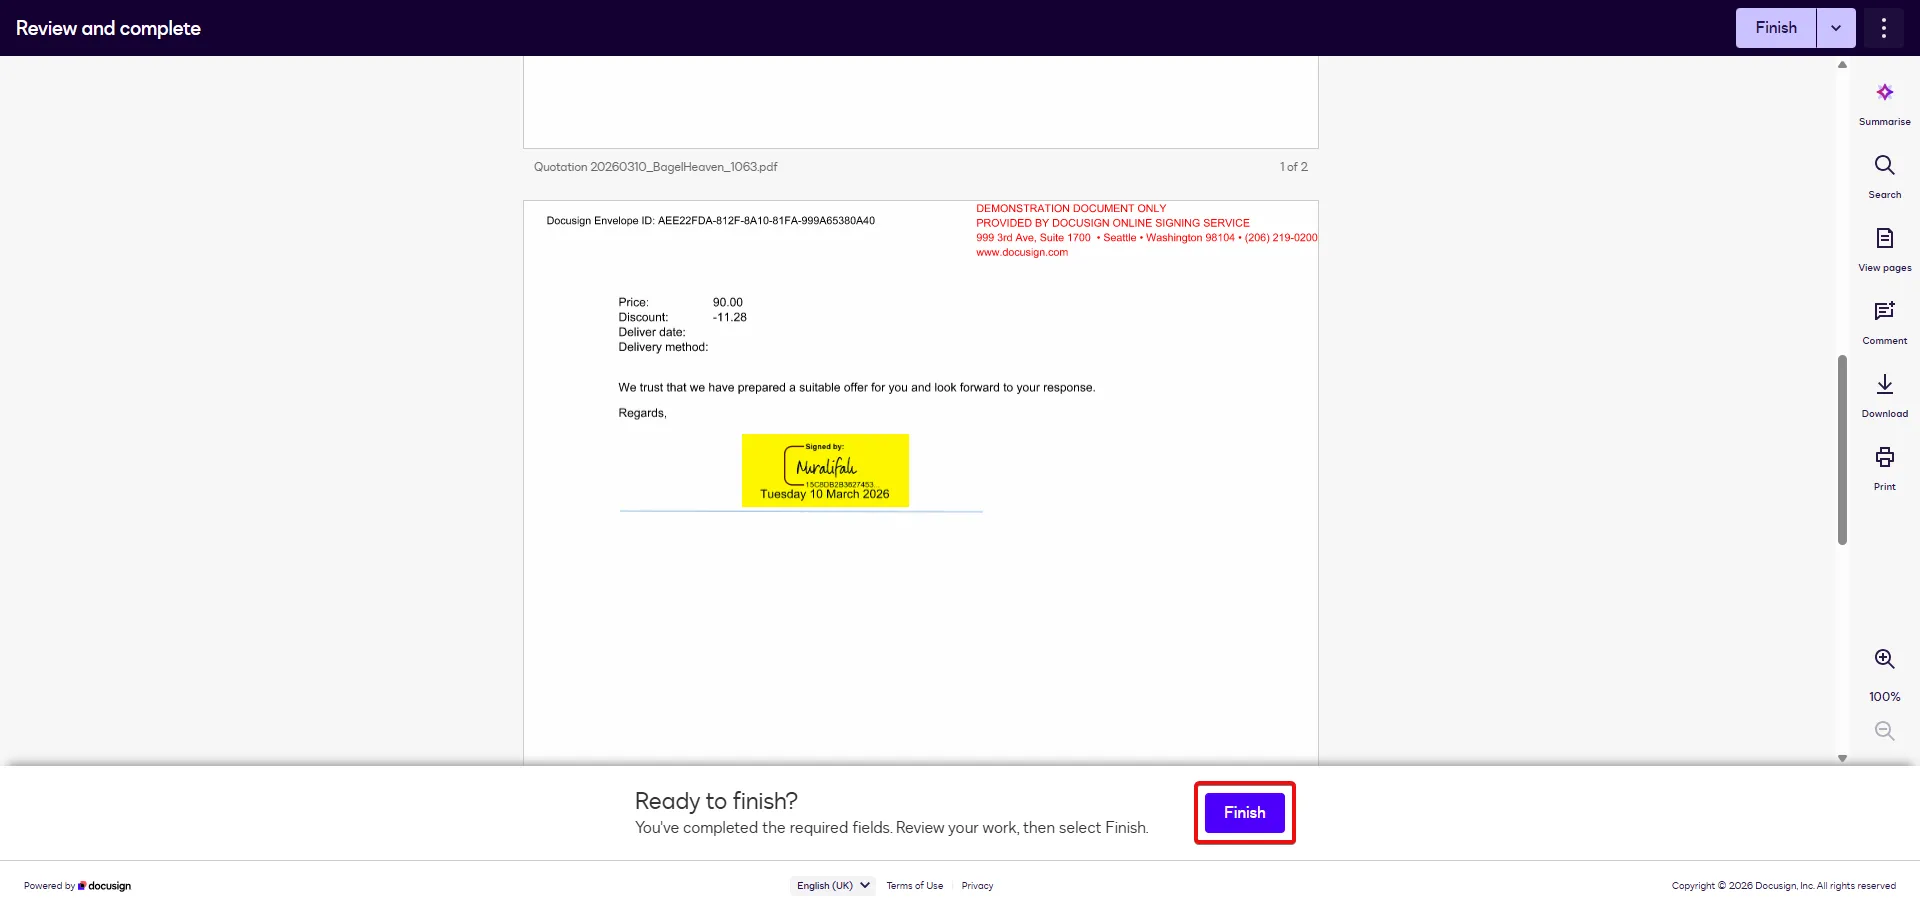
- Click the Finish button.
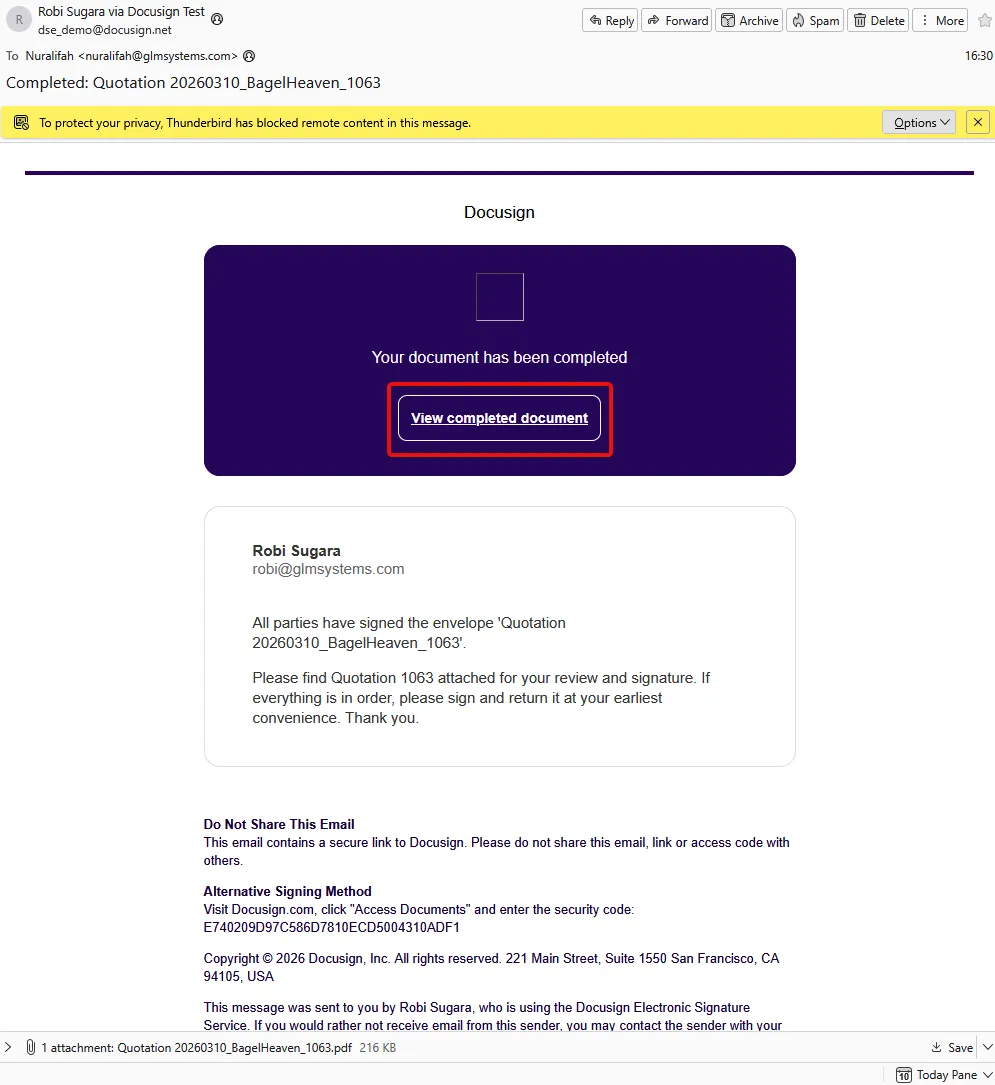
- You will receive an email notification.
- Click View completed document.
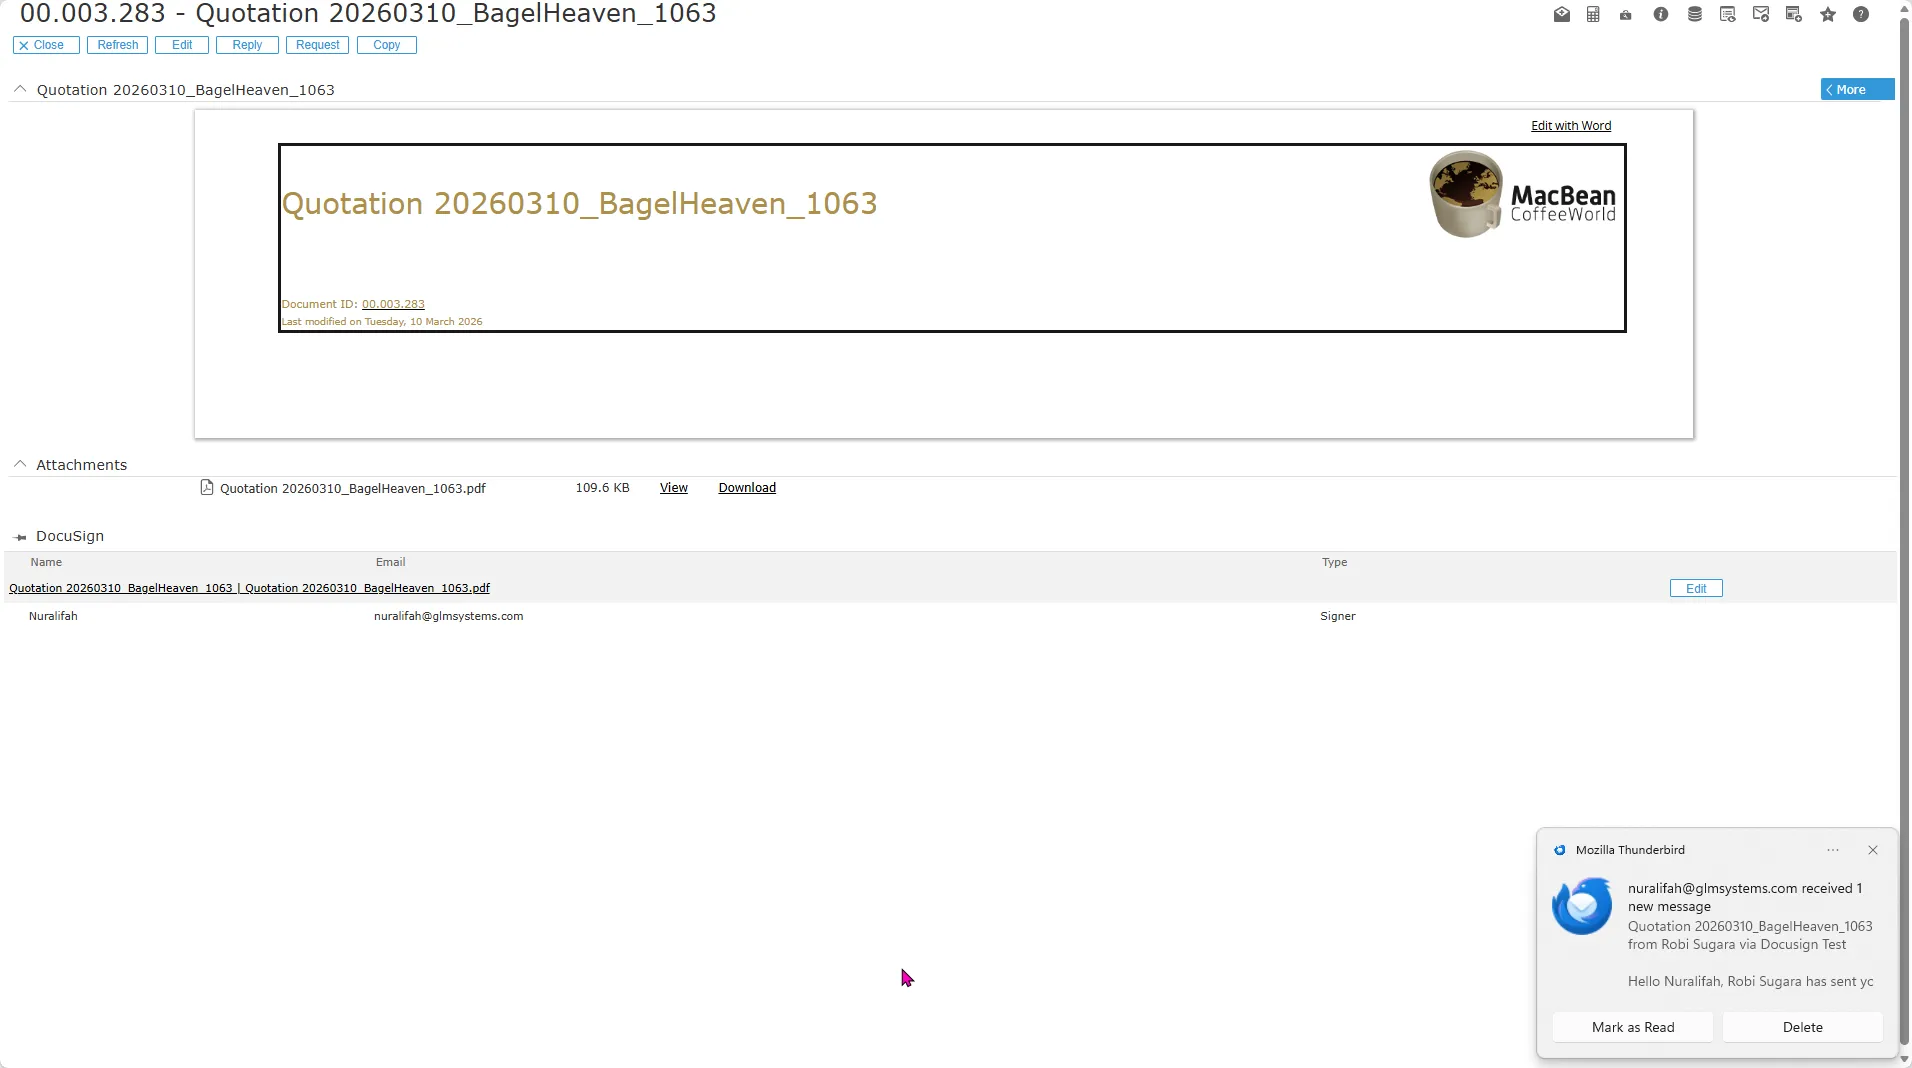
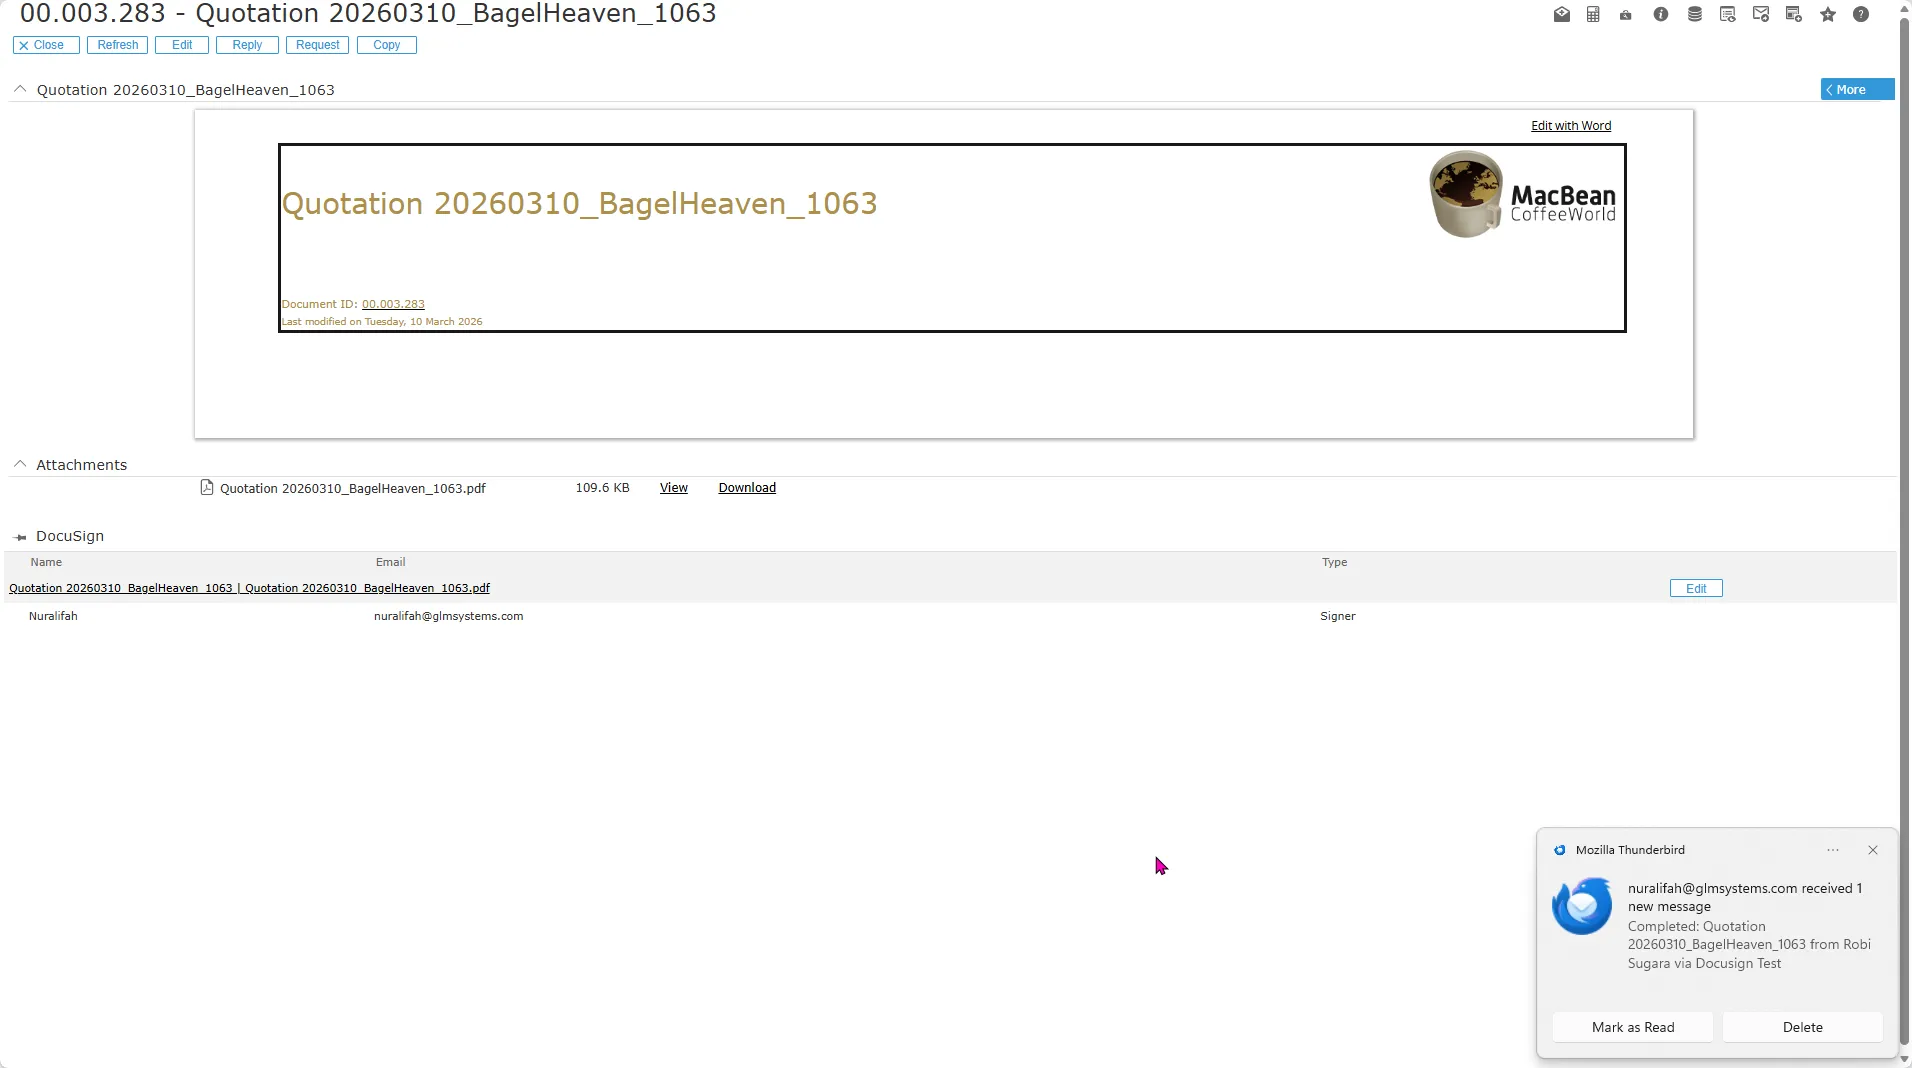
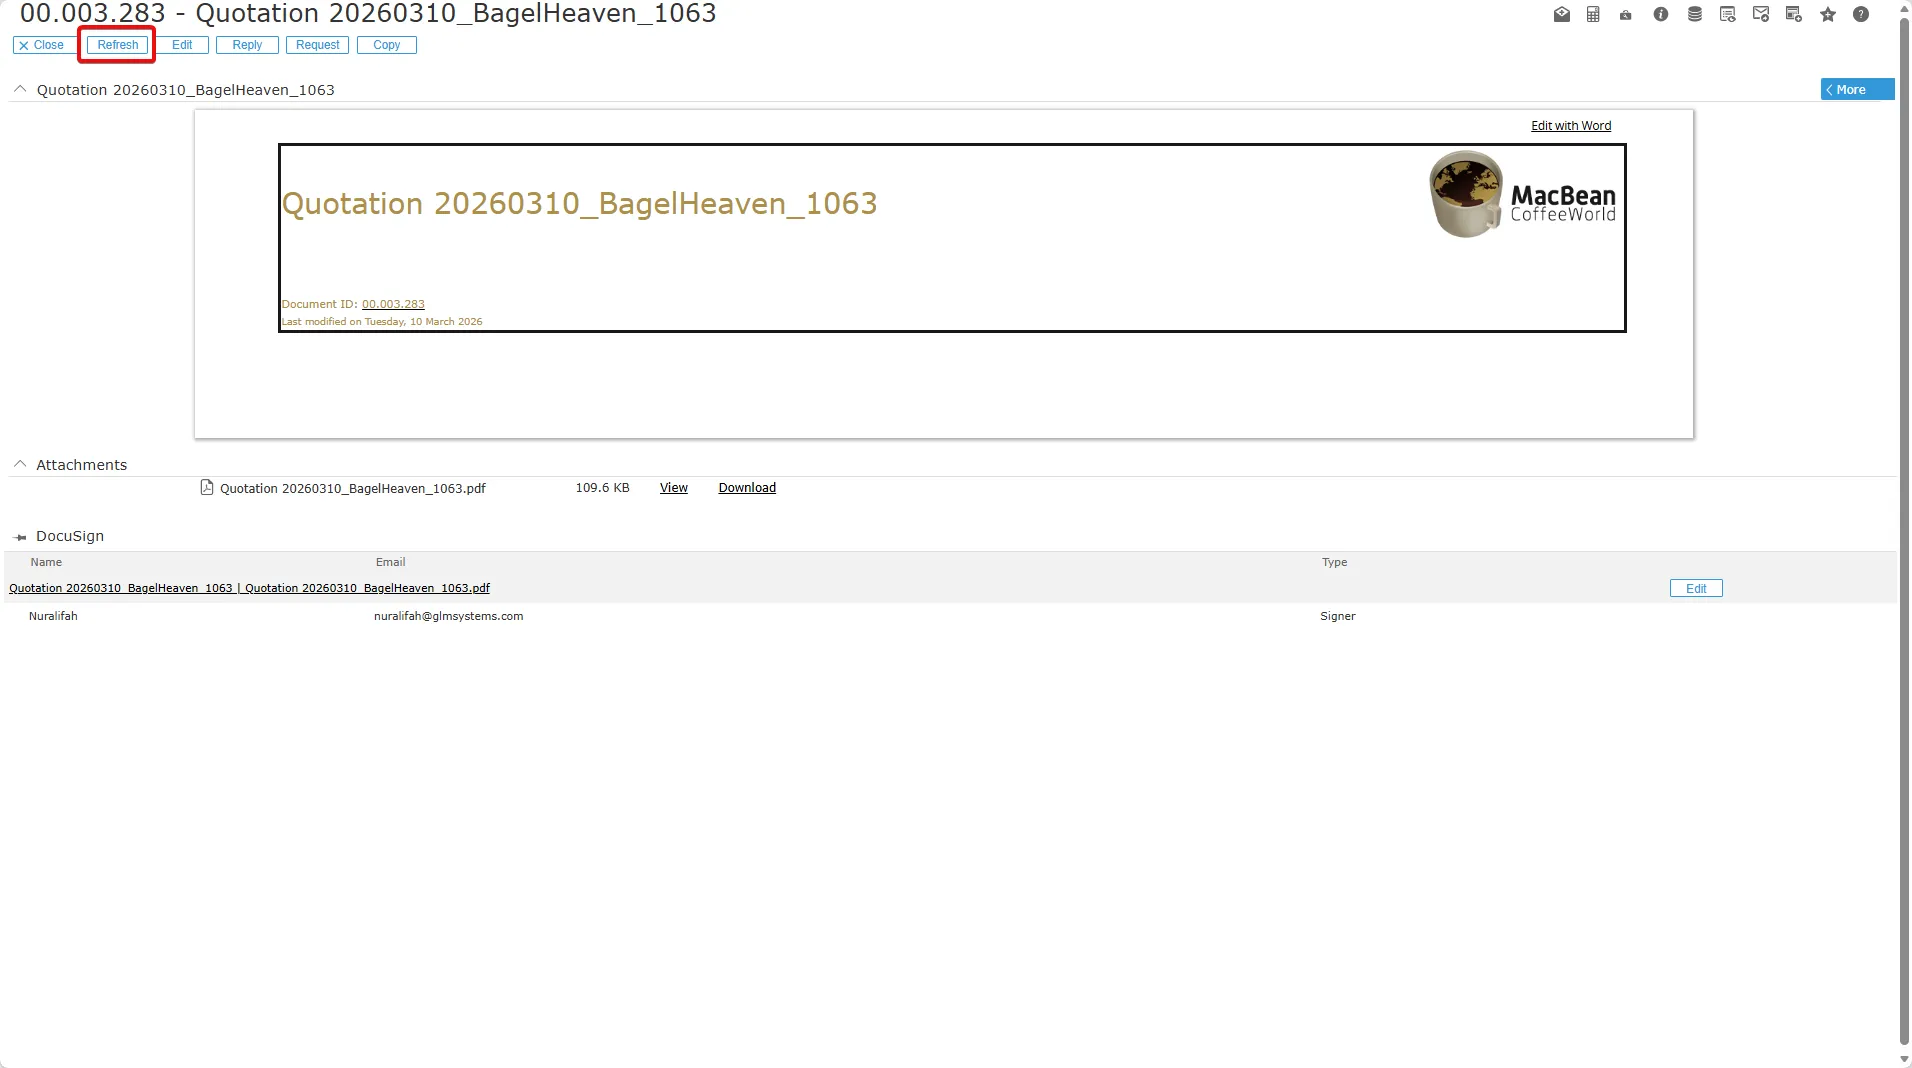
- Click the Refresh button in Synergy.
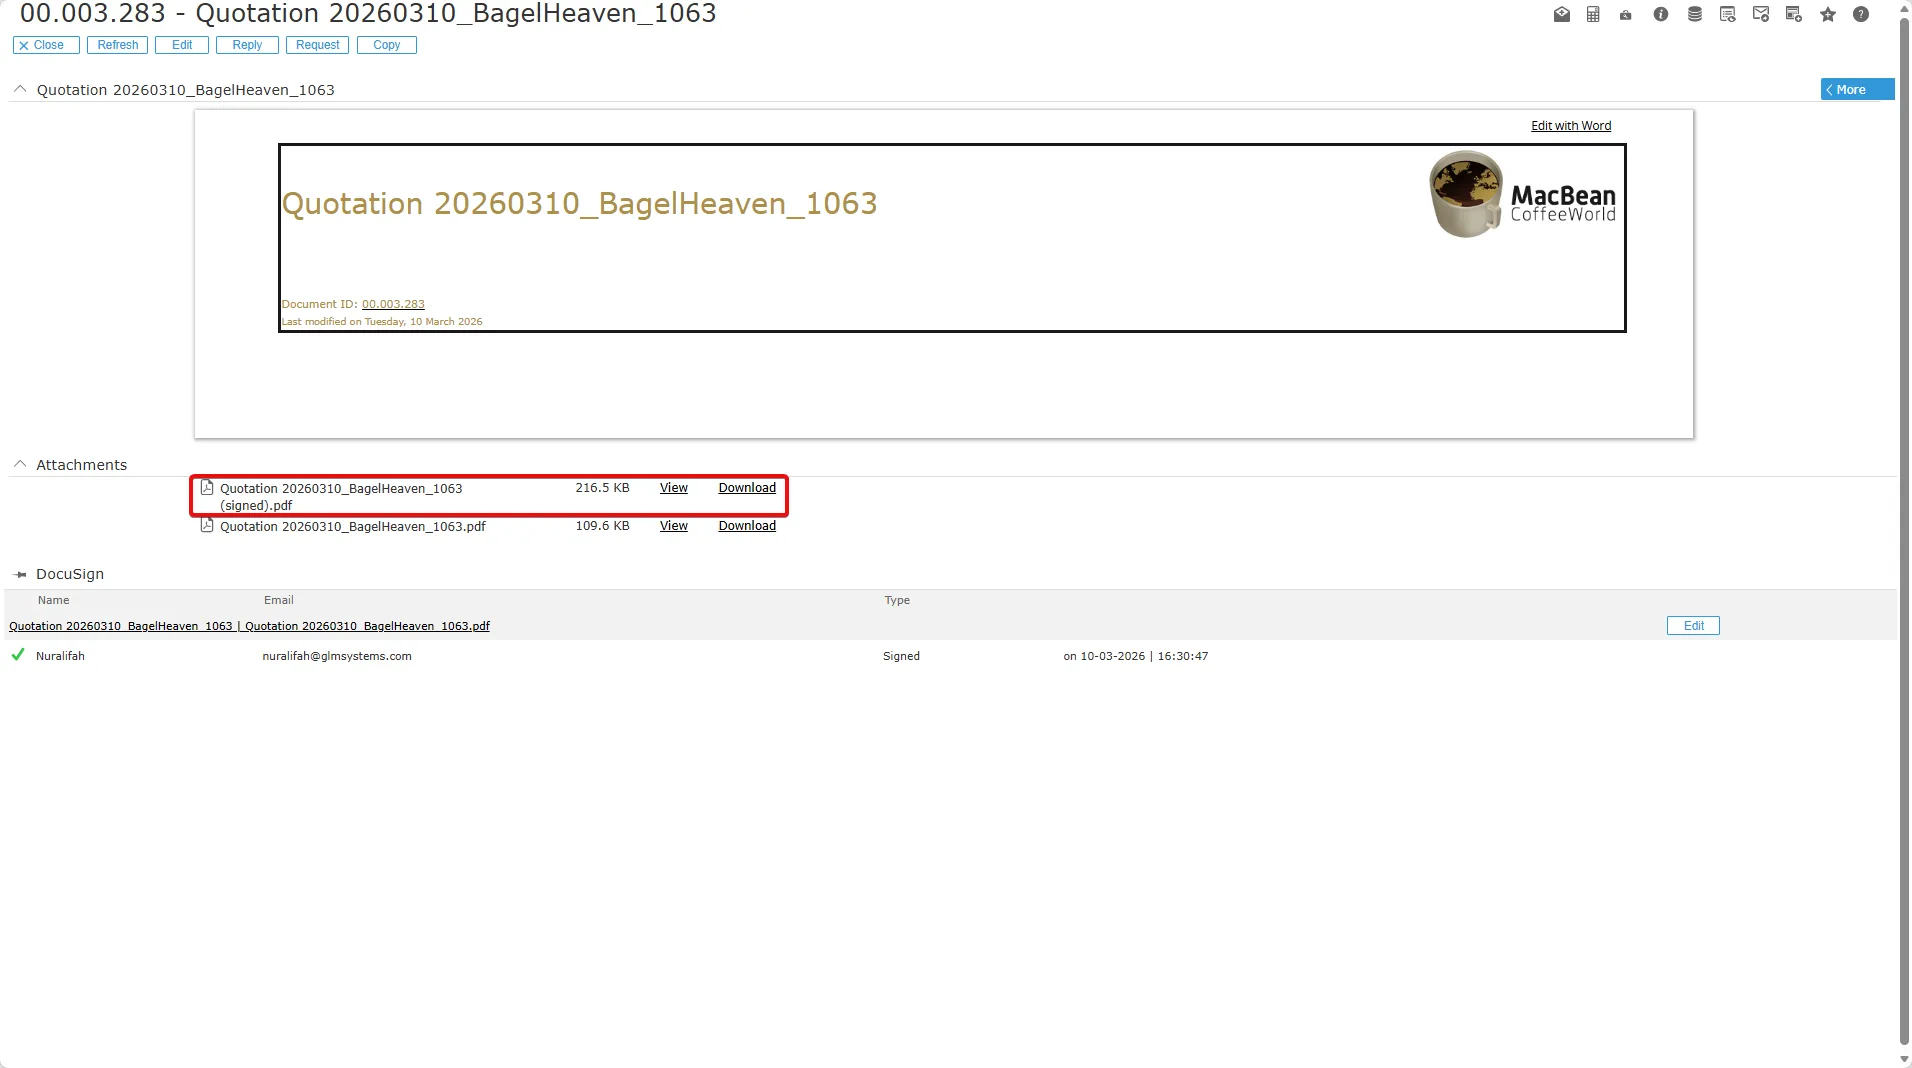
- After you refresh, the Attachments section will show the quotation document that has been signed, and you can view or download it in Synergy.
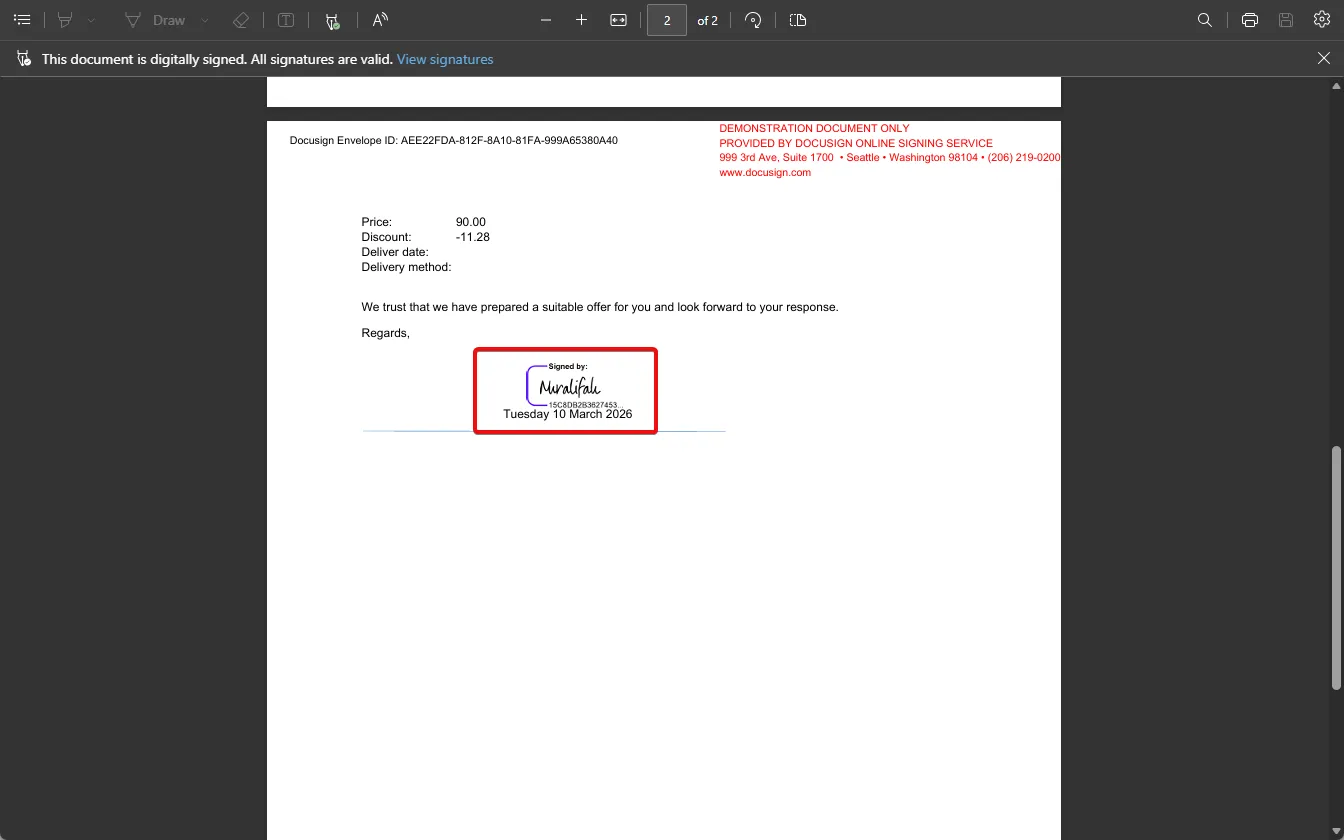
- Your document has been successfully saved with your signature through DocuSign.
Troubleshooting
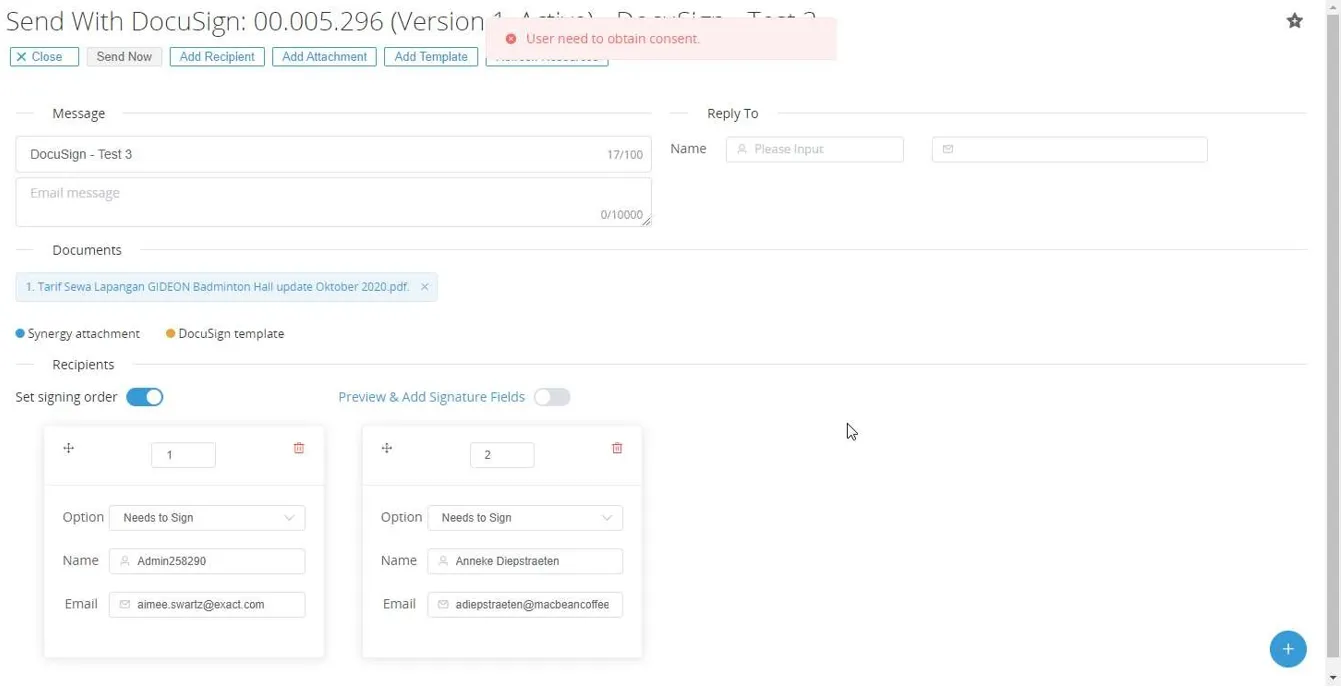
Section titled “Troubleshooting”Error: user need to obtain consent
Section titled “Error: user need to obtain consent”This happens when the DocuSign connection uses the Use Individual Auth and user consent is needed for the add-on to send an envelope on behalf of the logged user.
Step to resolve:
Make sure the browser allows to show the pop-up screen for user consent so the user can enter the credentials.
Error: Import Docusign Views
Section titled “Error: Import Docusign Views”The error occurs because the required view files DocusignViews.xml were not imported correctly or cannot be found by the system.
Step to resolve:
After installing the latest DocuSign add-on, you need to import the View DocusignViews.xml.
You can go to this path on the application server to get the XML files, for example:
<ESE installation folder>\Templates\DocuSign.