Logistic Plus - User Manual
Introduction
Section titled “Introduction”Project plus has 2 feature
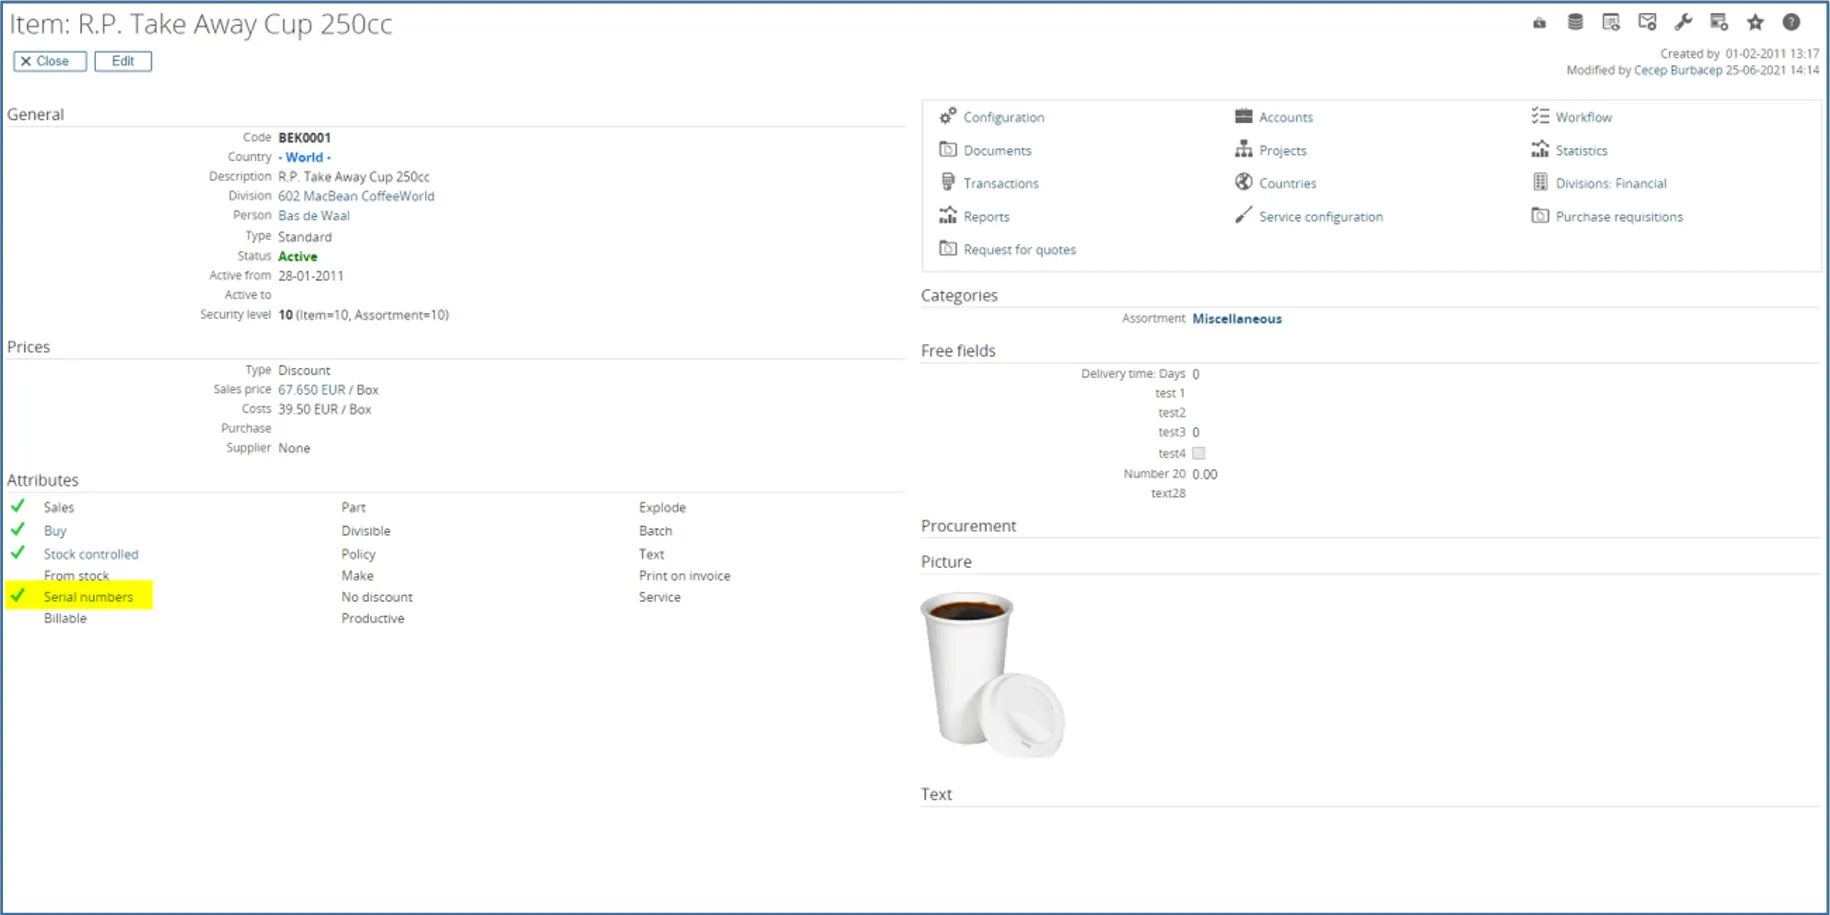
Item and Serial number
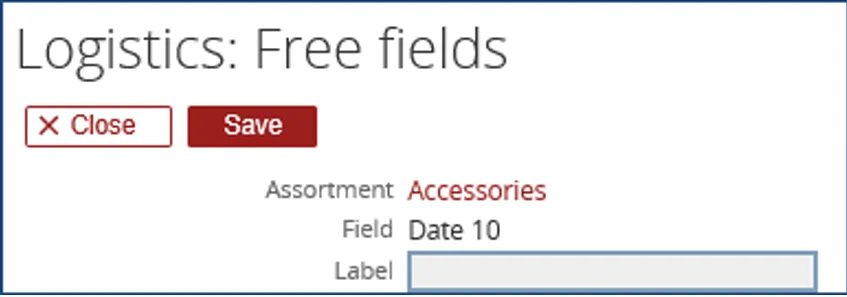
Section titled “Item and Serial number”After setup the Item and Serial Number Free fields, The free fields will show in the Item and Serial Numbers Card/Request.

For the Serial Number, click the Serial Number in the section Attributes, then create the new Item
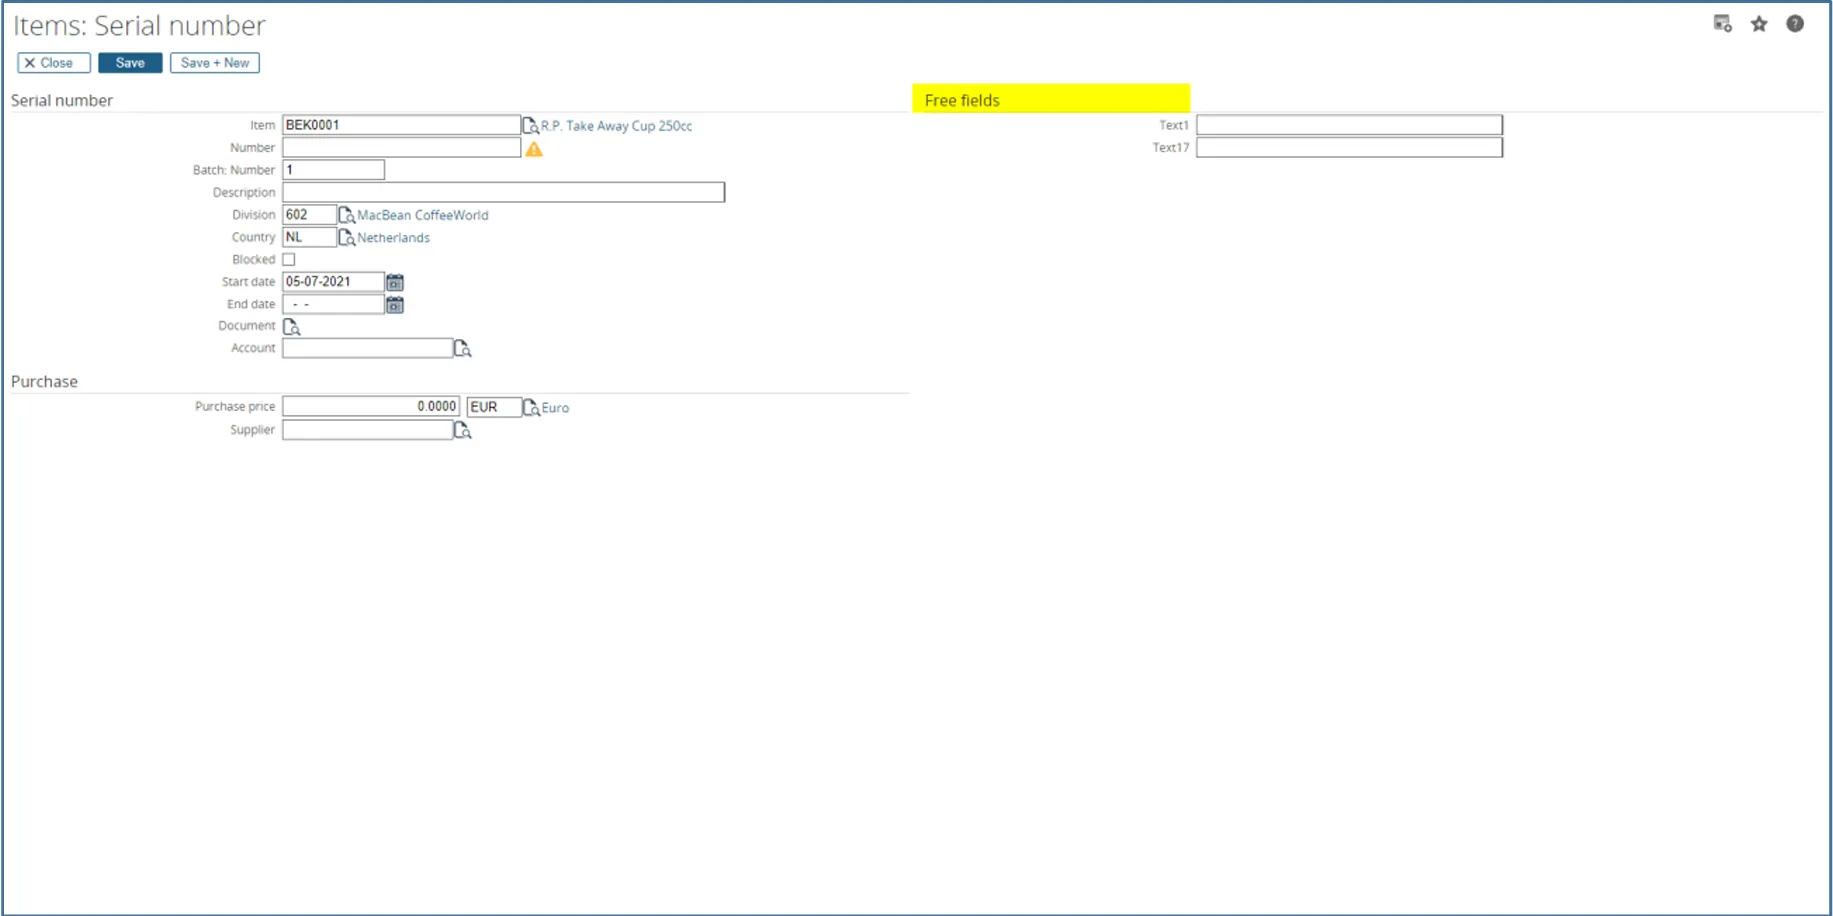
Serial number.
The section Free fields for serial numbers will show here.
Free Field Types of Data
Section titled “Free Field Types of Data”Standard within Synergy Enterprise, there is a set of free fields. Using this tool, the number of free fields with this module has been extended.
All of the free field types have either the same or enhances features as a standard free field.
This Tool provides you with (including Standard Fields in Synergy Enterprise). Each Assortment can use the
same field, but for different purposes and labels.
With these tools,we have added:
Item (143 new fields):
- 15 free text fields for a total of 25
- 25 free GUID fields for a total of 25
- 13 free number fields for a total of 23 (Free Text 7 & Free Text 8 Reserved for Exact)
- 20 free yes/no fields for a total of 25
- 25 free amount fields for a total of 25
- 20 free date fields for a total of 25
- 10 free comment fields for a total of 10
- 10 free image fields for a total of 10
Serial Numbers (175 new fields):
- 15 free text fields for a total of 25
- 25 free GUID fields for a total of 25
- 20 free number fields for a total of 25
- 20 free yes/no fields for a total of 25
- 25 free amount fields for a total of 25
- 20 free date fields for a total of 25
- 25 free comment fields for a total of 25
- 25 free image fields for a total of 25
Selecting and Viewing Free Fields on the Opportunity Card
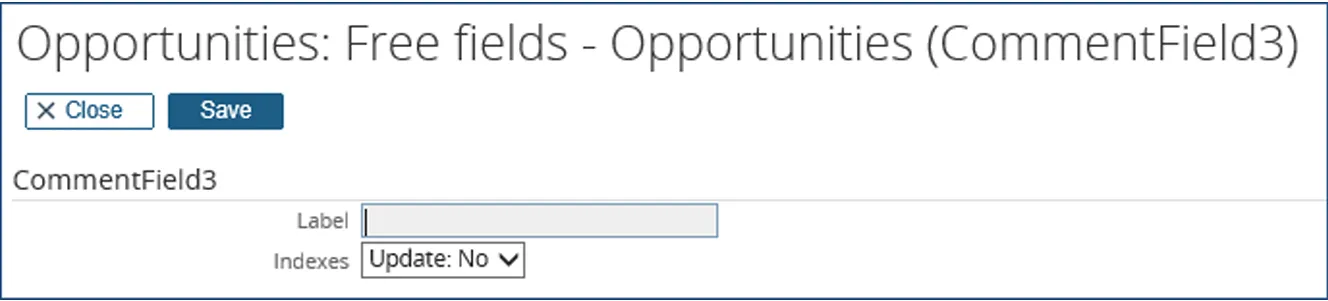
Section titled “Selecting and Viewing Free Fields on the Opportunity Card”Add our Fields to the Item Card and Items: Serial Number by going to the Assortments within Synergy and then using the same techniques that you would link the standard free fields to other Item Cards and Items: Serial Number, such as Opportunities, Contacts, Accounts, Resources or Projects.
Locating These Free Fields in the SQL Database
Section titled “Locating These Free Fields in the SQL Database”All of the Free Fields with this Tool are entered into Table (GLMSysLogPlusItems) for Item, and (GLMSysLogPlusSerialNumbers) for Serial Numbers in your SQL database. Labels are entered into the Table (GLMSysLogPlusItemAssortments).
You may create SSRS Reports by linking this GLM Table(GLMSysLogPlusItems) to the standard Items Table (Items)
Items – Use “ItemCode” to link to GLMSysLogPlusItems – Use “ItemCode”
- Free Text Fields labeled between “TextFreeField11 to Text FreeField50”
- Free GUID Fields labeled between “GUIDFreeField1 to GUIDFreeField25”
- Free Number Fields labeled between “NumIntFreeField6 to NumIntFreeField25” (NO 7 or8)
- Free Yes/No Fields labeled between “YesNoFreeField6 to YesNoFreeField25”
- Free Amount Fields labeled between “NumberFreeField6 to NumberFreeField25”
- Free Date Fields labeled between “DateFreeField6 to DateFreeField25”
- Free Comment Fields labeled between “CommentFreeField1 to CommentFreeField5”
- Free Image Fields labeled between “ImageFreeField1 to ImageFreeField10”
- Free Image Label Fields labeled between “ImageNameFreeField1 to ImageNameFreeField10”
Serial Numbers – Use “ID” to link to GLMSysLogPlusItems – Use “ID”
- Free Text Fields labeled between “NUserFreeField11 to Text FreeField50”
- Free GUID Fields labeled between “NUserFreeGuid1 to GUIDFreeField25”
- Free Number Fields labeled between “NUserFreeNumInt1 to NUserFreeNumInt25”
- Free Yes/No Fields labeled between “NUserFreeYesNo6 to NUserFreeYesNo25”
- Free Amount Fields labeled between “NUserFreeNumber6 to NUserFreeNumber25”
- Free Date Fields labeled between “NUserFreeDate6 to NUserFreeDate25”
- Free Comment Fields labeled between “NUserFreeComment1 to NUserFreeComment25”
- Free Image Fields labeled between “NUserFreeImage1 to NUserFreeImage25”
- Free Image Label Fields labeled between “NUserFreeImageName1 to NUserFreeImageName25”
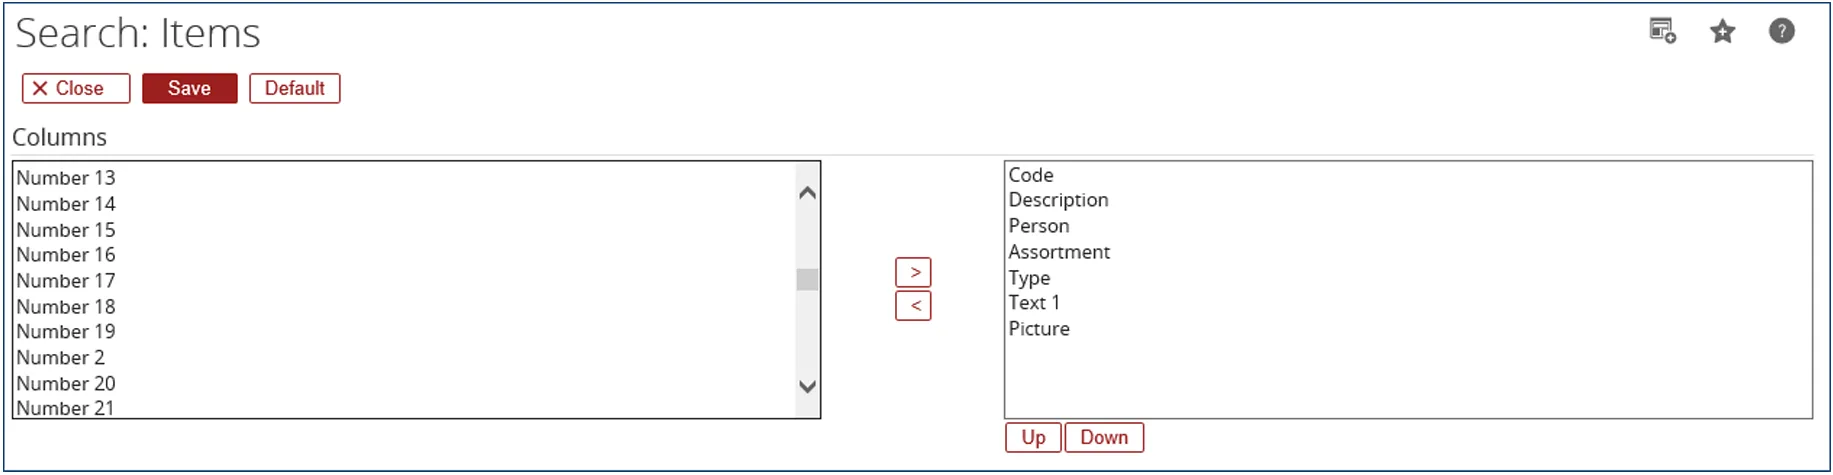
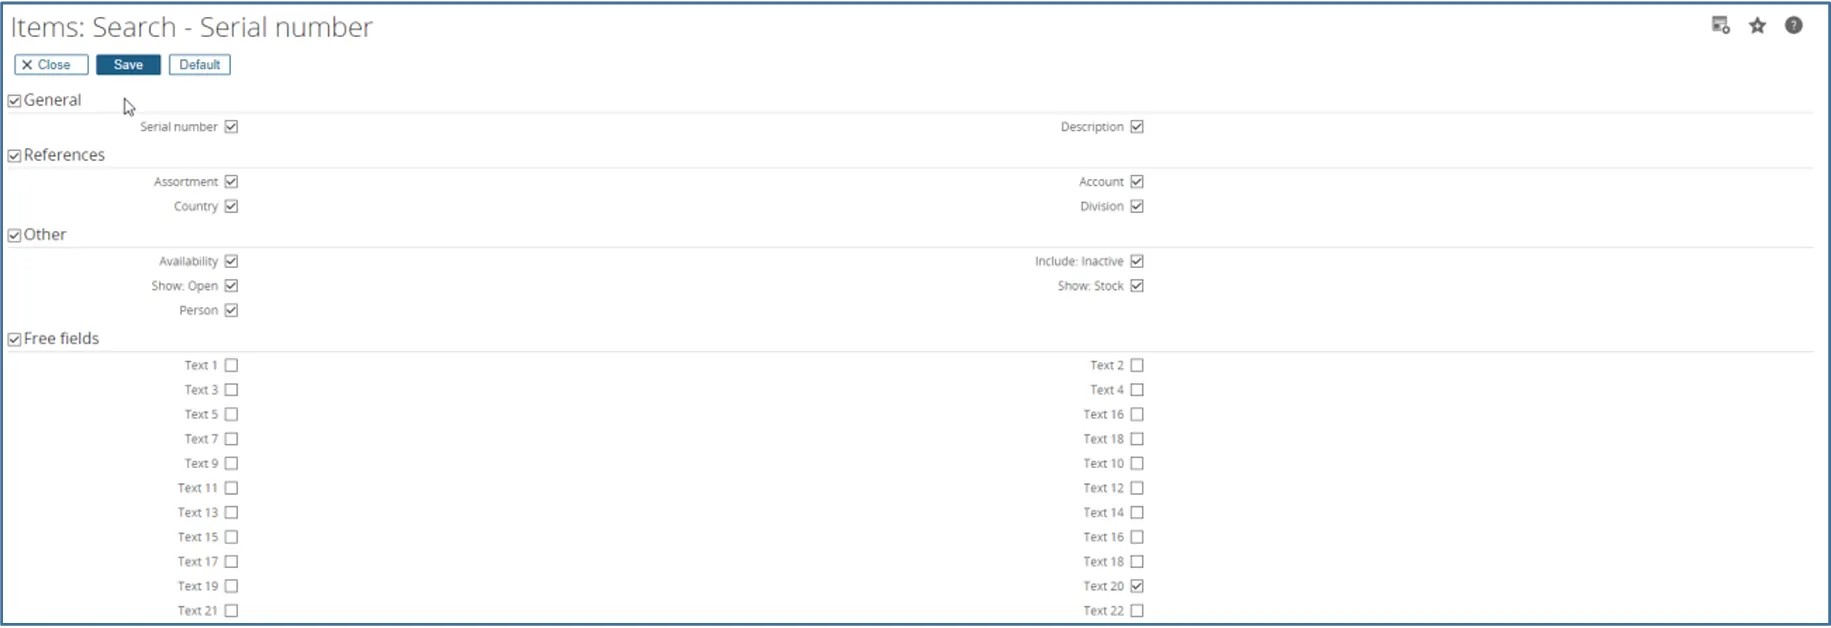
Searching with Logistic Free Fields
Section titled “Searching with Logistic Free Fields”All free fields are also available to use in a standard Items search. They may be used in the Columns to define the results.
Items Advanced Search Columns
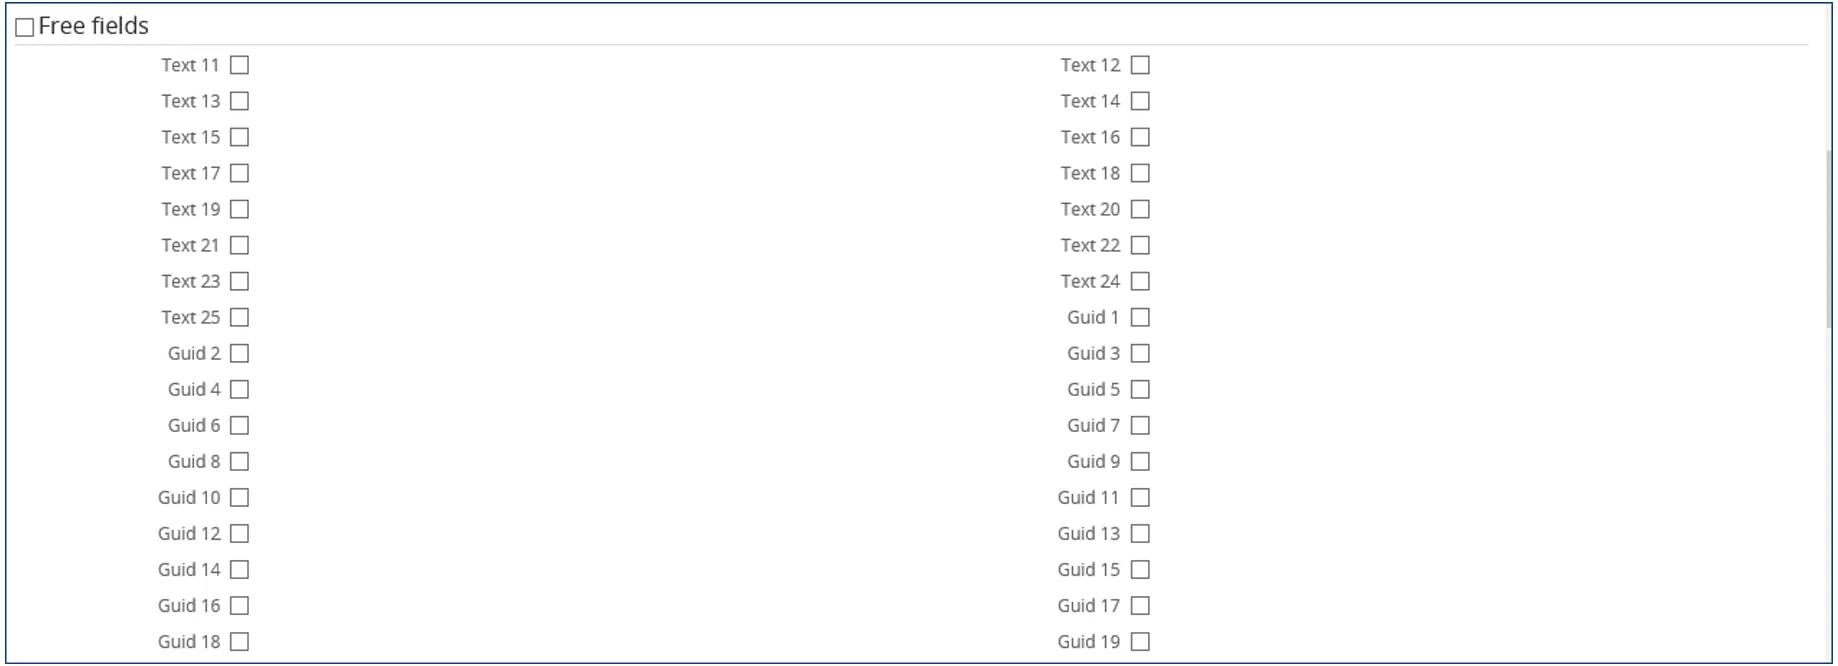
 These fields may also be used to display the Search Criteria.
Items Advanced Search Criteria
Serial Number Advanced Search Criteria
Pivot Analysis Reporting
Section titled “Pivot Analysis Reporting”Free Fields (Exact’s or GLM Systems) are not available in a standard Pivot Analysis Reports within Synergy Enterprise.
Free Text Fields
Section titled “Free Text Fields”All of the Free Text Fields for the Item Card and Items:Serial Number are provided with additional functionality than standard Synergy Enterprise, and that includes the standard 10 Free Text Fields.
Instead of just a label for the free field, we provide much of the same functionality that we use with
our Workflow Plus module for Free Fields.
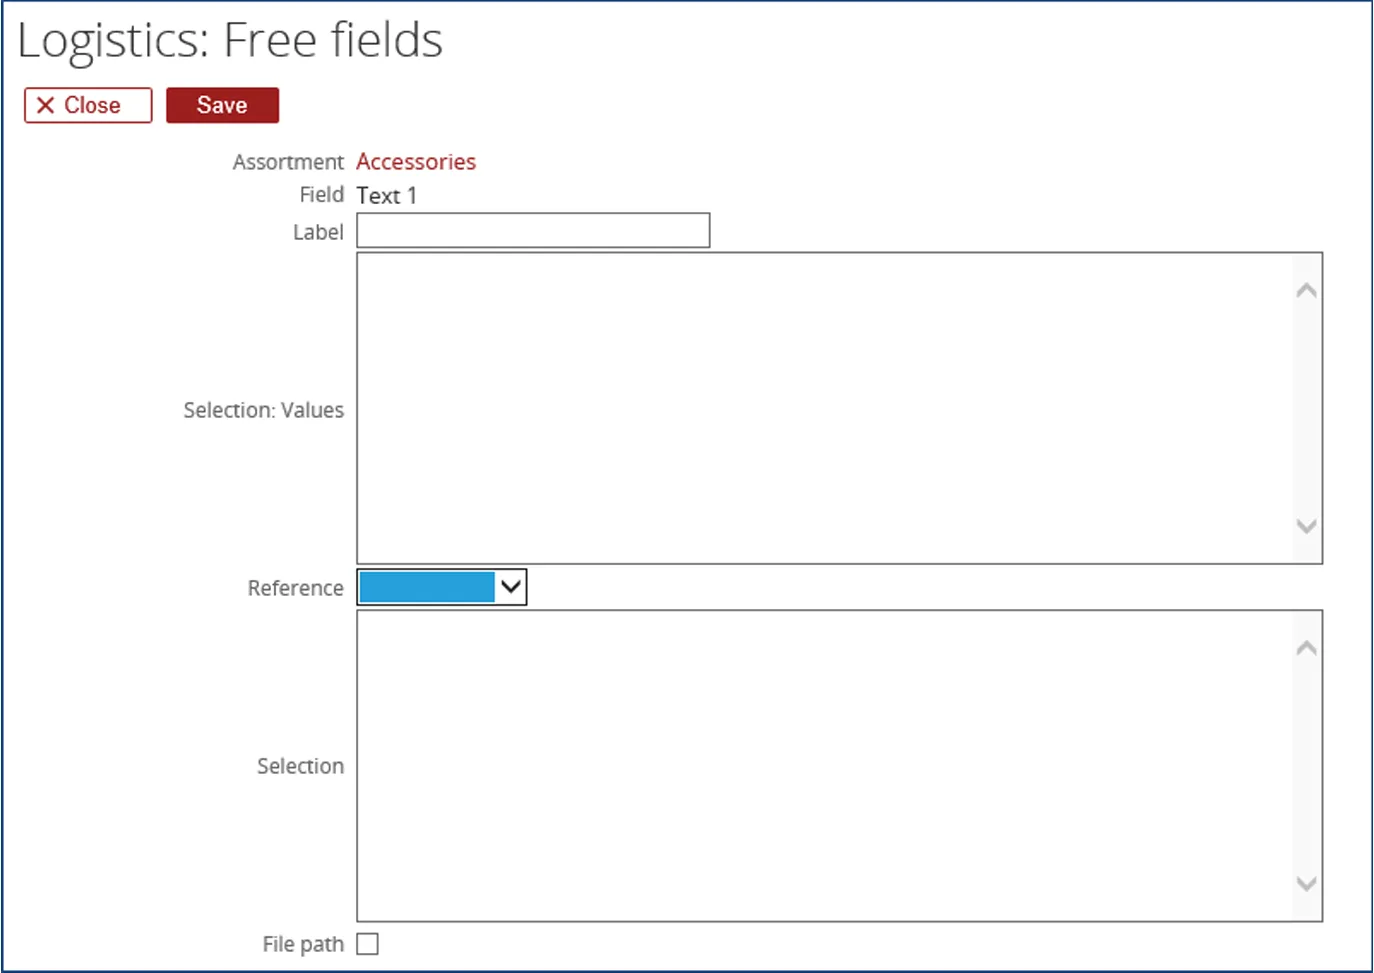
When using this type of Free Field, the label is necessary to be added, which will allow the field to be displayed within the Item Card and Items:Serial Number.
This field can contain up to 30 characters.
In the next selection section, a resource is allowed to create a drop-down list with values.
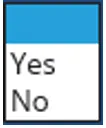
This is done by entering information that will be presented in a drop down list. A common dropdown list may the values of Yes and No.
A warning message may appear if the information is not presented properly and will inform you of the format and data required.
This message is “Please ensure that the selection values is in the following format: value, term, term id;value, term, term id”
The Reference label dropdown has nine values:

These links allow us to add more free fields that will display Items, Projects and the other fields within this list. The Selection box allows modified SQL statements to filter results of the browser.
A sample selection may be when selecting Items would be “Assortment = 0” for displaying Items only in Assortment “0” in the browser when the Reference is set to “Items”.
- Items would pull data from the Items Table
- Projects would pull data from the PRProjects Table
- Cost Centers would pull data from the Kstpl Table
- Cost Units would pull data from the Kstdr Table
- Countries would pull data from the Land Table
- Divisions would pull data from the ItemDivisions Table
- Languages would pull data from the ItemCountryTranslations
- Units would pull data from the ItemUnits Table
The File Path would allow you to browse from the Item Card and Items:Serial Number, allow a Resource to select a file and link it to the card.
If the box is checked, a screen like this will open within the request, allowing entry for this field.

Free GUID Fields
Section titled “Free GUID Fields”When using this type of Free Field, the label is necessary to be added, which will allow the field to be displayed within the Item Card and Items:Serial Number. This field can contain up to 30 characters.
The Reference drop-down list allows this field to search for Requests, Documents, Accounts, Contacts or Transactions, with the following selection box to be used for filtering on the drop down value selected.
The Selection section allows you to filter the results using a partial SQL statement. You do not use the Select, From, Where and Order by functions in the selection statement.
A sample selection may be when selecting Items would be “cmp_type = C” for displaying Customers
only in the browser when the Reference is set to “Accounts”.
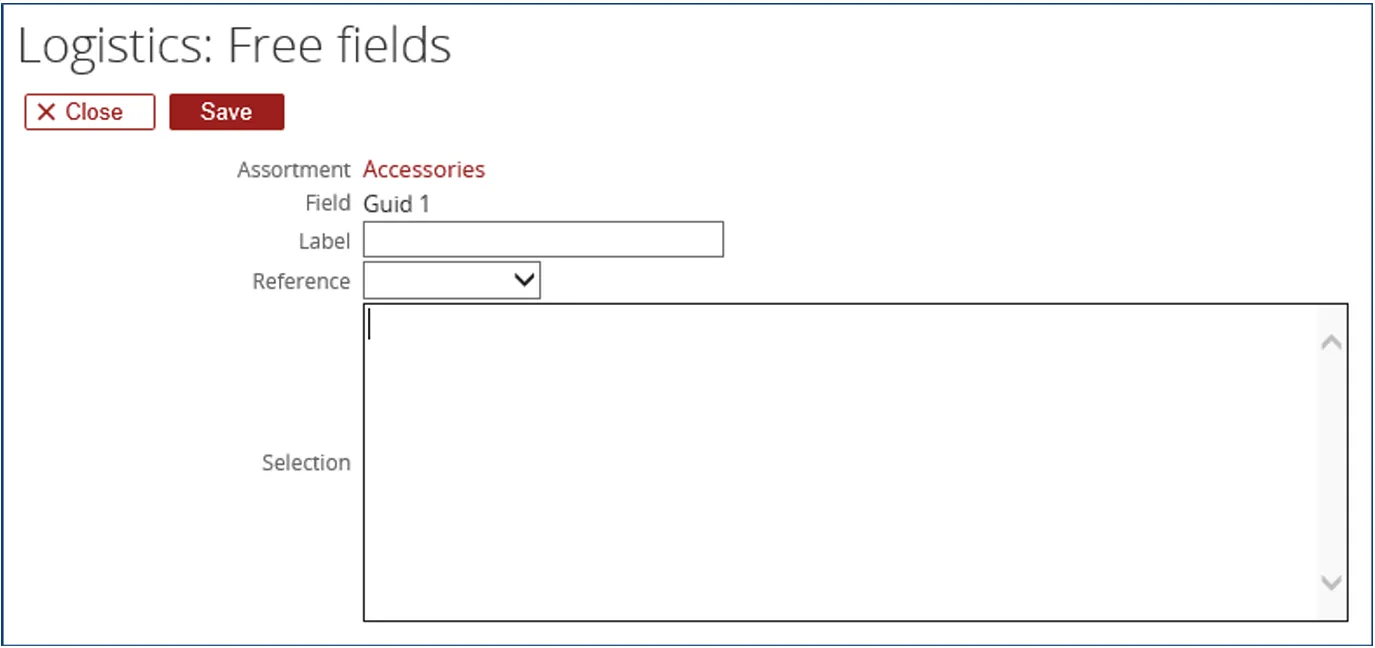
- Requests would pull data from the Absences Table
- Documents would pull data from the BacoDiscussions Table
- Accounts would pull data from the Cicmpy Table
- Contacts would pull data from the Cicntp Table
- Transactions would pull data from the Gbkmut Table
Free Number Fields
Section titled “Free Number Fields”When using this type of Free Field, the label is necessary to be added, which will allow the field to be
displayed within the Item Card and Items:Serial Number. This field can contain up to 30 characters.
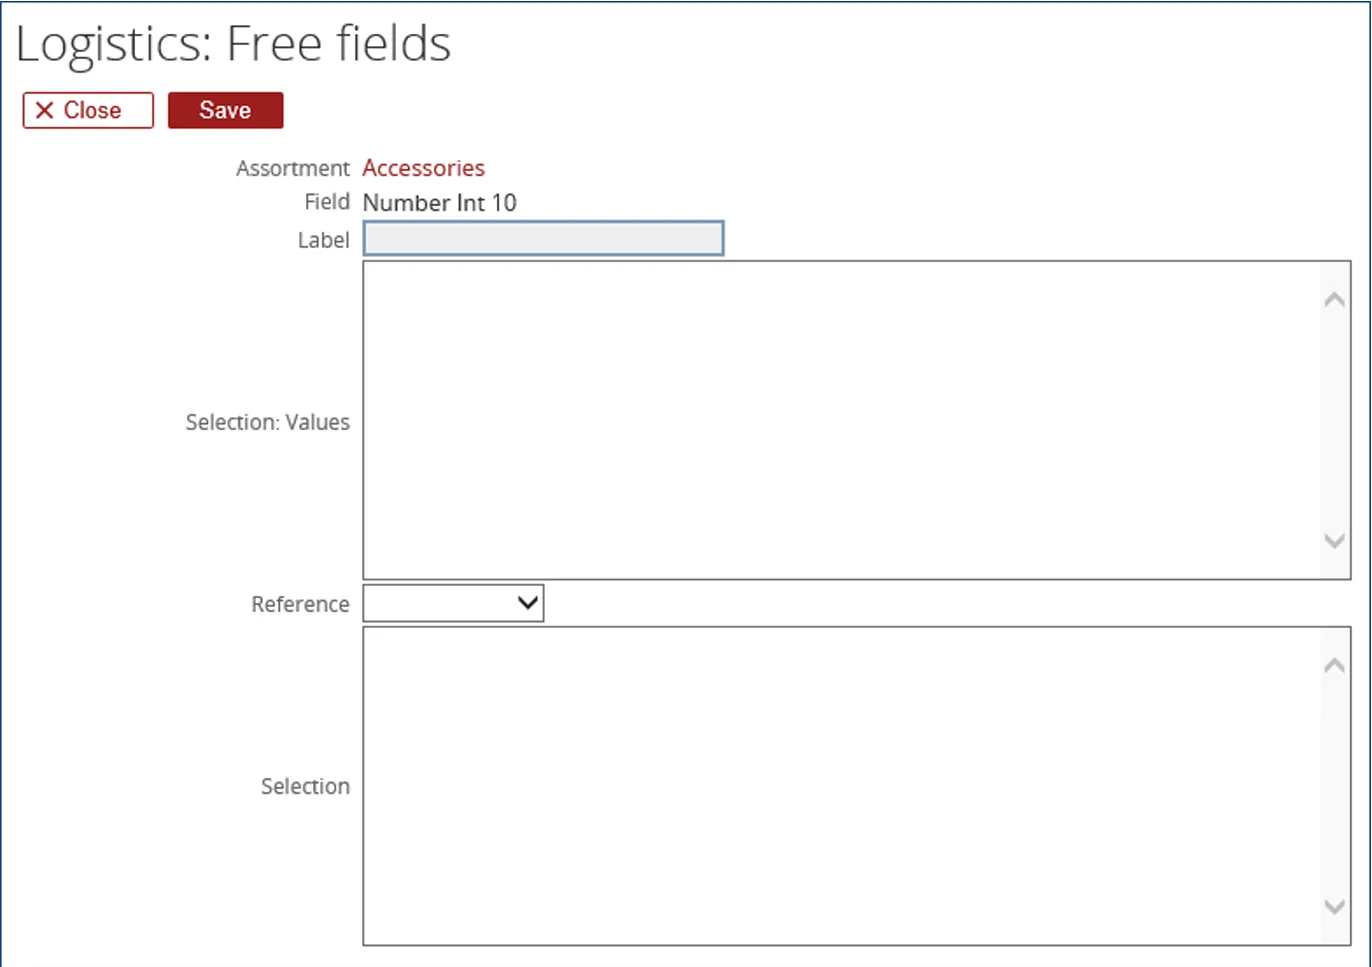
The Selection: Values field allows you to enter information that will be presented in a
drop down list.
A warning message may appear if the information is not presented properly and will inform you of the format and data required.
This message is “Please ensure that the selection values is in the following format: value, term, term id;value, term, term id”
The Reference drop-down list allows this field to search for People (Resources), Request Type or Assortments, with the following selection box to be used for filtering on the drop down value selected.
The Selection section allows you to filter the results using a partial SQL statement. You do not use the Select, From, Where and Order by functions in the selection statement.
A sample selection may be when selecting Items would be “Humres.blocked = 1”
- People (Resources) would pull data from the Humres Table
- Request Type would pull data from the AbsenceTypes Table
- Assortments would pull data from the ItemAssortment Table
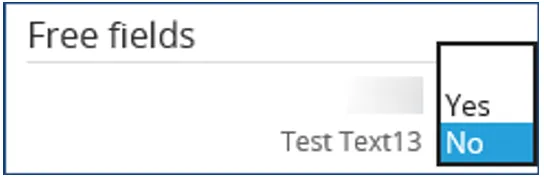
Free Yes / No Fields
Section titled “Free Yes / No Fields”When using this type of Free Field, the label is necessary to be added, which will allow the field to be
displayed within the Item Card and Items:Serial Number. This field can contain up to 30 characters.
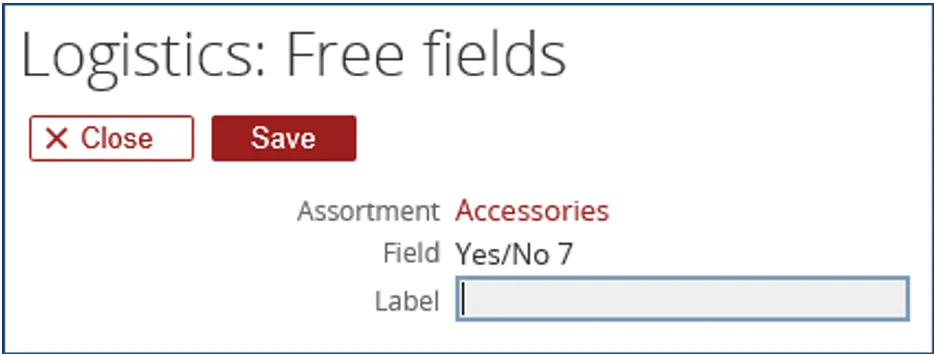
In an Item and Serial Number, the fields are presented as check boxes that the user can select or clear. In the SQL database, these values are either “0 = No or 1 = Yes”.
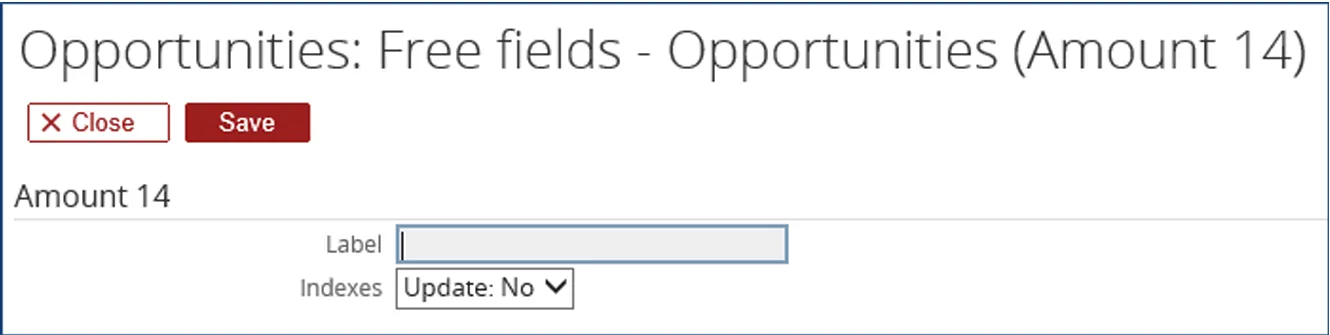
Free Amount (Number Integer) Fields
Section titled “Free Amount (Number Integer) Fields”When using this type of Free Field, the label is necessary to be added, which will allow the field to be
displayed within the Item Card and Items:Serial Number. This field can contain up to 30 characters.
Free Date Fields
Section titled “Free Date Fields”When using this type of Free Field, the label is necessary to be added, which will allow the field to be displayed within the Item Card and Items:Serial Number. This field can contain up to 30 characters.
During the use of this field in an Item Card and Items:Serial Number, the Calendar bowser will
appear, allowing the Resource to select a date value.
Free Comment Fields
Section titled “Free Comment Fields”When using this type of Free Field, the label is necessary to be added, which will allow the field to be displayed within the Item Card and Items:Serial Number.
This field can contain up to 30 characters.
This field is meant for the user to type comments or remarks in the Item Card and Items:Serial Number.
title: Logistic Plus - Troubleshooting description: This troubleshooting guide provides solutions to common problems, helping users quickly resolve technical challenges and ensure smooth operation.
Section titled “title: Logistic Plus - Troubleshooting description: This troubleshooting guide provides solutions to common problems, helping users quickly resolve technical challenges and ensure smooth operation.”Server Error or Compilation error
Section titled “Server Error or Compilation error”When opening the Logistics Plus settings application and a message as shown above is given this means there is a conflict in versions.
In this case let your vendor know which Synergy version you are currently using to make sure the correct version of the CRM Plus settings tool is installed.
To solution for this problem will be either updating Synergy to make sure you have the latest versions
of all components or installing a different version of the CRM Plus tool.

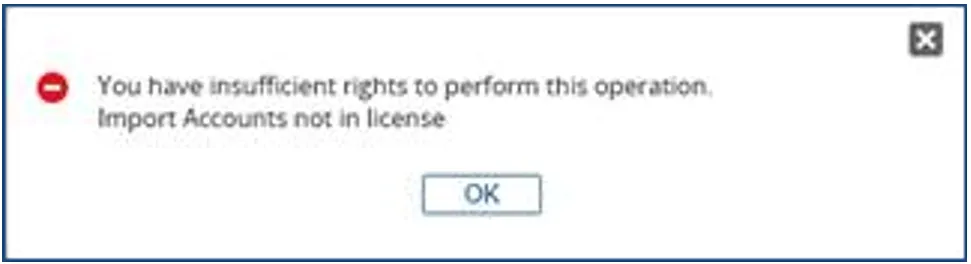
Insufficient Rights
Section titled “Insufficient Rights”You may receive an error message like this, if your license happens to be missing some tools.
Contact us for assistance with creating a new license for your tools. A new license may be required.
Other Errors which are Displayed
Section titled “Other Errors which are Displayed”Should you encounter any other errors, please contact us to assist in the problem resolution. Updates from Exact (Patches or Version Releases) or other customizations done by Synergy consultants or your staff may require a new installer from us.
Keeping at a current level of installers may mean that new functionality may be available for your organization that were created due to customer product suggestion requests.
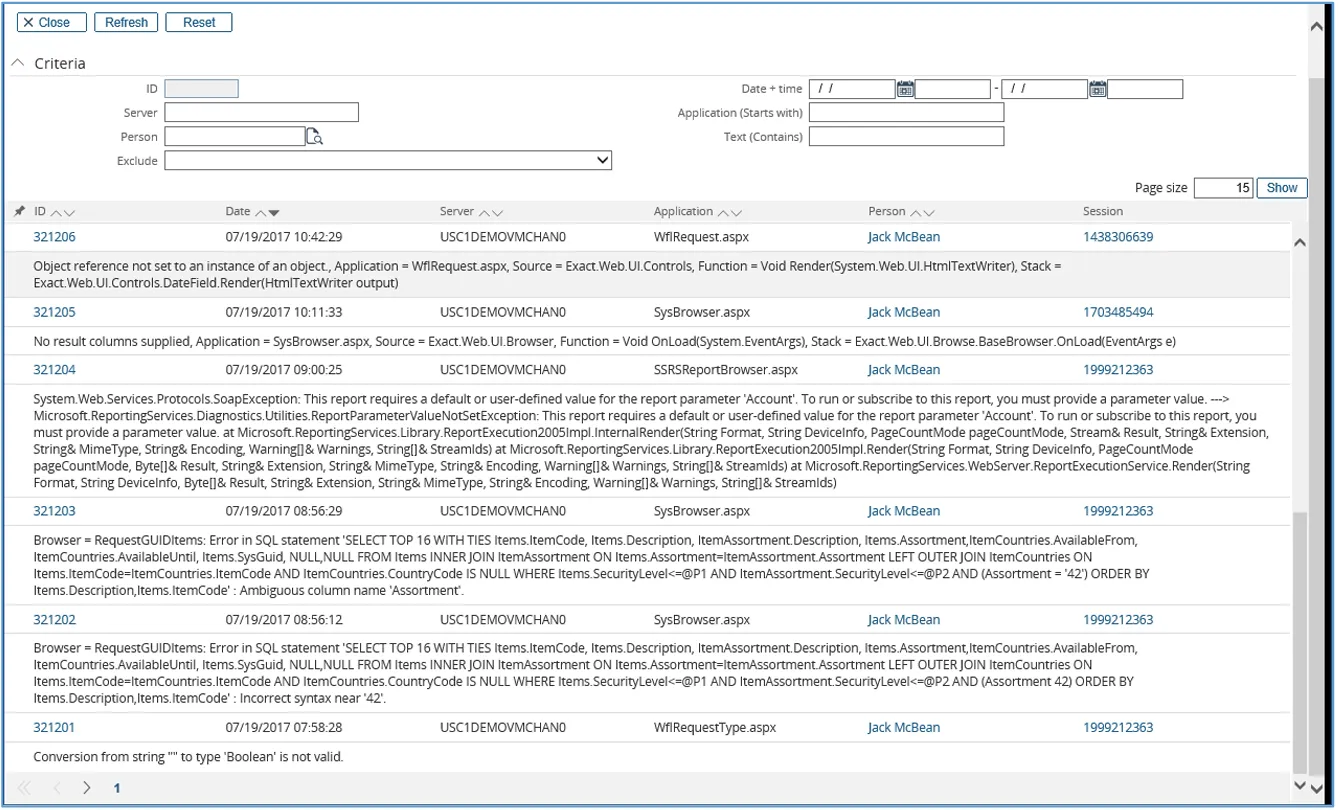
Report of Errors within Synergy Enterprise
Section titled “Report of Errors within Synergy Enterprise”In the path of System / Reports / Log / Errors, you will find a listing of Errors that have occurred in your Synergy environment. This information is useful to us when a problem with any of our Tools appear.
You are able to filter the error log by a number of criteria, but the fastest way to look at an error is to click on the “Show” button. This error log report page will display.
If an Error is reported to us, this page will be used to understand what occurred during its creation. It
is vital for us to see this screen with the error message.
Logistic Plus - Resolution of Many Issue
Section titled “Logistic Plus - Resolution of Many Issue”description: This troubleshooting guide provides solutions to common problems, helping users quickly resolve technical challenges and ensure smooth operation. Errors may appear within your Synergy when other Applications are installed. The following steps may be taken to try to correct any issues that occur. If you wish assistance, please contact us or your Tool Representative.
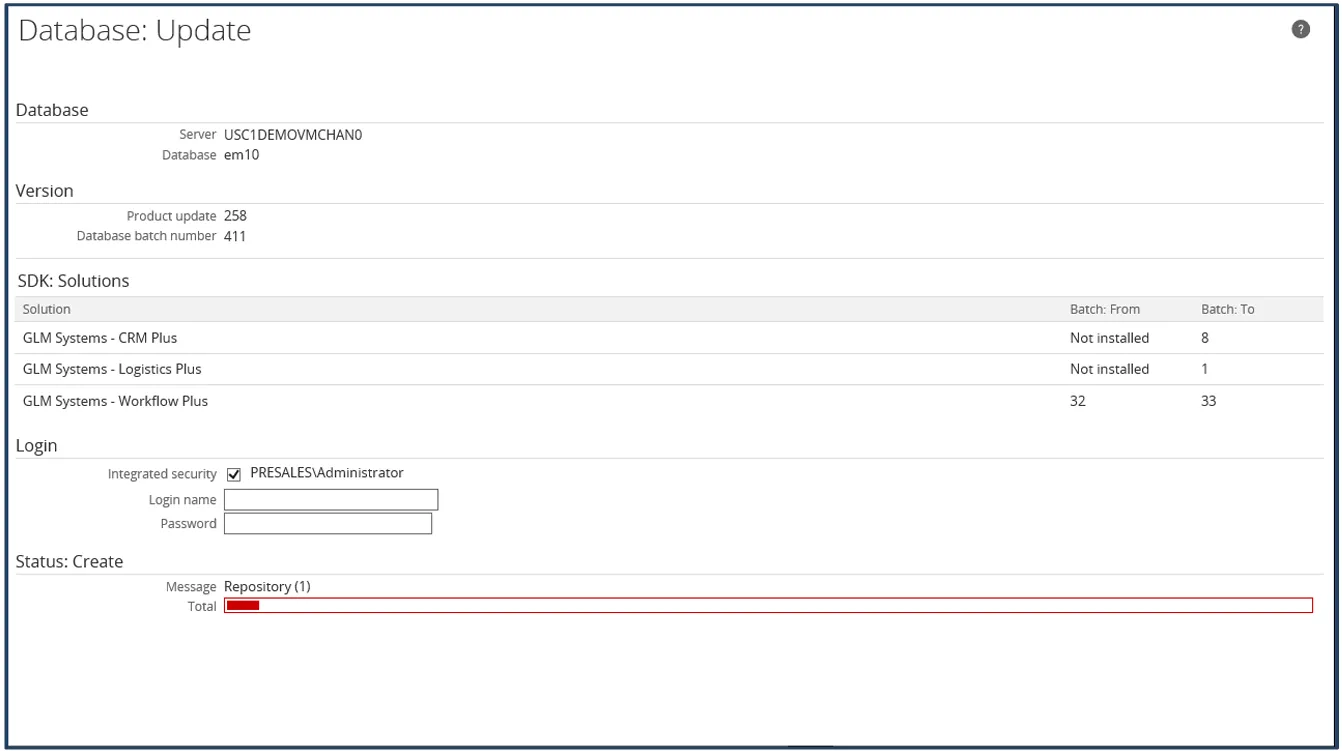
Database: Update Screen
Section titled “Database: Update Screen”When you install a Tool for the first time or reinstalling (with new functionality for you to use), a
Database: Update screen may appear. If this appears, please click on the “Update” button.

While running, there will be a line bar in the Status: Create displaying progress with the function.
When completed, it will display “Done” on the screen.
Clear Session and Cache
Section titled “Clear Session and Cache”When reinstalling the software, for new functionality – you may not find the new functionality working.
This may be due to some data still left in the Session or Cache still within Synergy.
To “Clear” this data, please go the Cache screen by selecting Modules / System / Reports / Activity / Session. Use the “Clear” button on each of these two sections (Session & Cache). Immediately information may appear in those sections, so do not be alarmed.
It may be necessary to use the bottom scroll bar to find the buttons for the “Clear”.

After this process, the first time you visit a page within Synergy, you may find a small time delay.
Once this page have been viewed, it then becomes cached and faster to open.
Rebuild the Repository
Section titled “Rebuild the Repository”To make the uninstall process complete, or when reinstalling the software, for new functionality – you may not find the new functionality working. This may be due to some data still left in the Repository still within Synergy.
You will find the Repository at Modules / System /Setup / Repository / Rebuild.
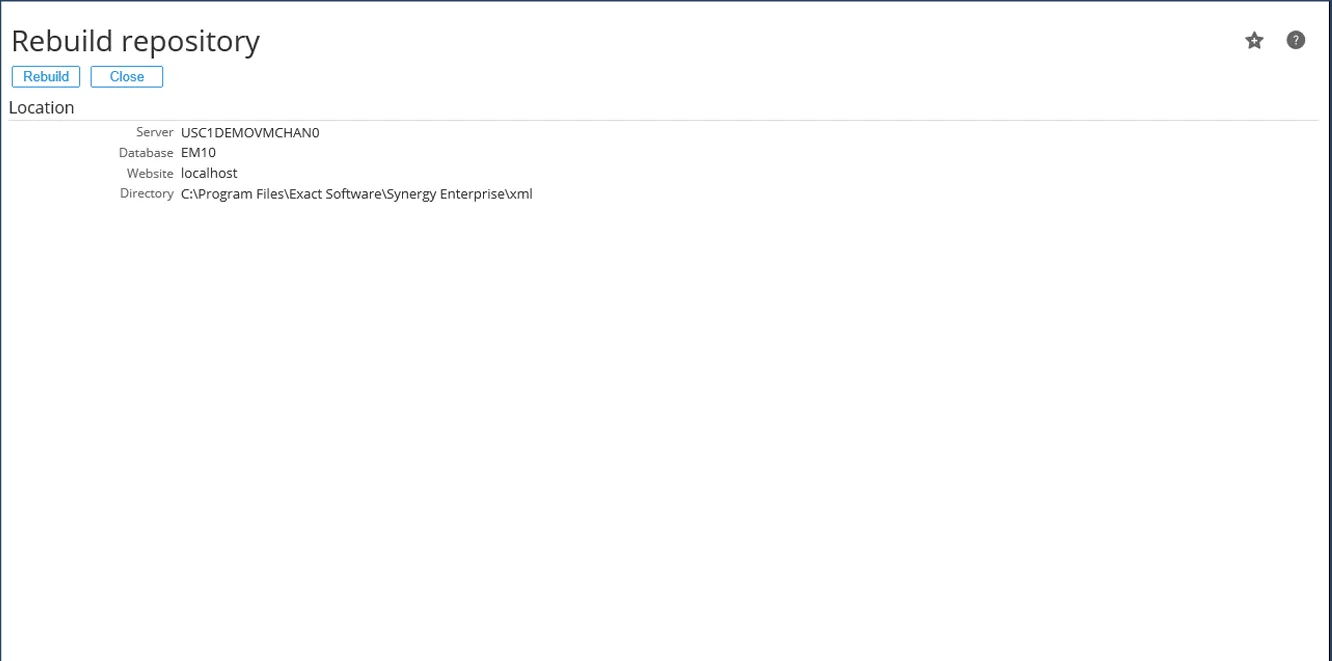
If this screen appears, please click on the “Rebuild” button.
While running, there will be a line bar in the Status: Create displaying progress with the function.
When completed, it will display “Done” on the screen.
After this process, the first time you visit a page within Synergy, you may find a small time delay.
Once this page have been viewed, it then becomes cached and faster to open.
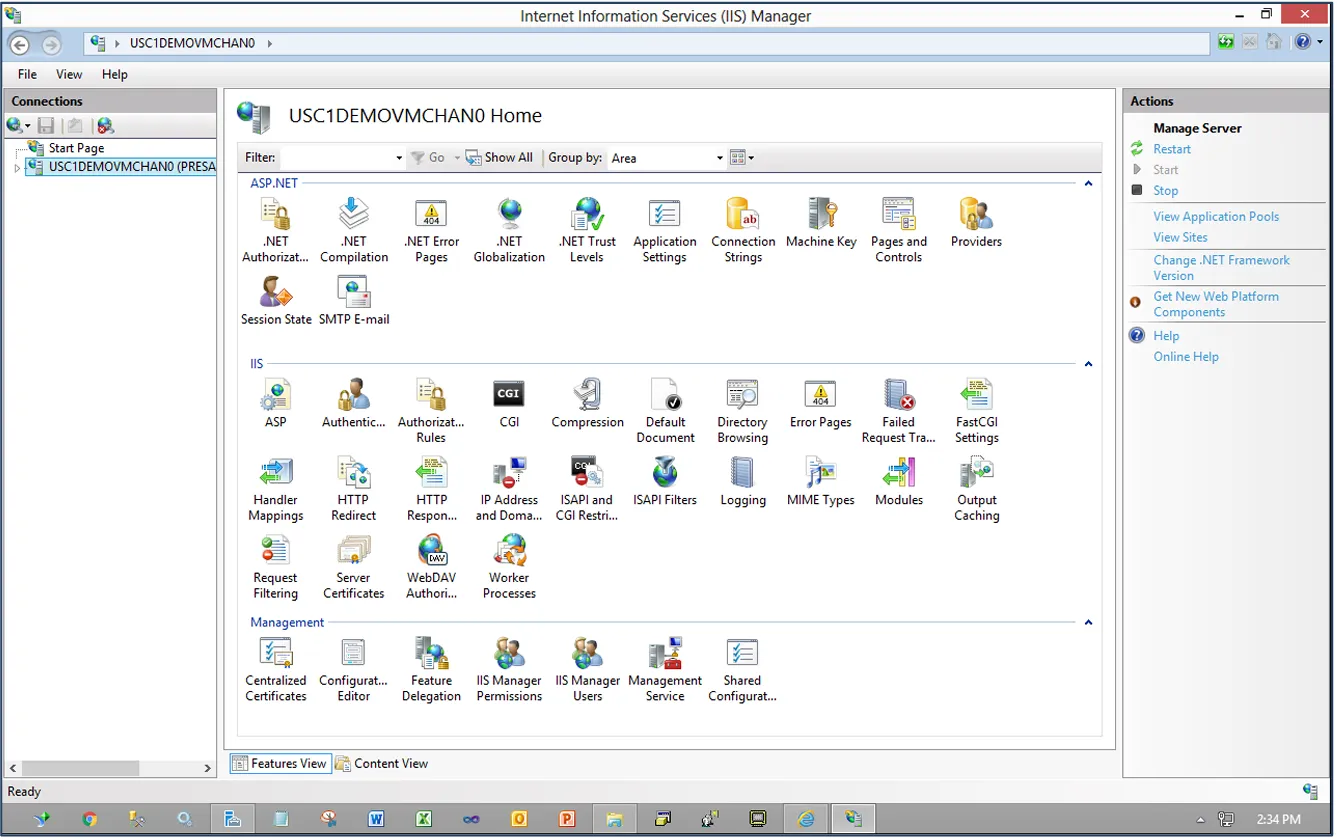
Reset IIS
Section titled “Reset IIS”When reinstalling the software, for new functionality – you may not find the new functionality working.
This may be due to some data still left in the still left in your software and the IIS server must be
Restarted.
After this process, the first time you visit a page within Synergy, you may find a small time delay.
Once this page have been viewed, it then becomes cached and faster to open.
Reviewing Customizations
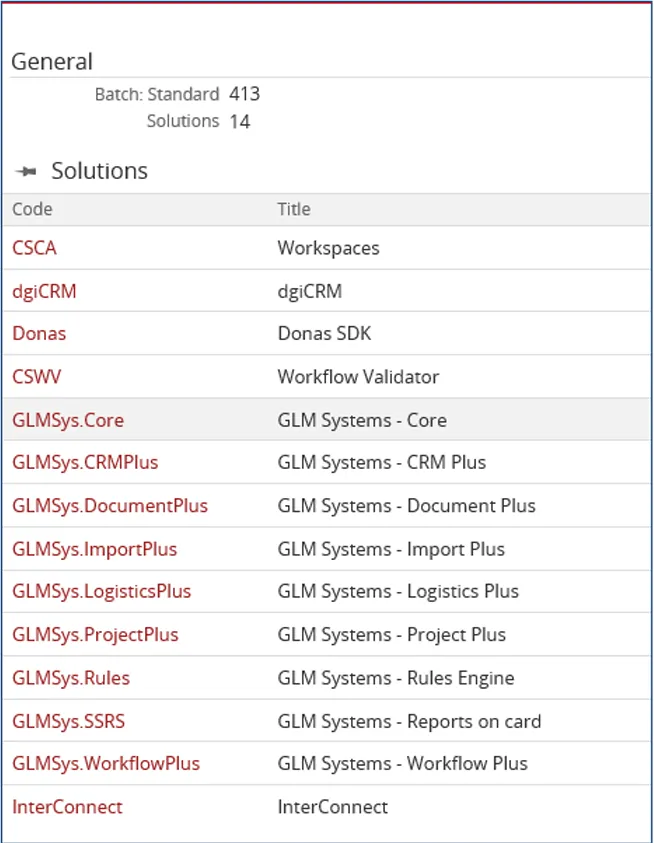
Section titled “Reviewing Customizations”To Review Customizations and Tools in the Synergy Enterprise environment, follow the path Modules / System / Reports / Add-ons / Solutions. This will provide you with the following information:
First Section “Solution license end date”
This will display all of the GLM System Tools, including the options that have been purchased by the
Account. In many cases, customers select and purchase various sub-modules that make business
sense to fulfill requirements. Next to the Features includes the Start date and End Date of the license,
which is used for Annual Maintenance follow-up.
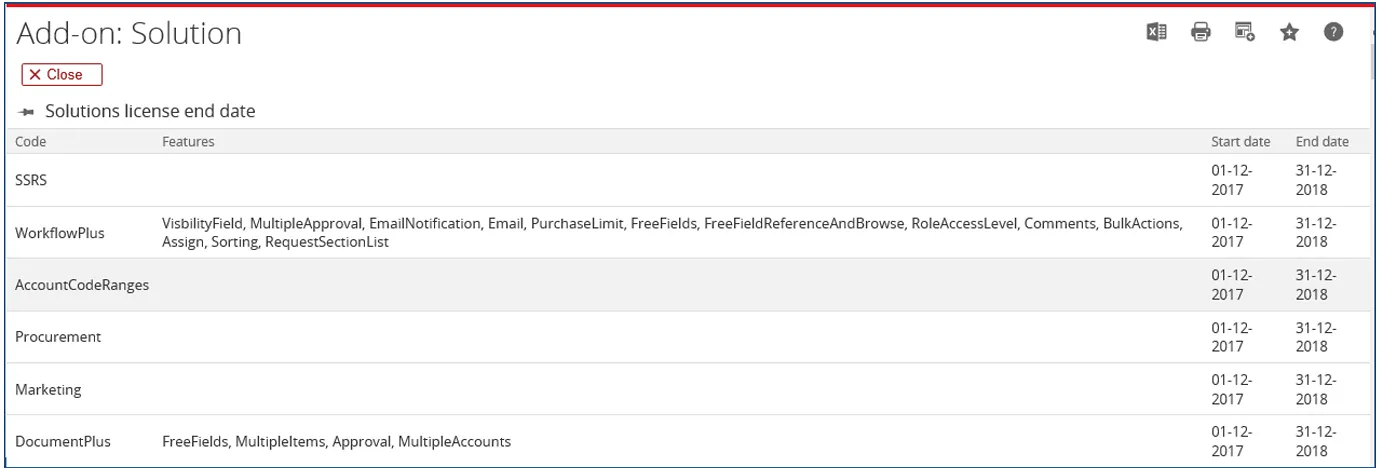
Second Section “Solutions”
This section will display all solutions installed within your Synergy Enterprise environment. Some of
these customizations may be from your Software provider, such as “InterConnect”, which is a Macola
Tool, while others such as “dgiCRM” is a Tool for CRM activities created by The Donas Group, Inc.
Requirements for Customizations
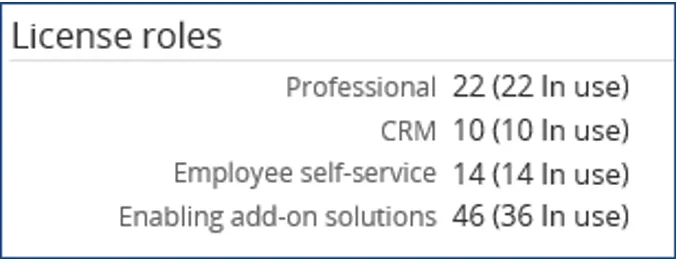
Section titled “Requirements for Customizations”All customizations for Synergy Enterprise require the Exact Software “Enabling add-on solutions role” to be in their license.
In this example, we see that there are:
- Professional Role (22 licenses purchased and 22 in use)
- CRM Role (10 licenses purchased and 10 in use)
- Employee Self Service Role (14 licenses purchased and 14 in use)
- Enabling Add-on Solutions Role (46 licenses purchased and only 36 in use)
This means that some of the resources are unable to use the functionality of these tools
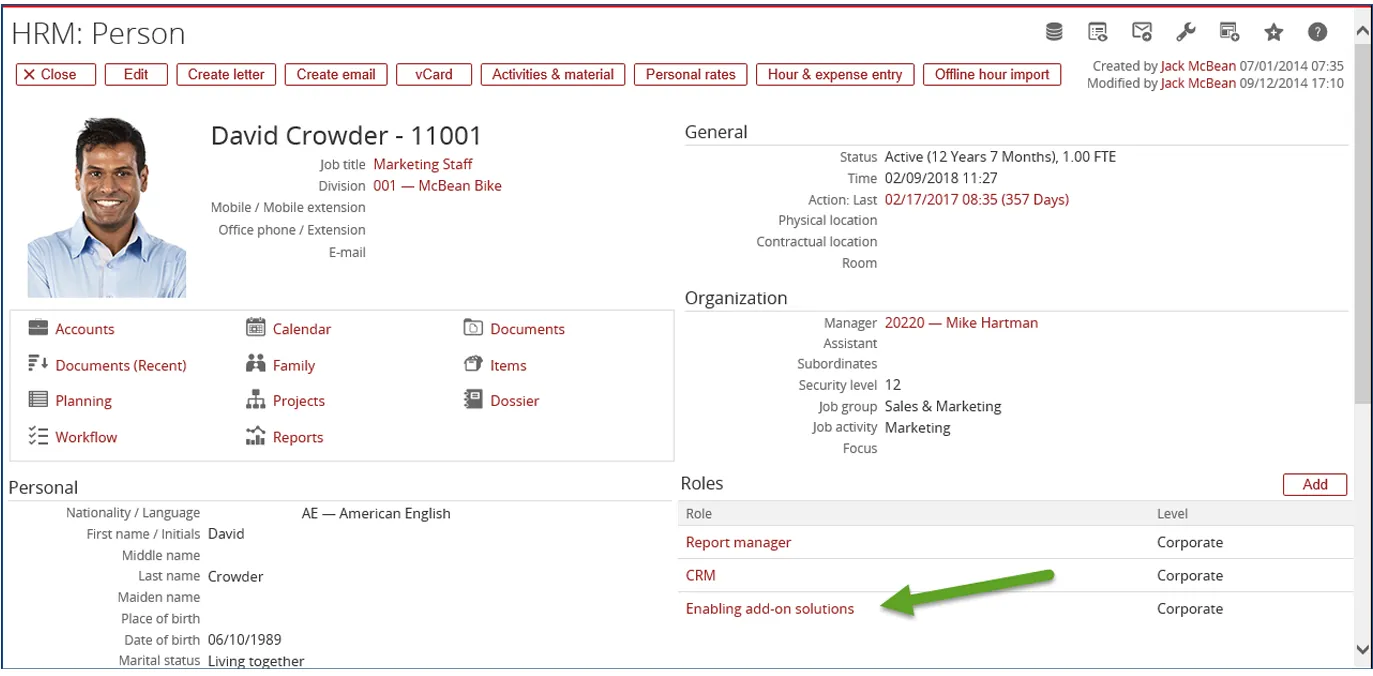
Customizations will be enabled only to those Resources which have this role linked to their HR Card.
Here is an example of a Resource that has this role in their HR Card.
Uninstall
Section titled “Uninstall”Uninstalling of the Logistics Plus add-on consist of the following steps:
Run the installer
Open the GLMSysAddOnInstaller.exe and select install mode ‘Uninstall’. Select or enter the location of
the Synergy installation folder.
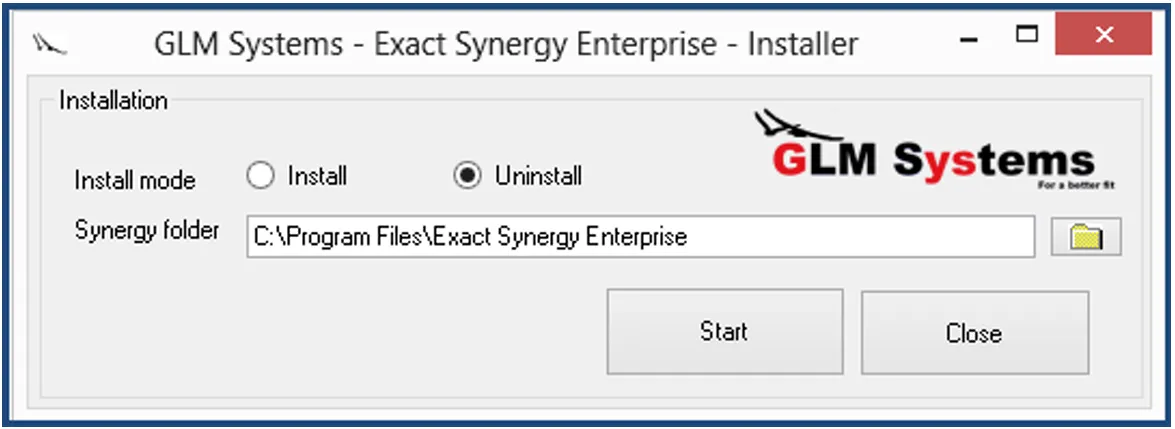
To uninstall, click ‘Start’. The uninstall will remove the customization files from your Synergy folder and will copy back the original Synergy files.
Rebuild Repository
Section titled “Rebuild Repository”To make the uninstall process complete, open Synergy and rebuild the repository via System / Setup / Repository / Rebuild.
Database Triggers - Optional
Section titled “Database Triggers - Optional”In some instances, it is necessary to delete SQL database triggers within some of the tables. Contact us for more infomration and assistance.
Options for Disengaging Synergy Customizations
Section titled “Options for Disengaging Synergy Customizations”Option – Disengage all Customizations
Under Modules / System / Setup / Add-Ons / Settings, select the Disable add-ons and click it. Close
the browser and all customizations in Synergy will disappear when opened by the Administrator.
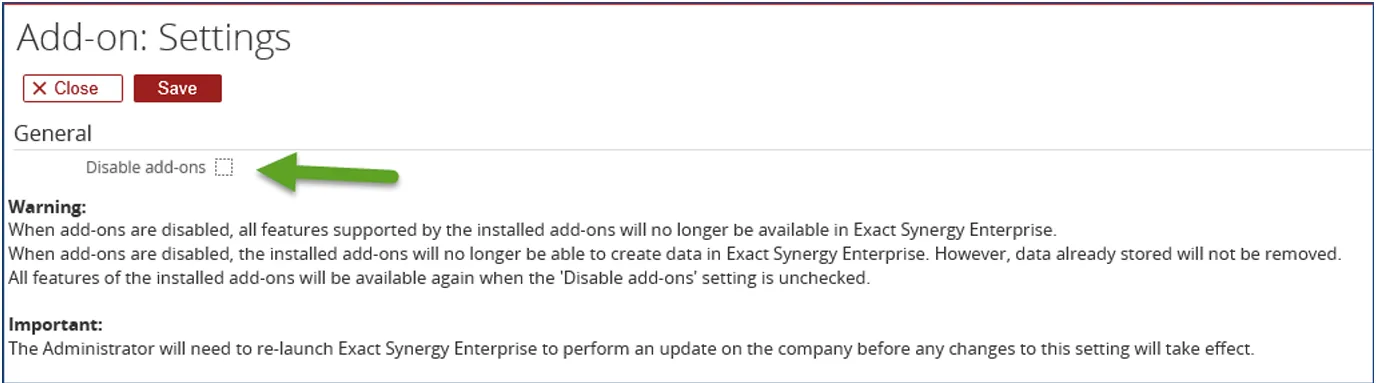
This will also turn off all customizations done by Exact, Macola, JobBOSS or MAX personnel and including those done by other consultants.
To turn back customizations, follow the same path and unclick the “Disable add-ons”. Close the browser and all customizations in Synergy will appear when opened by the Administrator.
Option – Disengage GLM System Modifications
Section titled “Option – Disengage GLM System Modifications”To disable a GLM Systems Tool, a System Administrator may go to the Synergy Installation Directory and under the XML directory, there will be three files for each of the tools.
As an example, the files for the CRM Plus Tool include:
a. Custom.GLMSys.CRMPlus.xmlb. Repository.GLMSys.CRMPlus.xmlc. Repository.zGLMSys.CRMPlus.xmlTo disable the tool, place a “z” in front of each of these files, as this example demonstrates:
a. zCustom.GLMSys.CRMPlus.xmlb. zRepository.GLMSys.CRMPlus.xmlc. zRepository.zGLMSys.CRMPlus.xmlThis will temporarily disable the tool without Installing. This must be done for all of the Tools which are being utilized by the Account.